Nokia 6120 classic User Guide - Page 29
General log, 4. Text input, Traditional text input
 |
View all Nokia 6120 classic manuals
Add to My Manuals
Save this manual to your list of manuals |
Page 29 highlights
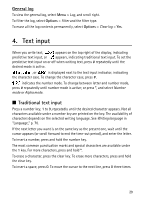
General log To view the general log, select Menu > Log, and scroll right. To filter the log, select Options > Filter and the filter type. To erase all the log contents permanently, select Options > Clear log > Yes. 4. Text input When you write text, appears on the top right of the display, indicating predictive text input, or appears, indicating traditional text input. To set the predictive text input on or off when writing text, press # repeatedly until the desired mode is active. , , or is displayed next to the text input indicator, indicating the character case. To change the character case, press #. indicates the number mode. To change between letter and number mode, press # repeatedly until number mode is active; or press *, and select Number mode or Alpha mode. ■ Traditional text input Press a number key, 1 to 9, repeatedly until the desired character appears. Not all characters available under a number key are printed on the key. The availability of characters depends on the selected writing language. See Writing language in "Language," p. 70. If the next letter you want is on the same key as the present one, wait until the cursor appears (or scroll forward to end the time-out period), and enter the letter. To insert a number, press and hold the number key. The most common punctuation marks and special characters are available under the 1 key. For more characters, press and hold *. To erase a character, press the clear key. To erase more characters, press and hold the clear key. To insert a space, press 0. To move the cursor to the next line, press 0 three times. 29
-
 1
1 -
2
-
3
-
4
-
5
-
6
-
7
-
8
-
9
-
10
-
11
-
12
-
13
-
14
-
15
-
16
-
17
-
18
-
19
-
20
-
21
-
22
-
23
-
 24
24 -
 25
25 -
 26
26 -
 27
27 -
 28
28 -
 29
29 -
 30
30 -
 31
31 -
 32
32 -
 33
33 -
 34
34 -
35
-
36
-
37
-
38
-
39
-
40
-
41
-
42
-
43
-
44
-
45
-
46
-
47
-
48
-
49
-
50
-
51
-
52
-
53
-
54
-
55
-
56
-
57
-
58
-
59
-
60
-
61
-
62
-
63
-
64
-
65
-
66
-
67
-
68
-
69
-
70
-
71
-
72
-
73
-
74
-
75
-
76
-
77
-
78
-
79
-
80
-
81
-
82
-
83
-
84
-
85
-
86
-
87
-
88
-
89
-
90
-
91
-
92
-
93
-
94
-
95
-
96
-
97
-
98
-
99
-
100
-
101
-
102
-
103
 |
 |