Nokia E90 Communicator User Guide - Page 67
Contacts, Copy contacts between SIM and device memory, Manage contacts, Add ringing tones for contacts
 |
View all Nokia E90 Communicator manuals
Add to My Manuals
Save this manual to your list of manuals |
Page 67 highlights
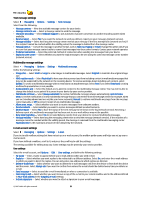
7. Contacts Select > Contacts. You can save and update contact information, such as phone numbers, home addresses, or e-mail addresses of your contacts. You can add a personal ringing tone or a thumbnail image to a contact. You can also create contact groups, which allow you to send text messages or e-mail to many recipients at the same time. You can add received contact information (business cards) to Contacts. Contact information can only be sent to or received from compatible devices. Copy contacts between SIM and device memory If you already have contacts saved on your SIM card, you can copy them to the device memory. To copy contacts from a SIM card to the device memory, select Options > SIM contacts > SIM directory. Mark the contacts to copy, or select Options > Mark/Unmark > Mark all to copy all contacts. Select Options > Copy to Contacts. To copy contacts from the device memory to a SIM card, select Options > Copy to SIM directory. Mark the contacts you want to copy, or select Options > Mark/Unmark > Mark all to copy all contacts. Select Options > Copy to SIM directory. Tip: If you have saved contacts on your previous device, you can use the Transfer application to copy them. See "Transfer content between devices " on page 20. To search for a contact, enter the first letters of the name to the search field. A list of the contacts starting with the letters appear on the display. Manage contacts To add a contact, select Options > New contact. To attach a small thumbnail image to a contact, select Options > Edit > Options > Add thumbnail. The thumbnail image is shown when the contact calls. To listen to the voice tag assigned to the contact, select Options > Play voice tag. To edit information in a contact, select Options > Edit. Tip: You can also use Nokia PC Suite to add and edit contacts. To send contact information, select Options > Send. You can assign a default number or address to a contact so you can easily call or send a message to the default number or address, even if several numbers or addresses are saved to that contact. The default number is also used in voice dialing. To change the default information for a contact, open the contact, and select Options > Defaults. Select the number or address you want to set as a default. The default number or address is underlined in the contact. To add a contact to a group, select Options > Add to group (shown only if you have created a group). Tip: To check to which groups a contact belongs, select Options > Belongs to groups. To add a speed dial key to the contact's phone number, select Options > Assign speed dial. To change the display order of the first and last names of your contacts, select Options > Settings, and Last name First name, or First name Last name. Manage contact groups You can create a contact group so that you can send text or e-mail messages to several recipients at the same time. 1. Open the contact groups tab, and select Options > New group. 2. Enter a name for the group, and select OK. 3. Open the group, and select Options > Add members. 4. Scroll to each contact you want to add to the group, and press the scroll key to mark it. 5. Select OK to add all marked contacts to the group. To remove a contact from a contact group, scroll to the contact that you want to remove, and select Options > Remove from group. To rename a group, select Options > Rename. Add ringing tones for contacts © 2007 Nokia. All rights reserved. 35
-
 1
1 -
2
-
3
-
4
-
5
-
6
-
7
-
8
-
9
-
10
-
11
-
12
-
13
-
14
-
15
-
16
-
17
-
18
-
19
-
20
-
21
-
22
-
23
-
24
-
25
-
26
-
27
-
28
-
29
-
30
-
31
-
32
-
33
-
34
-
35
-
36
-
37
-
38
-
39
-
40
-
41
-
42
-
43
-
44
-
45
-
46
-
47
-
48
-
49
-
50
-
51
-
52
-
53
-
54
-
55
-
56
-
57
-
58
-
59
-
60
-
61
-
 62
62 -
 63
63 -
 64
64 -
 65
65 -
 66
66 -
 67
67 -
 68
68 -
 69
69 -
 70
70 -
 71
71 -
 72
72 -
73
-
74
-
75
-
76
-
77
-
78
-
79
-
80
-
81
-
82
-
83
-
84
-
85
-
86
-
87
-
88
-
89
-
90
-
91
-
92
-
93
-
94
-
95
-
96
-
97
-
98
-
99
-
100
-
101
-
102
-
103
-
104
-
105
-
106
-
107
-
108
-
109
-
110
-
111
-
112
-
113
-
114
-
115
-
116
-
117
-
118
-
119
-
120
-
121
-
122
-
123
-
124
-
125
 |
 |