Panasonic BL-WV10A BL-MS103A Owner's Manual (English) - Page 42
Connecting Cameras Using The Router, Connection Overview, Television And Router Connection
 |
View all Panasonic BL-WV10A manuals
Add to My Manuals
Save this manual to your list of manuals |
Page 42 highlights
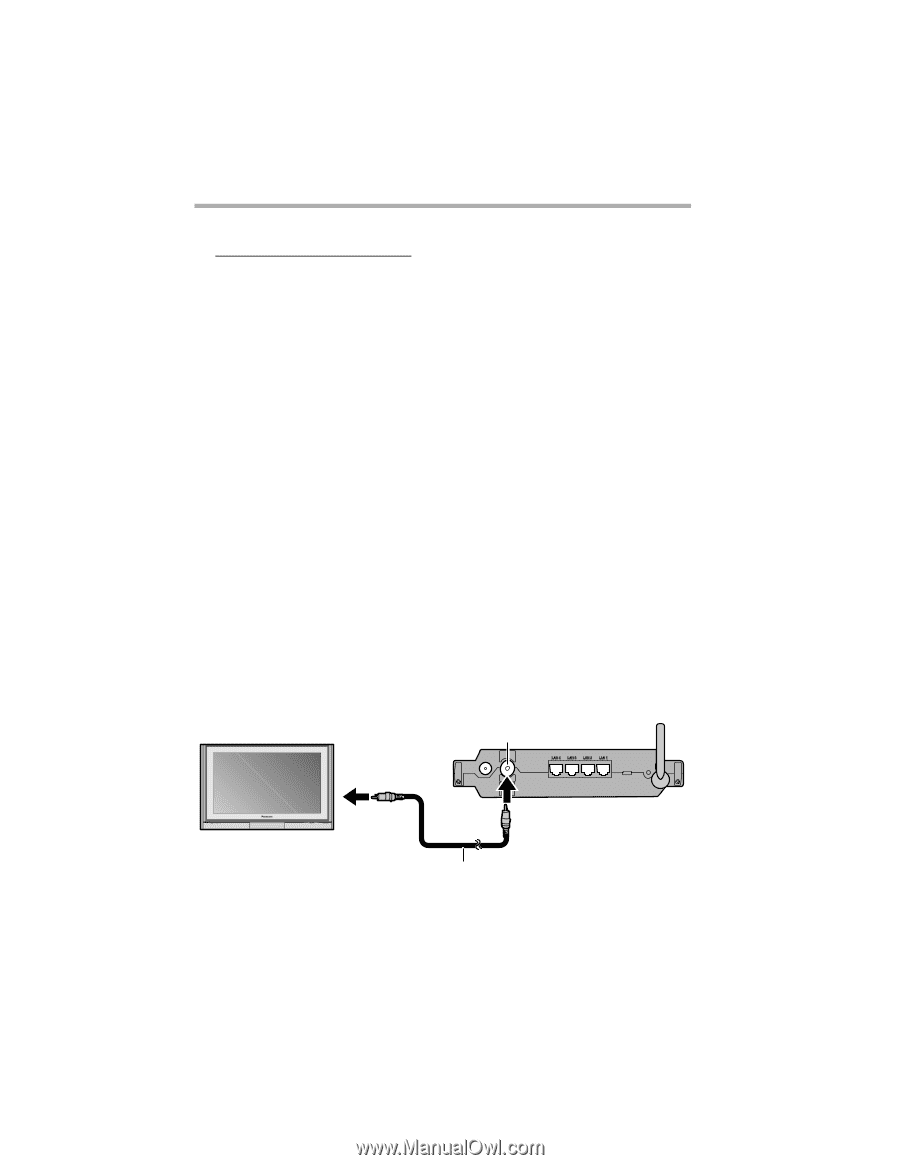
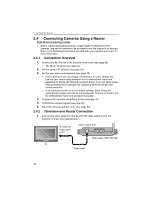
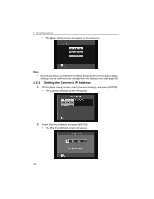
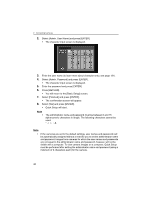
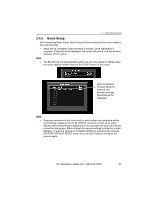
2 Connecting Cameras 2.4 Connecting Cameras Using a Router Note about connecting a router • Before registering existing cameras, assign Static IP addresses to the cameras, and set the cameras to be accessible over the Internet if so desired. Refer to the Operating Instructions included with your cameras and router for more information. 2.4.1 Connection Overview 1. Connect the BL-WV10A to the television and router (see page 42) • The [Basic Setup] screen appears. 2. Set the camera IP address (see page 44) 3. Set the user name and password (see page 45) • If the cameras in use are already connected to a router, change the camera user names and passwords to the administrator name and password for the BL-WV10A and run Quick Setup. If you run Quick Setup without making these changes, the registered cameras will become remote cameras. • If the cameras are still set to the default settings, Quick Setup will automatically assign user names and passwords. There is no need to set the administrator name and password manually. 4. Configure the cameras using Quick Setup (see page 47) 5. Confirm the camera images (see page 50) 6. Place the cameras and the router (see page 52) 2.4.2 Television and Router Connection 1. Connect the video cable from the BL-WV10A video output port to the television's video input (yellow) jack. To external video input of TV Video output port Rear panel of BL-WV10A TV Video cable 42
-
 1
1 -
2
-
3
-
4
-
5
-
6
-
7
-
8
-
9
-
10
-
11
-
12
-
13
-
14
-
15
-
16
-
17
-
18
-
19
-
20
-
21
-
22
-
23
-
24
-
25
-
26
-
27
-
28
-
29
-
30
-
31
-
32
-
33
-
34
-
35
-
36
-
 37
37 -
 38
38 -
 39
39 -
 40
40 -
 41
41 -
 42
42 -
 43
43 -
 44
44 -
 45
45 -
 46
46 -
 47
47 -
48
-
49
-
50
-
51
-
52
-
53
-
54
-
55
-
56
-
57
-
58
-
59
-
60
-
61
-
62
-
63
-
64
-
65
-
66
-
67
-
68
-
69
-
70
-
71
-
72
-
73
-
74
-
75
-
76
-
77
-
78
-
79
-
80
-
81
-
82
-
83
-
84
-
85
-
86
-
87
-
88
-
89
-
90
-
91
-
92
-
93
-
94
-
95
-
96
-
97
-
98
-
99
-
100
-
101
-
102
-
103
-
104
-
105
-
106
-
107
-
108
-
109
-
110
-
111
-
112
-
113
-
114
-
115
-
116
-
117
-
118
-
119
-
120
-
121
-
122
-
123
-
124
-
125
-
126
-
127
-
128
-
129
-
130
-
131
-
132
-
133
-
134
-
135
-
136
-
137
-
138
-
139
-
140
-
141
-
142
-
143
-
144
-
145
-
146
-
147
-
148
-
149
-
150
-
151
-
152
-
153
-
154
-
155
-
156
-
157
-
158
-
159
-
160
-
161
-
162
-
163
-
164
-
165
-
166
-
167
-
168
-
169
-
170
-
171
-
172
-
173
-
174
-
175
-
176
-
177
-
178
-
179
-
180
-
181
-
182
-
183
-
184
 |
 |