Panasonic CS-E18SD3UAW service manual - Page 38
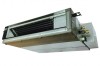
Wrap the flange and duct connection area with aluminium tape or similar to prevent air leak.
 |
View all Panasonic CS-E18SD3UAW manuals
Add to My Manuals
Save this manual to your list of manuals |
Page 38 highlights
Installing an Intake and Discharge Duct Type Ensure the range of unit external static pressure is not exceeded. Refer technical manual for the range of external static pressure setting. Connect the duct as shown. When attaching duct to the intake side, remove the product filter frame assy and replace with locally purchase intake-side flange by using flange by using 10 - Ø 1/8" (Ø 3.1)(hole) screws. Wrap the flange and duct connection area with aluminium tape or similar to prevent air leak. Flange (locally purchase) Connection screw (x10) Rectangular solic duct Main unit Flange Insulation material (locally purchased) Air inlet side Air outlet side When attaching a duct to the intake-side, be sure to attach an air filter inside the air passage on the intake-side. (Use an air filter with dust collecting efficiency at least 50% in a gravimetric technique.) Installation into the Ceiling Attach the nuts and washers to the hanging bolts, then lift up and hook the main unit onto the hanging fixtures. Check if the unit is leveled using a level or a vinyl hose filled partially with water. Level Washer 9 Hanging bolt (M10) (locally purchased) Hexagonal nut (M10) (locally purchased) 38
-
 1
1 -
2
-
3
-
4
-
5
-
6
-
7
-
8
-
9
-
10
-
11
-
12
-
13
-
14
-
15
-
16
-
17
-
18
-
19
-
20
-
21
-
22
-
23
-
24
-
25
-
26
-
27
-
28
-
29
-
30
-
31
-
32
-
 33
33 -
 34
34 -
 35
35 -
 36
36 -
 37
37 -
 38
38 -
 39
39 -
 40
40 -
 41
41 -
 42
42 -
 43
43 -
44
-
45
-
46
-
47
-
48
-
49
-
50
-
51
-
52
-
53
-
54
-
55
-
56
-
57
-
58
-
59
-
60
-
61
-
62
-
63
-
64
-
65
-
66
-
67
-
68
-
69
-
70
-
71
-
72
-
73
-
74
-
75
-
76
-
77
-
78
-
79
-
80
-
81
-
82
-
83
-
84
-
85
-
86
-
87
-
88
-
89
-
90
-
91
-
92
-
93
-
94
-
95
-
96
-
97
-
98
-
99
-
100
-
101
-
102
-
103
-
104
-
105
-
106
-
107
-
108
-
109
-
110
-
111
-
112
-
113
-
114
-
115
-
116
-
117
-
118
-
119
-
120
-
121
-
122
-
123
-
124
 |
 |
