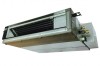
Panasonic CS-E18SD3UAW service manual - Page 47
Piping Insulation
 |
View all Panasonic CS-E18SD3UAW manuals
Add to My Manuals
Save this manual to your list of manuals |
Page 47 highlights
11.2.6 Piping Insulation 1 Please carry out insulation at pipe connection portion as mentioned in Indoor/Outdoor Unit Installation Diagram. Please wrap the insulated piping end to prevent water from going inside the piping. 2 If drain hose or connecting piping is in the room (where dew may form), please increase the insulation by using POLY-E FOAM with thickness 1/4" (6 mm) or above. Switching the High State Switch (SW2) To increase the air volume, open the control box and on the control board, switch the FAN switch (SW2) to "HI". See the diagram for "Connecting the Indoor/Outdoor Connection Cable". Note: Enabling Long-range Remote Control To maintain EMC emission limits, cabling interconnecting the HA terminal and subsequent opto-coupler, must be no more than 6.2 ft (1.9 m) length. Loop four turns of this cable through a suitable small EMC ferrite toroid, and protect with a short length of large diameter heat-shrink tube. There is no similar length limit for cable following on from the opto-coupler isolation. DISPOSAL OF OUTDOOR UNIT DRAIN WATER If a drain elbow is used, the unit should be placed on a stand which is taller than 1 3/16" (30 mm). If the unit is used in an area where temperature falls below 32°F (0°C) for 2 or 3 days in succession, it is recommended not to use a drain elbow, for the drain water freezes and the fan will not rotate. Drain elbow ¥ Hose Install the hose at an angle so that the water smoothly flows out. CHECK THE DRAINAGE Check after connecting the power supply. Pour approximately 600 cc of water into the drain pan of the main unit using a squeeze bottle, etc. Press the drain test run switch on the control board in the control box to start the drain motor and check whether the water drains normally. (The drain motor operates for approximately 5 minutes and then stops automatically.) (See the diagram for "Connecting the Indoor/Outdoor Connection Cable".) Heat exchanger Drain pan Squeeze bottle Approximately 600 cc of water 47
-
 1
1 -
2
-
3
-
4
-
5
-
6
-
7
-
8
-
9
-
10
-
11
-
12
-
13
-
14
-
15
-
16
-
17
-
18
-
19
-
20
-
21
-
22
-
23
-
24
-
25
-
26
-
27
-
28
-
29
-
30
-
31
-
32
-
33
-
34
-
35
-
36
-
37
-
38
-
39
-
40
-
41
-
 42
42 -
 43
43 -
 44
44 -
 45
45 -
 46
46 -
 47
47 -
 48
48 -
 49
49 -
 50
50 -
 51
51 -
 52
52 -
53
-
54
-
55
-
56
-
57
-
58
-
59
-
60
-
61
-
62
-
63
-
64
-
65
-
66
-
67
-
68
-
69
-
70
-
71
-
72
-
73
-
74
-
75
-
76
-
77
-
78
-
79
-
80
-
81
-
82
-
83
-
84
-
85
-
86
-
87
-
88
-
89
-
90
-
91
-
92
-
93
-
94
-
95
-
96
-
97
-
98
-
99
-
100
-
101
-
102
-
103
-
104
-
105
-
106
-
107
-
108
-
109
-
110
-
111
-
112
-
113
-
114
-
115
-
116
-
117
-
118
-
119
-
120
-
121
-
122
-
123
-
124
 |
 |
