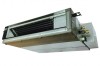
Panasonic CS-E18SD3UAW service manual - Page 96
Disassembly and Assembly Instructions
 |
View all Panasonic CS-E18SD3UAW manuals
Add to My Manuals
Save this manual to your list of manuals |
Page 96 highlights
16. Disassembly and Assembly Instructions WARNING High Voltage are generated in the electrical parts area by the capacitor. Ensure that the capacitor has discharged sufficiently before proceeding with repair work. Failure to heed this caution may result in electric shocks. 16.1 Indoor Electronic Controller, Blower Fan, Fan Motor & Drain Motor Removal Procedure. 16.1.1 To Remove Cabinet Bottom Plate 1 Unscrew 14 screws on the cabinet bottom plate, 10 screws on the cabinet top plate and detach cabinet bottom plate and cabinet top plate from unit. Cabinet bottom plate Remove 14 Screw Remove 10 Screw Cabinet top plate 16.1.2 To Remove Electronic Controller 1 Unscrew the 2 screws on the Control Board and open the Control Board Cover. Remove Screw 2 Detach all connectors as labeled from the electronic controller. Then pull out main controller gently. CN-T1 CN-T2 CN-FM CN-TH CN-AC CN-DRMTR1 CN-DISP CN-FSW 96
-
 1
1 -
2
-
3
-
4
-
5
-
6
-
7
-
8
-
9
-
10
-
11
-
12
-
13
-
14
-
15
-
16
-
17
-
18
-
19
-
20
-
21
-
22
-
23
-
24
-
25
-
26
-
27
-
28
-
29
-
30
-
31
-
32
-
33
-
34
-
35
-
36
-
37
-
38
-
39
-
40
-
41
-
42
-
43
-
44
-
45
-
46
-
47
-
48
-
49
-
50
-
51
-
52
-
53
-
54
-
55
-
56
-
57
-
58
-
59
-
60
-
61
-
62
-
63
-
64
-
65
-
66
-
67
-
68
-
69
-
70
-
71
-
72
-
73
-
74
-
75
-
76
-
77
-
78
-
79
-
80
-
81
-
82
-
83
-
84
-
85
-
86
-
87
-
88
-
89
-
90
-
 91
91 -
 92
92 -
 93
93 -
 94
94 -
 95
95 -
 96
96 -
 97
97 -
 98
98 -
 99
99 -
 100
100 -
 101
101 -
102
-
103
-
104
-
105
-
106
-
107
-
108
-
109
-
110
-
111
-
112
-
113
-
114
-
115
-
116
-
117
-
118
-
119
-
120
-
121
-
122
-
123
-
124
 |
 |
