Pioneer AVIC-7200NEX Owner s Manual - Page 18
Checking and modifying the current route
 |
View all Pioneer AVIC-7200NEX manuals
Add to My Manuals
Save this manual to your list of manuals |
Page 18 highlights
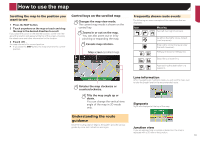
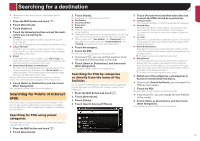
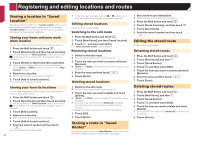
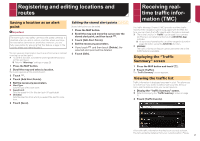
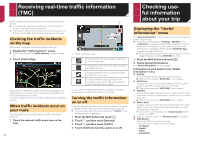
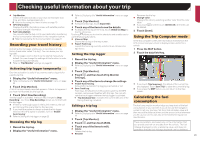
Checking and modifying the current route Modifying the route When navigation is already started, there are several ways to modify the current route. The following sections describe some of those options. Building a route using "Route Planner" The "Route Planner" (or "My Route") feature lets you build your route using the list of destinations. Editing the list allows you to plan your route easily. p Once you set the route, you can edit your route using the menu displayed as "My Route". 1 Press the MAP button and touch . 2 Touch [Route Planner] or [My Route]. 3 Touch one of the options. 65 1 2 3 4 1 Starting position (The current vehicle position is set as default and [Current GPS Position] is displayed.) Refer to Changing the starting position on page 18 2 Calculates the route and shows the "Route Summary" screen. 3 Displays the options for the location. Move Up/Move Down: Edits the order you want to visit the locations. Delete: Deletes the destination or waypoint. Save Location: Stores the location in "Saved Location". Refer to Storing a location in "Saved Location" on page 20 Change: Changes the destination or waypoint to another location. 18 Show on Map: Shows the selected location on the map. 4 Displays the shortcuts. Delete All: Deletes all waypoints and the destination. Touch [Continue Without Route] to cancel the planned route. Optimize Waypoints: Changes the order of waypoints automatically so that the route can be easily traveled. (If the resulting order is the same as the current order, this option is invalid.) Optimize Route: Changes the order of all waypoints and the destination automatically so that the route can be easily traveled. (If the resulting order is the same as the current order, this option is invalid.) 5 Inserts a new waypoint. 6 Adds a new destination and changes the current destination to the last waypoint. Changing the starting position The starting position for route can be changed from the current position. 1 Press the MAP button and touch . 2 Touch [Route Planner] or [My Route]. 3 Touch [Current GPS Position]. 4 Touch [Set Start Point] or [Change Start Point] and then touch [OK]. 5 Search for a location. 6 Touch [Set Start Point] or [Change Start Point]. The selected position is set as the starting position for route calculation. 7 Touch [Show Route] or [Continue Without Route]. The system starts route recalculation after [Show Route] is touched, and then the "Route Summary" screen appears. After [Start Navigation] is touched, your navigation system starts the route guidance. After [Continue Without Route] is touched, the current position map appears. Restoring the current position as the starting position 1 Press the MAP button and touch . 2 Touch [Route Planner] or [My Route]. 3 Touch [Current GPS Position]. 4 Touch [Back to GPS Position] and then touch [Delete Start Point]. The starting position for route calculation returns to the current position. Adding waypoints 1 Press the MAP button and touch . 2 Touch [Add Waypoint]. 3 Search for a location. 4 Touch [Select as Waypoint]. The route is recalculated, and the "Route Summary" screen appears. (When the waypoint is already set, the "My Route" screen appears. Touch [Show Route] and proceed to the next step.) 5 Touch [Start Navigation]. Your navigation system starts the route guidance. Checking route alternatives You can select another route and compare different route alternatives. 1 Press the MAP button and touch . 2 Touch [Detours & Alternatives]. 3 Touch [Alternative Routes]. 4 Touch any of the route calculate conditions. You can see the approximate time required and total distance of selected route alternatives. Touch any of the route alternatives to see it on the map. p If more than three route alternatives have been found, [More Results] appears. Touch [More Results] to show the other routes.
-
 1
1 -
2
-
3
-
4
-
5
-
6
-
7
-
8
-
9
-
10
-
11
-
12
-
 13
13 -
 14
14 -
 15
15 -
 16
16 -
 17
17 -
 18
18 -
 19
19 -
 20
20 -
 21
21 -
 22
22 -
 23
23 -
24
-
25
-
26
-
27
-
28
-
29
-
30
-
31
-
32
-
33
-
34
-
35
-
36
-
37
-
38
-
39
-
40
-
41
-
42
-
43
-
44
-
45
-
46
-
47
-
48
-
49
-
50
-
51
-
52
-
53
-
54
-
55
-
56
-
57
-
58
-
59
-
60
-
61
-
62
-
63
-
64
-
65
-
66
-
67
-
68
-
69
-
70
-
71
-
72
-
73
-
74
-
75
-
76
-
77
-
78
-
79
-
80
-
81
-
82
-
83
-
84
-
85
-
86
-
87
-
88
-
89
-
90
-
91
-
92
 |
 |