Pioneer AVIC-7200NEX Owner s Manual - Page 72
Video settings
 |
View all Pioneer AVIC-7200NEX manuals
Add to My Manuals
Save this manual to your list of manuals |
Page 72 highlights
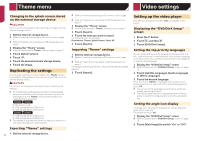
Theme menu Video settings Changing to the splash screen stored on the external storage device CAUTION Do not turn off the engine while importing an image from the external storage device. 1 Set the external storage device. Refer to Inserting and ejecting an SD memory card on page 7 Refer to Plugging and unplugging a USB storage device on page 7 2 Display the "Theme" screen. Refer to Displaying the "Theme" setting screen on page 71 3 Touch [Splash Screen]. 4 Touch . 5 Touch the desired external storage device. 6 Touch the image. Replicating the settings You can export settings you have made on the "Theme" screen to an external storage device. Also, you can import them from an external storage device. CAUTION Do not turn off the engine while exporting or importing the settings. p If multiple external storage devices that include available data are connected to this product, the order of priority for the targets that the "Theme" settings are exported to or imported from is as follows: 8200NEX 7200NEX 1 SD memory card 2 USB storage device (USB port 1) 3 USB storage device (USB port 2) 6200NEX 5200NEX 1 USB storage device (USB port 1) 2 USB storage device (USB port 2) p This setting is available only when you stop your vehicle in a safe place and apply the parking brake. Exporting "Theme" settings 72 1 Set the external storage device. Refer to Inserting and ejecting an SD memory card on page 7 Refer to Plugging and unplugging a USB storage device on page 7 2 Display the "Theme" screen. Refer to Displaying the "Theme" setting screen on page 71 3 Touch [Export]. 4 Touch the item you want to export. The following items are available: Illumination, Theme, Splash Screen, Select All 5 Touch [Export]. Importing "Theme" settings 1 Set the external storage device. Refer to Inserting and ejecting an SD memory card on page 7 Refer to Plugging and unplugging a USB storage device on page 7 A message confirming whether to import the stored setting data appears. 2 Touch [Import]. Setting up the video player This setting is available only when "Disc" is selected as the source. Displaying the "DVD/DivX Setup" screen 1 Press the button. 2 Touch , and then . 3 Touch [DVD/DivX Setup]. Setting the top-priority languages You can assign the top-priority language to the top-priority subtitle, audio and menu in initial playback. If the selected language is recorded on the disc, subtitles, audio and menu are displayed or output in that language. 1 Display the "DVD/DivX Setup" screen Refer to Displaying the "DVD/DivX Setup" screen on page 72 2 Touch [Subtitle Language], [Audio Language] or [Menu Language]. 3 Touch the desired language. When you select "Others", a language code input screen is shown. Input the four-digit code of the desired language then touch . p You can switch the language by touching the switch lan- guages key during playback. p The setting made here will not be affected even if the lan- guage is switched during playback using the appropriate key. Setting the angle icon display The angle icon can be set so it appears on scenes where the angle can be switched. The default setting is "On". 1 Display the "DVD/DivX Setup" screen Refer to Displaying the "DVD/DivX Setup" screen on page 72 2 Touch [Multi Angle] to switch "On" or "Off".
-
 1
1 -
2
-
3
-
4
-
5
-
6
-
7
-
8
-
9
-
10
-
11
-
12
-
13
-
14
-
15
-
16
-
17
-
18
-
19
-
20
-
21
-
22
-
23
-
24
-
25
-
26
-
27
-
28
-
29
-
30
-
31
-
32
-
33
-
34
-
35
-
36
-
37
-
38
-
39
-
40
-
41
-
42
-
43
-
44
-
45
-
46
-
47
-
48
-
49
-
50
-
51
-
52
-
53
-
54
-
55
-
56
-
57
-
58
-
59
-
60
-
61
-
62
-
63
-
64
-
65
-
66
-
 67
67 -
 68
68 -
 69
69 -
 70
70 -
 71
71 -
 72
72 -
 73
73 -
 74
74 -
 75
75 -
 76
76 -
 77
77 -
78
-
79
-
80
-
81
-
82
-
83
-
84
-
85
-
86
-
87
-
88
-
89
-
90
-
91
-
92
 |
 |