Pioneer AVIC-7200NEX Owner s Manual - Page 7
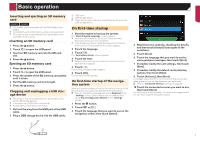
On first-time startup
 |
View all Pioneer AVIC-7200NEX manuals
Add to My Manuals
Save this manual to your list of manuals |
Page 7 highlights
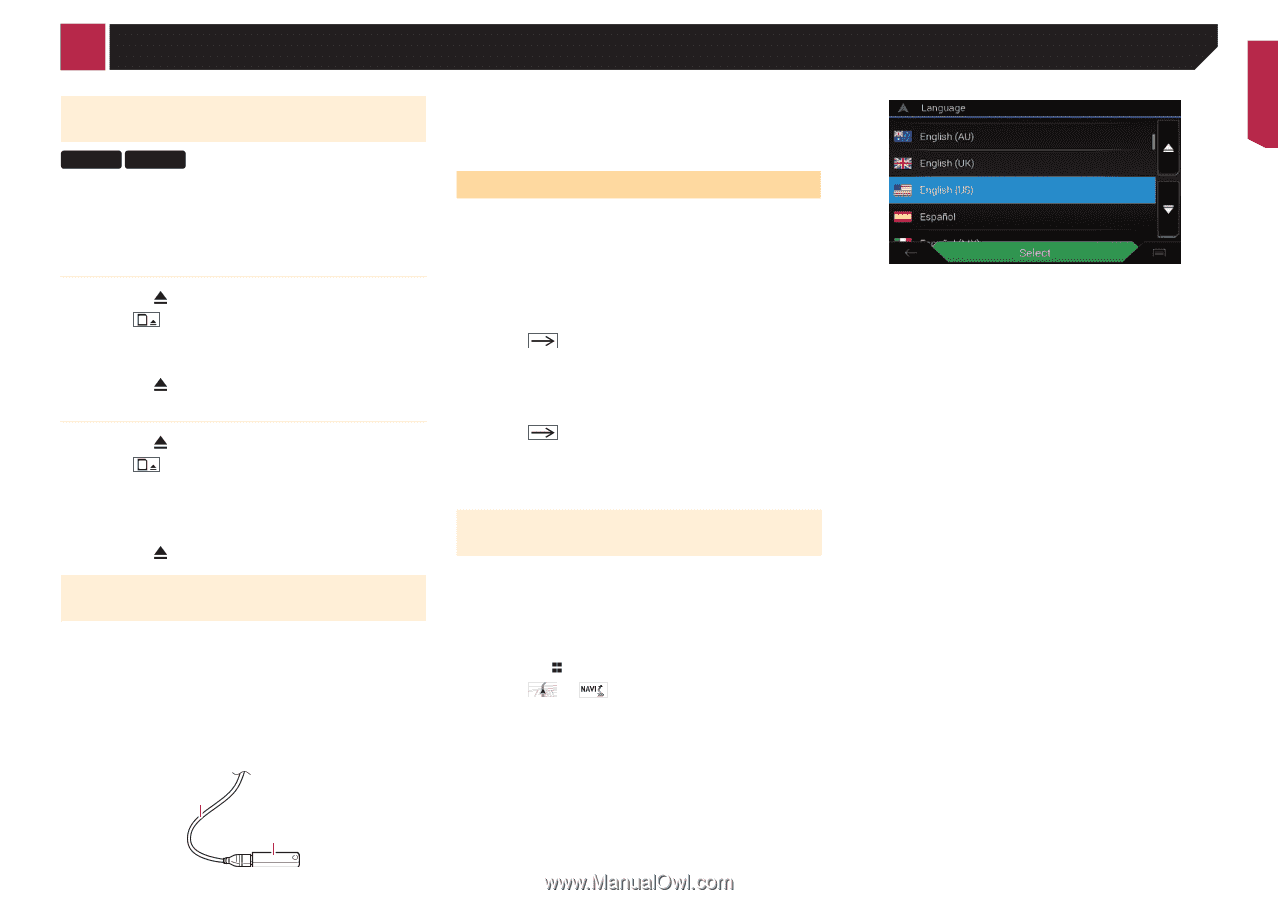
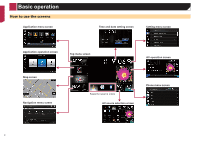
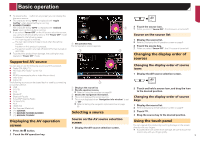
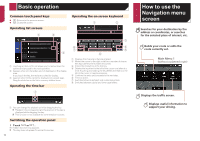
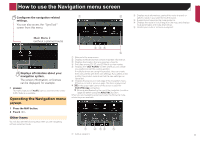
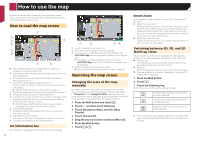
Basic operation Inserting and ejecting an SD memory card 8200NEX 7200NEX p This system is not compatible with the Multi Media Card (MMC). p Compatibility with all SD memory cards is not guaranteed. p This product may not achieve optimum performance with some SD memory cards. Inserting an SD memory card 1 Press the button. 2 Touch to open the LCD panel. 3 Insert an SD memory card into the SD card slot. 4 Press the button. Ejecting an SD memory card 1 Press the button. 2 Touch to open the LCD panel. 3 Press the middle of the SD memory card gently until it clicks. 4 Pull the SD memory card out straight. 5 Press the button. Plugging and unplugging a USB storage device p This product may not achieve optimum performance with some USB storage devices. p Connection via a USB hub is not possible. p A USB cable is required for connection. 1 Pull out the plug from the USB port of the USB cable. 2 Plug a USB storage device into the USB cable. 1 USB cable 2 USB storage device p Check that no data is being accessed before pulling out the USB storage device. On first-time startup 1 Start the engine to boot up the system. The "Select Program Language" screen appears. p From the second time on, the screen shown will differ depending on the previous conditions. p From the second time on, enter the password for the anti- theft function if the password entry screen appears. 2 Touch the language. 3 Touch . The "Smartphone Setup" screen appears. 4 Touch the item. Refer to Information on the connections and functions for each device on page 35 5 Touch . The warning message screen appears. 6 Touch [OK]. The top menu screen appears. On first-time startup of the navigation system When you use the navigation function for the first time, an initial setup process starts automatically. Follow the steps below. p You can change the language later using [Regional] in the "Settings" screen. Other settings can be restarted later using [Start Configuration Wizard] in the "Settings" screen. 1 Press the button. 2 Touch or . 3 Touch the language that you want to use on the navigation screen, then touch [Select]. 4 Read the terms carefully, checking the details, and then touch [Accept] if you agree to the conditions. 5 Touch [Next]. 6 Touch the language that you want to use for voice guidance messages, then touch [Next]. 7 If needed, modify the unit settings, then touch [Next]. 8 If needed, modify the default route planning options, then touch [Next]. 9 Touch [Activate], then [Next]. A message saying that the connected online features are activated appears if you activate these services right away. Refer to "Connected Services" settings on page 28 10 Touch the connected services you want to use, then touch [Next]. The initial setup is now complete. The map screen appears and you can start using the navigation system. 1 2 7
-
 1
1 -
 2
2 -
 3
3 -
 4
4 -
 5
5 -
 6
6 -
 7
7 -
 8
8 -
 9
9 -
 10
10 -
 11
11 -
 12
12 -
13
-
14
-
15
-
16
-
17
-
18
-
19
-
20
-
21
-
22
-
23
-
24
-
25
-
26
-
27
-
28
-
29
-
30
-
31
-
32
-
33
-
34
-
35
-
36
-
37
-
38
-
39
-
40
-
41
-
42
-
43
-
44
-
45
-
46
-
47
-
48
-
49
-
50
-
51
-
52
-
53
-
54
-
55
-
56
-
57
-
58
-
59
-
60
-
61
-
62
-
63
-
64
-
65
-
66
-
67
-
68
-
69
-
70
-
71
-
72
-
73
-
74
-
75
-
76
-
77
-
78
-
79
-
80
-
81
-
82
-
83
-
84
-
85
-
86
-
87
-
88
-
89
-
90
-
91
-
92
 |
 |