Samsung EK-GC110 User Manual Generic Ek-gc110 Galaxy Camera English User Manua - Page 78
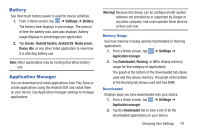
Important, Settings, Add VPN network, Server address, PPP encryption MPPE, Show advanced options
 |
View all Samsung EK-GC110 manuals
Add to My Manuals
Save this manual to your list of manuals |
Page 78 highlights
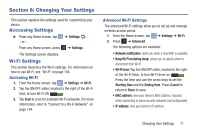
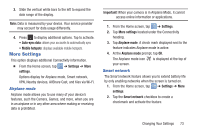
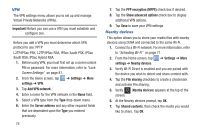
VPN The VPN settings menu allows you to set up and manage Virtual Private Networks (VPNs). Important! Before you can use a VPN you must establish and configure one. Before you add a VPN you must determine which VPN protocol to use: PPTP L2TP/IPSec PSK, L2TP/IPSec RSA, IPSec Xauth PSK, IPSec Xauth RSA, IPSec Hybrid RSA. 1. Before using VPN, you must first set up a screen unlock PIN or password. For more information, refer to "Lock Screen Settings" on page 81. 2. From the Home screen, tap settings ➔ VPN. ➔ Settings ➔ More 3. Tap Add VPN network. 4. Enter a name for the VPN network in the Name field. 5. Select a VPN type from the Type drop-down menu. 6. Enter the Server address and any other required fields that are dependent upon the Type you entered previously. 74 7. Tap the PPP encryption (MPPE) check box if desired. 8. Tap the Show advanced options check box to display additional VPN options. 9. Tap Save to save your VPN settings. Nearby devices This option allows you to share your media files with nearby devices using DLNA and connected to the same Wi-Fi. 1. Connect to a Wi-Fi network. For more information, refer to "Activating Wi-Fi" on page 71. 2. From the Home screen, tap settings ➔ Nearby devices. ➔ Settings ➔ More 3. Verify Wi-Fi Direct is enabled and you are paired with the device you wish to detect and share content with. 4. Tap the File sharing checkbox to create a checkmark and activate File sharing. 5. Verify (Nearby devices) appears at the top of the screen. 6. At the Nearby devices prompt, tap OK. 7. Tap Shared contents, then check the media you would like to share. Tap OK.
-
 1
1 -
2
-
3
-
4
-
5
-
6
-
7
-
8
-
9
-
10
-
11
-
12
-
13
-
14
-
15
-
16
-
17
-
18
-
19
-
20
-
21
-
22
-
23
-
24
-
25
-
26
-
27
-
28
-
29
-
30
-
31
-
32
-
33
-
34
-
35
-
36
-
37
-
38
-
39
-
40
-
41
-
42
-
43
-
44
-
45
-
46
-
47
-
48
-
49
-
50
-
51
-
52
-
53
-
54
-
55
-
56
-
57
-
58
-
59
-
60
-
61
-
62
-
63
-
64
-
65
-
66
-
67
-
68
-
69
-
70
-
71
-
72
-
 73
73 -
 74
74 -
 75
75 -
 76
76 -
 77
77 -
 78
78 -
 79
79 -
 80
80 -
 81
81 -
 82
82 -
 83
83 -
84
-
85
-
86
-
87
-
88
-
89
-
90
-
91
-
92
-
93
-
94
-
95
-
96
-
97
-
98
-
99
-
100
-
101
-
102
-
103
-
104
-
105
-
106
-
107
-
108
-
109
-
110
-
111
-
112
-
113
-
114
-
115
-
116
-
117
-
118
-
119
-
120
-
121
-
122
-
123
-
124
-
125
-
126
-
127
-
128
-
129
-
130
-
131
-
132
-
133
-
134
-
135
-
136
-
137
-
138
-
139
-
140
-
141
-
142
-
143
-
144
-
145
-
146
-
147
-
148
-
149
-
150
-
151
-
152
-
153
-
154
-
155
-
156
-
157
-
158
-
159
-
160
-
161
-
162
-
163
-
164
-
165
-
166
-
167
-
168
-
169
-
170
-
171
-
172
-
173
-
174
-
175
-
176
-
177
 |
 |
