Samsung SCH-U410 User Manual - Page 102
Erase Files, File Info, GET IT NOW, Pictures, Take Picture, Options, Night Shot, Self Timer, White
 |
View all Samsung SCH-U410 manuals
Add to My Manuals
Save this manual to your list of manuals |
Page 102 highlights
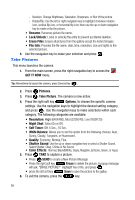
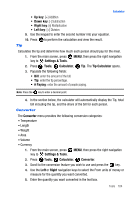
- Revision: Change Brightness, Saturation, Sharpness, or Blur of the picture. - Rotate/Flip: Use the left or right navigation key to highlight clockwise rotation icon, vertical flip icon, or horizontal flip icon; then use the up or down navigation key to rotate or flip the picture. • Rename: Renames picture file name. • Lock/Unlock: Locks or unlocks the entry to prevent accidental deletion. • Erase Files: Erases all pictures from the gallery except the locked images. • File Info: Provides the file name, date, time, resolution, size and rights to the selected picture. 5. Use the navigation key to make your selection and press . Take Pictures This menu launches the camera. 1. From the main screen, press the right navigation key to access the GET IT NOW menu. Tip: Alternatively to launch the camera, press Camera Key ( ). 2. Press Pictures. 3. Press Take Picture. The camera is now active. 4. Press the right soft key Options, to choose the specific camera settings. Use the navigation keys to highlight the desired setting category, and press . Use the navigation keys to make selections within each category. The following categories are available: • Resolution: High (640X480), Med (320X240), Low (160X120) • Night Shot: Select On or Off. • Self Timer: Off, 5 Sec., 10 Sec. • White Balance: Allows you to set this option from the following choices: Auto, Sunny, Cloudy, Tungsten, or Fluorescent. • Quality: Economy, Normal, Fine • Shutter Sound: Use the up or down navigation key to select a Shutter Sound. Select Shutter, Okay, Chime or No Sound. • Color Effects: Normal, Black&White, Sepia, Negative, Emboss, Green, or Aqua. 5. Press TAKE to capture a picture. • Press SEND to create a New Picture Message • Press the right soft key Erase to delete the picture. A popup message will ask, "ERASE PICTURE?" Highlight Yes or No, and press . • press the left soft key Save to save the picture to the galley. 6. To exit the camera, press the key. 99
-
 1
1 -
2
-
3
-
4
-
5
-
6
-
7
-
8
-
9
-
10
-
11
-
12
-
13
-
14
-
15
-
16
-
17
-
18
-
19
-
20
-
21
-
22
-
23
-
24
-
25
-
26
-
27
-
28
-
29
-
30
-
31
-
32
-
33
-
34
-
35
-
36
-
37
-
38
-
39
-
40
-
41
-
42
-
43
-
44
-
45
-
46
-
47
-
48
-
49
-
50
-
51
-
52
-
53
-
54
-
55
-
56
-
57
-
58
-
59
-
60
-
61
-
62
-
63
-
64
-
65
-
66
-
67
-
68
-
69
-
70
-
71
-
72
-
73
-
74
-
75
-
76
-
77
-
78
-
79
-
80
-
81
-
82
-
83
-
84
-
85
-
86
-
87
-
88
-
89
-
90
-
91
-
92
-
93
-
94
-
95
-
96
-
 97
97 -
 98
98 -
 99
99 -
 100
100 -
 101
101 -
 102
102 -
 103
103 -
 104
104 -
 105
105 -
 106
106 -
 107
107 -
108
-
109
-
110
-
111
-
112
-
113
-
114
-
115
-
116
-
117
-
118
-
119
-
120
-
121
-
122
-
123
-
124
-
125
-
126
-
127
-
128
-
129
-
130
-
131
-
132
-
133
-
134
-
135
-
136
-
137
-
138
-
139
-
140
-
141
-
142
 |
 |