Samsung SGH-A157V User Manual At&t Wireless Sgh-a157v Pocket Ve English Us - Page 36
Adding a New Contact, Storing Contact Information in the Phone's, Memory
 |
View all Samsung SGH-A157V manuals
Add to My Manuals
Save this manual to your list of manuals |
Page 36 highlights
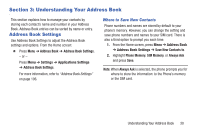
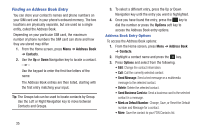
Adding a New Contact Use the following steps to add a new Contact. Storing Contact Information in the Phone's Memory To store a contact's information in the phone's memory: 1. From the Home screen, press Menu ➔ Address Book➔ Add New Contact. 2. Enter the contact's information into the following fields. Use the Down Navigation key to scroll down the list. • First Name: Contact's first name. • Last Name: Contact's last name. • Display Name: Defaults to the First Name and the Last Name and displays on the Home screen with the contact calls. • Mobile, Private: Contact's mobile phone number. • Landline, Private: Contact's landline number. • Email, Private: Contact's email address. • Group: Assign this contact to a Group. • Picture: Highlight the Picture field and press the key and select the contact's picture. • Ringtone: Highlight the Ringtone field and press the key and select a ringtone. 31 • Message Tone: Highlight the Message Tone field and press the key and select Message Tone 1, 2, 3, or 4, or select a Special Tone from your Audio files. • Notes: Add notes for the contact. 3. To save the information entered, press the Options soft key, select Save, and press the key. The contact's information displays. 4. Press the Options soft key to display the following options: • Edit: Edit the contact's information. • Call: Dials the selected contact number. • Send Message: Send a message to the selected contact entry as a Text message or a Multimedia message. • Delete: Delete the selected contact. • Send Business Card via: Send a business card to the selected contact as a Message. • Mark as Default Number: Change, Save, or Reset the Default number and Message for a contact. • More: Save the contact to your FDN Contacts list. 5. To return to the Home screen, press the key.
-
 1
1 -
2
-
3
-
4
-
5
-
6
-
7
-
8
-
9
-
10
-
11
-
12
-
13
-
14
-
15
-
16
-
17
-
18
-
19
-
20
-
21
-
22
-
23
-
24
-
25
-
26
-
27
-
28
-
29
-
30
-
 31
31 -
 32
32 -
 33
33 -
 34
34 -
 35
35 -
 36
36 -
 37
37 -
 38
38 -
 39
39 -
 40
40 -
 41
41 -
42
-
43
-
44
-
45
-
46
-
47
-
48
-
49
-
50
-
51
-
52
-
53
-
54
-
55
-
56
-
57
-
58
-
59
-
60
-
61
-
62
-
63
-
64
-
65
-
66
-
67
-
68
-
69
-
70
-
71
-
72
-
73
-
74
-
75
-
76
-
77
-
78
-
79
-
80
-
81
-
82
-
83
-
84
-
85
-
86
-
87
-
88
-
89
-
90
-
91
-
92
-
93
-
94
-
95
-
96
-
97
-
98
-
99
-
100
-
101
-
102
-
103
-
104
-
105
-
106
-
107
-
108
-
109
-
110
-
111
-
112
-
113
-
114
-
115
-
116
-
117
-
118
-
119
-
120
-
121
-
122
-
123
-
124
-
125
-
126
-
127
-
128
-
129
-
130
-
131
-
132
-
133
-
134
-
135
-
136
-
137
-
138
-
139
-
140
-
141
-
142
-
143
-
144
-
145
-
146
-
147
-
148
-
149
-
150
-
151
-
152
-
153
-
154
-
155
-
156
 |
 |