Sharp AR-BC260 AR-BC260 Operation Manual Suite - Page 148
INSTALLING THE PRINTER DRIVER AND UTILITIES SOFTWARE INSTALLATION, When you are using Windows 2000/ - xp driver
 |
View all Sharp AR-BC260 manuals
Add to My Manuals
Save this manual to your list of manuals |
Page 148 highlights
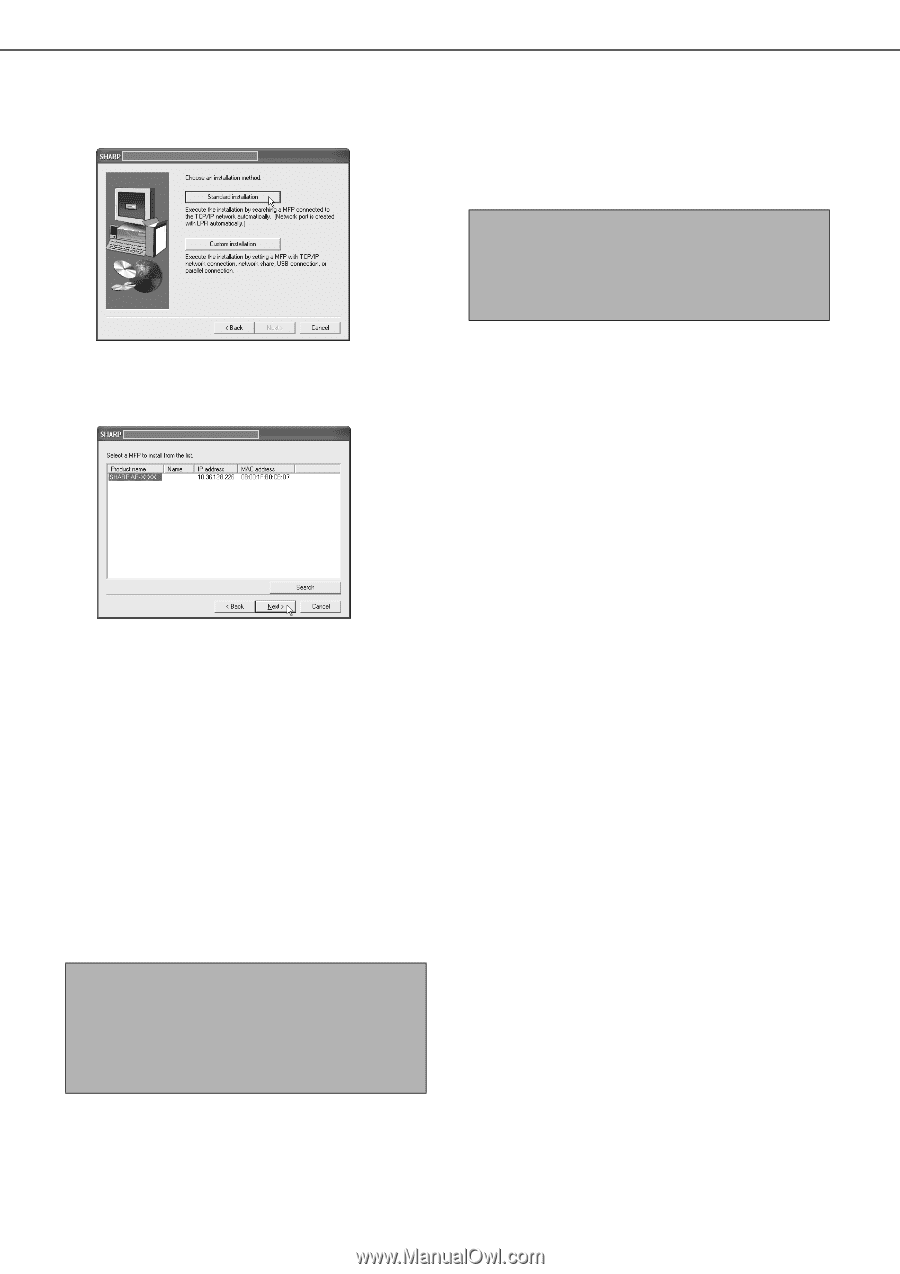
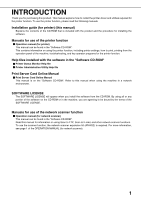
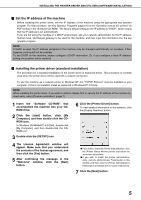
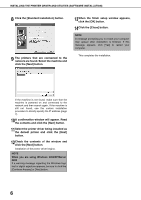
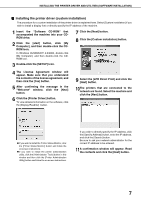
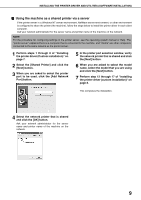
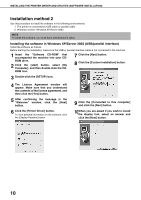
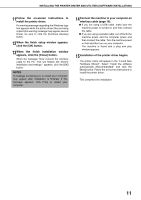
INSTALLING THE PRINTER DRIVER AND UTILITIES (SOFTWARE INSTALLATION) 8 Click the [Standard installation] button. 9 The printers that are connected to the network are found. Select the machine and click the [Next] button. 13When the finish setup window appears, click the [OK] button. 14Click the [Close] button. NOTE A message prompting you to restart your computer may appear after installation is finished. If this message appears, click [Yes] to restart your computer. This completes the installation. If the machine is not found, make sure that the machine is powered on and connected to the network and then search again. If the machine is still not found, use the custom installation procedure to directly specify the IP address (page 7). 10A confirmation window will appear. Read the contents and click the [Next] button. 11Select the printer driver being installed as the default printer and click the [Next] button. 12Check the contents of the window and click the [Next] button. Installation of the printer driver begins. NOTE When you are using Windows 2000/XP/Server 2003 If a warning message regarding the Windows logo test or digital signature appears, be sure to click the [Continue Anyway] or [Yes] button. 6
-
 1
1 -
2
-
3
-
4
-
5
-
6
-
7
-
8
-
9
-
10
-
11
-
12
-
13
-
14
-
15
-
16
-
17
-
18
-
19
-
20
-
21
-
22
-
23
-
24
-
25
-
26
-
27
-
28
-
29
-
30
-
31
-
32
-
33
-
34
-
35
-
36
-
37
-
38
-
39
-
40
-
41
-
42
-
43
-
44
-
45
-
46
-
47
-
48
-
49
-
50
-
51
-
52
-
53
-
54
-
55
-
56
-
57
-
58
-
59
-
60
-
61
-
62
-
63
-
64
-
65
-
66
-
67
-
68
-
69
-
70
-
71
-
72
-
73
-
74
-
75
-
76
-
77
-
78
-
79
-
80
-
81
-
82
-
83
-
84
-
85
-
86
-
87
-
88
-
89
-
90
-
91
-
92
-
93
-
94
-
95
-
96
-
97
-
98
-
99
-
100
-
101
-
102
-
103
-
104
-
105
-
106
-
107
-
108
-
109
-
110
-
111
-
112
-
113
-
114
-
115
-
116
-
117
-
118
-
119
-
120
-
121
-
122
-
123
-
124
-
125
-
126
-
127
-
128
-
129
-
130
-
131
-
132
-
133
-
134
-
135
-
136
-
137
-
138
-
139
-
140
-
141
-
142
-
 143
143 -
 144
144 -
 145
145 -
 146
146 -
 147
147 -
 148
148 -
 149
149 -
 150
150 -
 151
151 -
 152
152 -
 153
153 -
154
-
155
-
156
-
157
-
158
-
159
-
160
-
161
-
162
-
163
-
164
-
165
-
166
-
167
-
168
-
169
-
170
-
171
-
172
-
173
-
174
-
175
-
176
-
177
-
178
-
179
-
180
-
181
-
182
-
183
-
184
 |
 |