Sharp AR-BC260 AR-BC260 Operation Manual Suite - Page 35
Operation procedure common to all custom settings
 |
View all Sharp AR-BC260 manuals
Add to My Manuals
Save this manual to your list of manuals |
Page 35 highlights
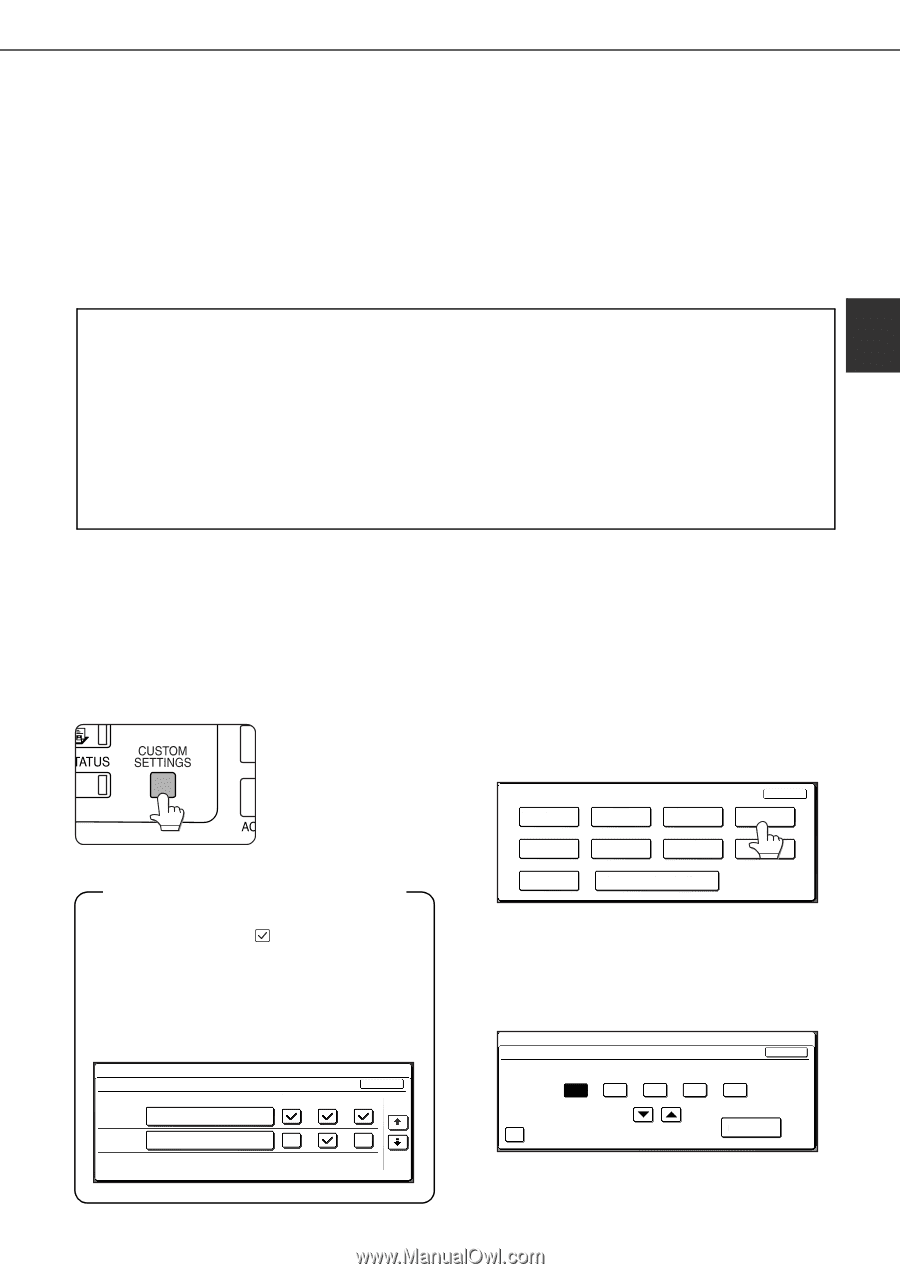
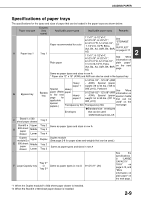
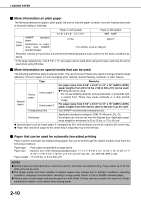
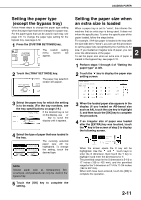
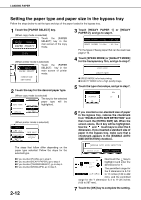
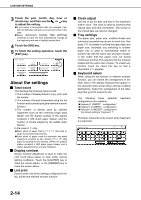
CUSTOM SETTINGS The items that can be set with the custom settings are shown below. G Total count The number of pages processed by the machine and optional equipment can be displayed. (See page 2-14.) G Display contrast Used to adjust the contrast of the operation panel display. (See page 2-14.) G List print Used to print a list of machine settings. (See page 2-14.) G Clock adjust Used to set the date and time of the built-in clock of the machine. (See this page.) G Tray settings The paper type, paper size and automatic tray switching can be set for each tray. Automatic tray switching allows feeding to switch between trays loaded with the same type and size of paper. If one tray runs out of paper during printing, printing will continue from the other tray. (See page 2-14) For the detailed descriptions and use of the settings listed below, see the Operation manuals for fax* and network scanner. 2 G Address control Use this to store fax destinations (fax numbers). This is also used to store groups, memory boxes, and user indexes. E-mail addresses, user indexes, and scanner senders can be stored for the network scanner function. G Receive mode Use this to configure fax reception settings (auto/manual). G Fax data forward Faxes received to memory can be forwarded to another destination. G Keyboard select When using the fax function or network scanner function, you can switch the arrangement of the letter keys in the display keyboard used for storing and editing destinations in the English character entry screen. G Key operator program These are programs that are used by the key operator (administrator of the machine) to configure machine settings. A key appears for these settings in the custom settings menu screen. For information on these settings, see the key operator's guide. * These fax settings can be configured only if the fax function has been enabled. Operation procedure common to all custom settings 1 Press the [CUSTOM SETTINGS] key. The custom setting menu screen will appear. 2 Touch the key of the desired item to display its setting screen. The settings accessed by touching the [CLOCK] key are explained here. CUSTOM SETTINGS TOTAL COUNT DISPLAY CONTRAST LIST PRINT EXIT CLOCK TRAY SETTINGS ADDRESS CONTROL RECEIVE MODE FAX DATA FORWARD More information on setting procedures In the following type of screen, a setting is turned on when a checkmark ( ) appears next to the key. A checkmark will appear or disappear by alternate touches of the checkmark box. In the following screen, tray 1 can be used in print, copy, and fax modes. Tray 2 can only be used in the copy mode. CUSTOM SETTINGS TRAY SETTINGS TRAY 1 TRAY 2 TYPE / SIZE PLAIN / PLAIN / PRINT COPY OK FAX 1/2 KEYBOARD SELECT KEY OPERATOR PROGRAMS Detailed descriptions for program settings start on the next page. The procedure for setting the clock is shown below as an example. CUSTOM SETTINGS CLOCK ADJUST OK YEAR MONTH DAY 2004 11 01 HOUR 00 MINUTE 00 DAYLIGHT SAVING TIME SETTING DATE FORMAT 2-13
-
 1
1 -
2
-
3
-
4
-
5
-
6
-
7
-
8
-
9
-
10
-
11
-
12
-
13
-
14
-
15
-
16
-
17
-
18
-
19
-
20
-
21
-
22
-
23
-
24
-
25
-
26
-
27
-
28
-
29
-
 30
30 -
 31
31 -
 32
32 -
 33
33 -
 34
34 -
 35
35 -
 36
36 -
 37
37 -
 38
38 -
 39
39 -
 40
40 -
41
-
42
-
43
-
44
-
45
-
46
-
47
-
48
-
49
-
50
-
51
-
52
-
53
-
54
-
55
-
56
-
57
-
58
-
59
-
60
-
61
-
62
-
63
-
64
-
65
-
66
-
67
-
68
-
69
-
70
-
71
-
72
-
73
-
74
-
75
-
76
-
77
-
78
-
79
-
80
-
81
-
82
-
83
-
84
-
85
-
86
-
87
-
88
-
89
-
90
-
91
-
92
-
93
-
94
-
95
-
96
-
97
-
98
-
99
-
100
-
101
-
102
-
103
-
104
-
105
-
106
-
107
-
108
-
109
-
110
-
111
-
112
-
113
-
114
-
115
-
116
-
117
-
118
-
119
-
120
-
121
-
122
-
123
-
124
-
125
-
126
-
127
-
128
-
129
-
130
-
131
-
132
-
133
-
134
-
135
-
136
-
137
-
138
-
139
-
140
-
141
-
142
-
143
-
144
-
145
-
146
-
147
-
148
-
149
-
150
-
151
-
152
-
153
-
154
-
155
-
156
-
157
-
158
-
159
-
160
-
161
-
162
-
163
-
164
-
165
-
166
-
167
-
168
-
169
-
170
-
171
-
172
-
173
-
174
-
175
-
176
-
177
-
178
-
179
-
180
-
181
-
182
-
183
-
184
 |
 |