Sharp AR-BC260 AR-BC260 Operation Manual Suite - Page 154
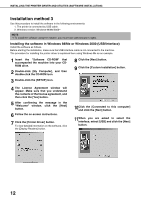
Installation method 3
 |
View all Sharp AR-BC260 manuals
Add to My Manuals
Save this manual to your list of manuals |
Page 154 highlights
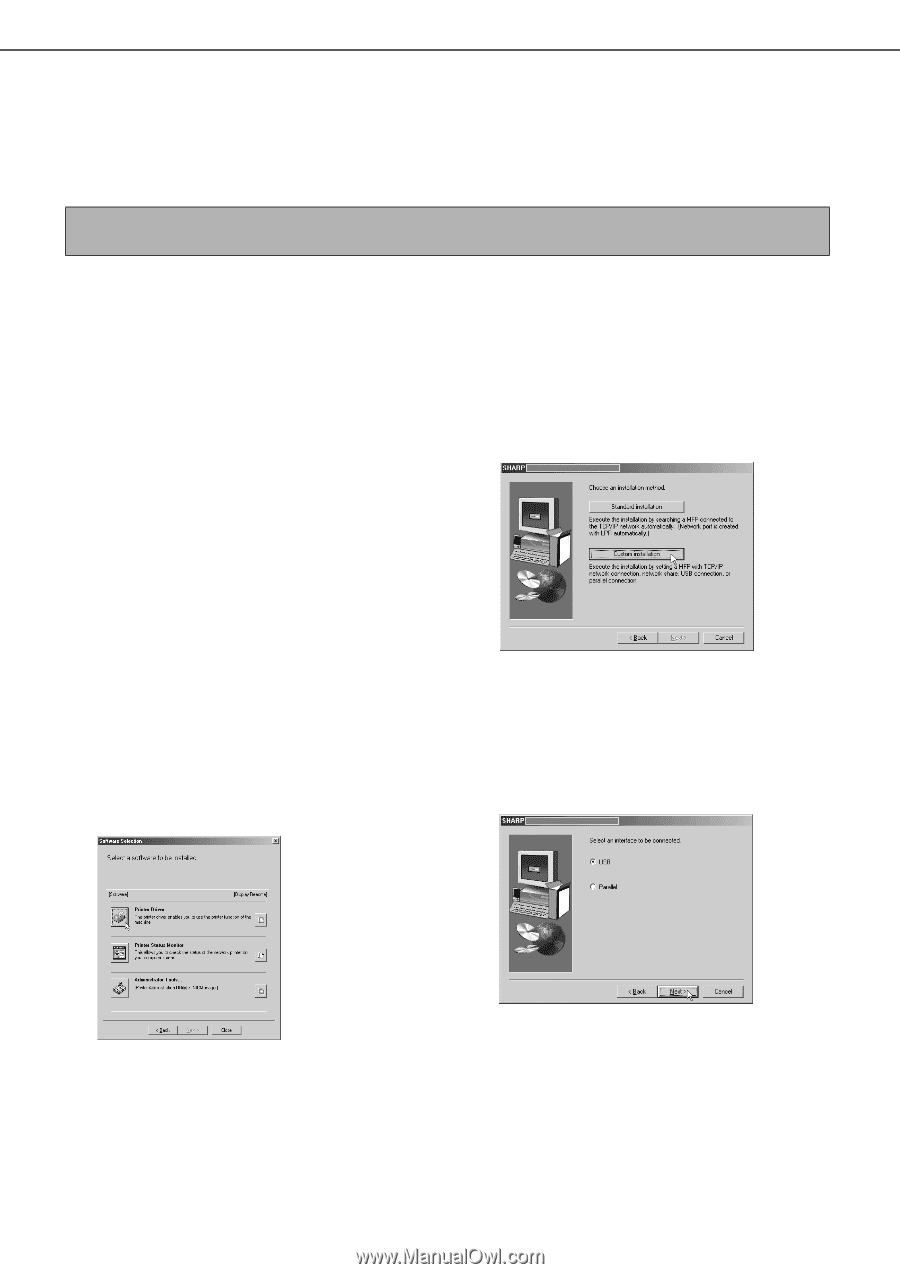
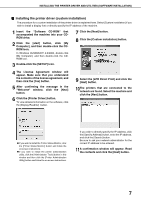
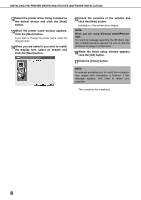
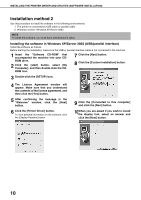
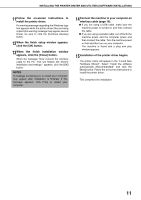
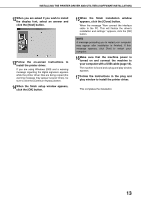
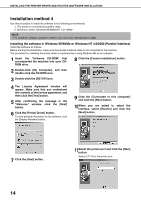
INSTALLING THE PRINTER DRIVER AND UTILITIES (SOFTWARE INSTALLATION) Installation method 3 Use this procedure to install the software in the following environments: 1. The printer is connected by USB cable. 2. Windows version: Windows 98/Me/2000*1 NOTE *1 To install the software using the installer, you must have administrator's rights. Installing the software in Windows 98/Me or Windows 2000 (USB/interface) Install the software as follows. Before starting the installation, make sure the USB interface cable is not connected to the machine. The procedure for installing the printer driver is explained here using Windows Me as an example. 1 Insert the "Software CD-ROM" that accompanied the machine into your CDROM drive. 2 Double-click [My Computer], and then double-click the CD-ROM icon. 3 Double-click the [SETUP] icon. 8 Click the [Next] button. 9 Click the [Custom installation] button. 4 The License Agreement window will appear. Make sure that you understand the contents of the license agreement, and then click the [Yes] button. 5 After confirming the message in the "Welcome" window, click the [Next] button. 6 Follow the on-screen instructions. 7 Click the [Printer Driver] button. To view detailed information on the software, click the [Display Readme] button. 10Click the [Connected to this computer] and click the [Next] button. 11When you are asked to select the interface, select [USB] and click the [Next] button. 12
-
 1
1 -
2
-
3
-
4
-
5
-
6
-
7
-
8
-
9
-
10
-
11
-
12
-
13
-
14
-
15
-
16
-
17
-
18
-
19
-
20
-
21
-
22
-
23
-
24
-
25
-
26
-
27
-
28
-
29
-
30
-
31
-
32
-
33
-
34
-
35
-
36
-
37
-
38
-
39
-
40
-
41
-
42
-
43
-
44
-
45
-
46
-
47
-
48
-
49
-
50
-
51
-
52
-
53
-
54
-
55
-
56
-
57
-
58
-
59
-
60
-
61
-
62
-
63
-
64
-
65
-
66
-
67
-
68
-
69
-
70
-
71
-
72
-
73
-
74
-
75
-
76
-
77
-
78
-
79
-
80
-
81
-
82
-
83
-
84
-
85
-
86
-
87
-
88
-
89
-
90
-
91
-
92
-
93
-
94
-
95
-
96
-
97
-
98
-
99
-
100
-
101
-
102
-
103
-
104
-
105
-
106
-
107
-
108
-
109
-
110
-
111
-
112
-
113
-
114
-
115
-
116
-
117
-
118
-
119
-
120
-
121
-
122
-
123
-
124
-
125
-
126
-
127
-
128
-
129
-
130
-
131
-
132
-
133
-
134
-
135
-
136
-
137
-
138
-
139
-
140
-
141
-
142
-
143
-
144
-
145
-
146
-
147
-
148
-
 149
149 -
 150
150 -
 151
151 -
 152
152 -
 153
153 -
 154
154 -
 155
155 -
 156
156 -
 157
157 -
 158
158 -
 159
159 -
160
-
161
-
162
-
163
-
164
-
165
-
166
-
167
-
168
-
169
-
170
-
171
-
172
-
173
-
174
-
175
-
176
-
177
-
178
-
179
-
180
-
181
-
182
-
183
-
184
 |
 |