Sharp AR-BC260 AR-BC260 Operation Manual Suite - Page 58
Misfeed in the saddle stitch finisher
 |
View all Sharp AR-BC260 manuals
Add to My Manuals
Save this manual to your list of manuals |
Page 58 highlights
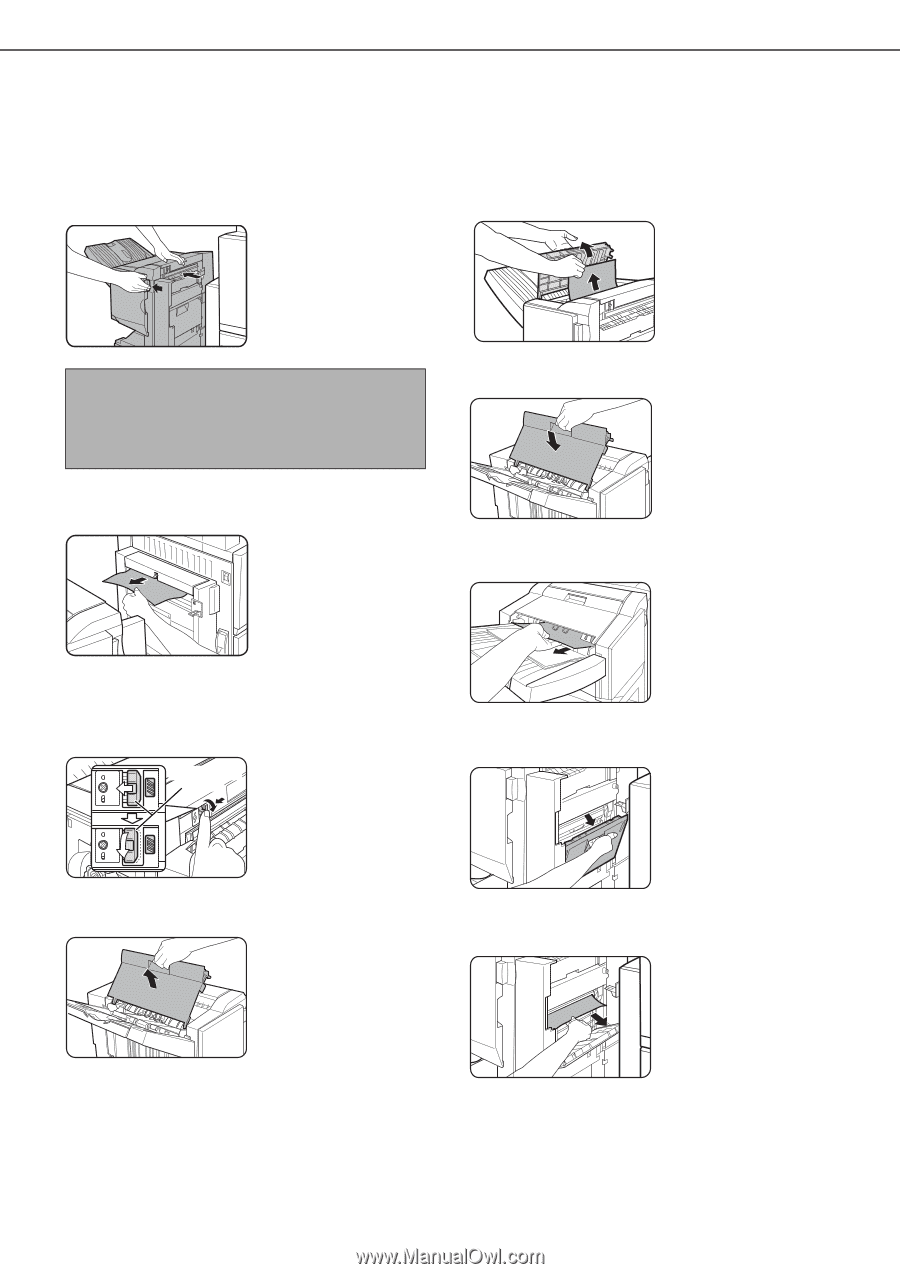
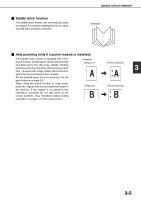
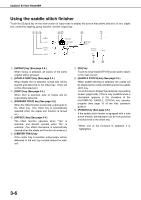
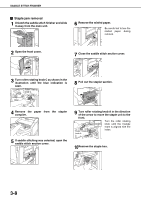
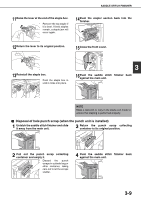
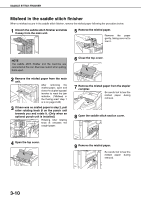
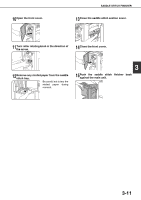
SADDLE STITCH FINISHER Misfeed in the saddle stitch finisher When a misfeed occurs in the saddle stitch finisher, remove the misfed paper following the procedure below. 1 Unlatch the saddle stitch finisher and slide it away from the main unit. 5 Remove the misfed paper. Remove the paper gently, taking care not to tear it. NOTE The saddle stitch finisher and the machine are connected at the rear. Exercise caution when pulling them apart. 2 Remove the misfed paper from the main unit. After removing the misfed paper, open and close the duplex bypass/ inverter to reset the jam indicator. ("Misfeed in the Fusing area" step 1 or 4 on page 2-20) 3 If there was no misfed paper in step 2, pull roller rotating knob B on the punch unit towards you and rotate it. (Only when an optional punch unit is installed.) Roller rotating knob B Rotating roller rotating knob B releases the caught paper. 6 Close the top cover. 7 Remove the misfed paper from the stapler compiler. Be careful not to tear the misfed paper during removal. 8 Open the saddle stitch section cover. 4 Open the top cover. 9 Remove the misfed paper. Be careful not to tear the misfed paper during removal. 3-10
-
 1
1 -
2
-
3
-
4
-
5
-
6
-
7
-
8
-
9
-
10
-
11
-
12
-
13
-
14
-
15
-
16
-
17
-
18
-
19
-
20
-
21
-
22
-
23
-
24
-
25
-
26
-
27
-
28
-
29
-
30
-
31
-
32
-
33
-
34
-
35
-
36
-
37
-
38
-
39
-
40
-
41
-
42
-
43
-
44
-
45
-
46
-
47
-
48
-
49
-
50
-
51
-
52
-
 53
53 -
 54
54 -
 55
55 -
 56
56 -
 57
57 -
 58
58 -
 59
59 -
 60
60 -
 61
61 -
 62
62 -
 63
63 -
64
-
65
-
66
-
67
-
68
-
69
-
70
-
71
-
72
-
73
-
74
-
75
-
76
-
77
-
78
-
79
-
80
-
81
-
82
-
83
-
84
-
85
-
86
-
87
-
88
-
89
-
90
-
91
-
92
-
93
-
94
-
95
-
96
-
97
-
98
-
99
-
100
-
101
-
102
-
103
-
104
-
105
-
106
-
107
-
108
-
109
-
110
-
111
-
112
-
113
-
114
-
115
-
116
-
117
-
118
-
119
-
120
-
121
-
122
-
123
-
124
-
125
-
126
-
127
-
128
-
129
-
130
-
131
-
132
-
133
-
134
-
135
-
136
-
137
-
138
-
139
-
140
-
141
-
142
-
143
-
144
-
145
-
146
-
147
-
148
-
149
-
150
-
151
-
152
-
153
-
154
-
155
-
156
-
157
-
158
-
159
-
160
-
161
-
162
-
163
-
164
-
165
-
166
-
167
-
168
-
169
-
170
-
171
-
172
-
173
-
174
-
175
-
176
-
177
-
178
-
179
-
180
-
181
-
182
-
183
-
184
 |
 |