Sharp AR-BC260 AR-BC260 Operation Manual Suite - Page 40
Misfeed Removal - transfer belt
 |
View all Sharp AR-BC260 manuals
Add to My Manuals
Save this manual to your list of manuals |
Page 40 highlights
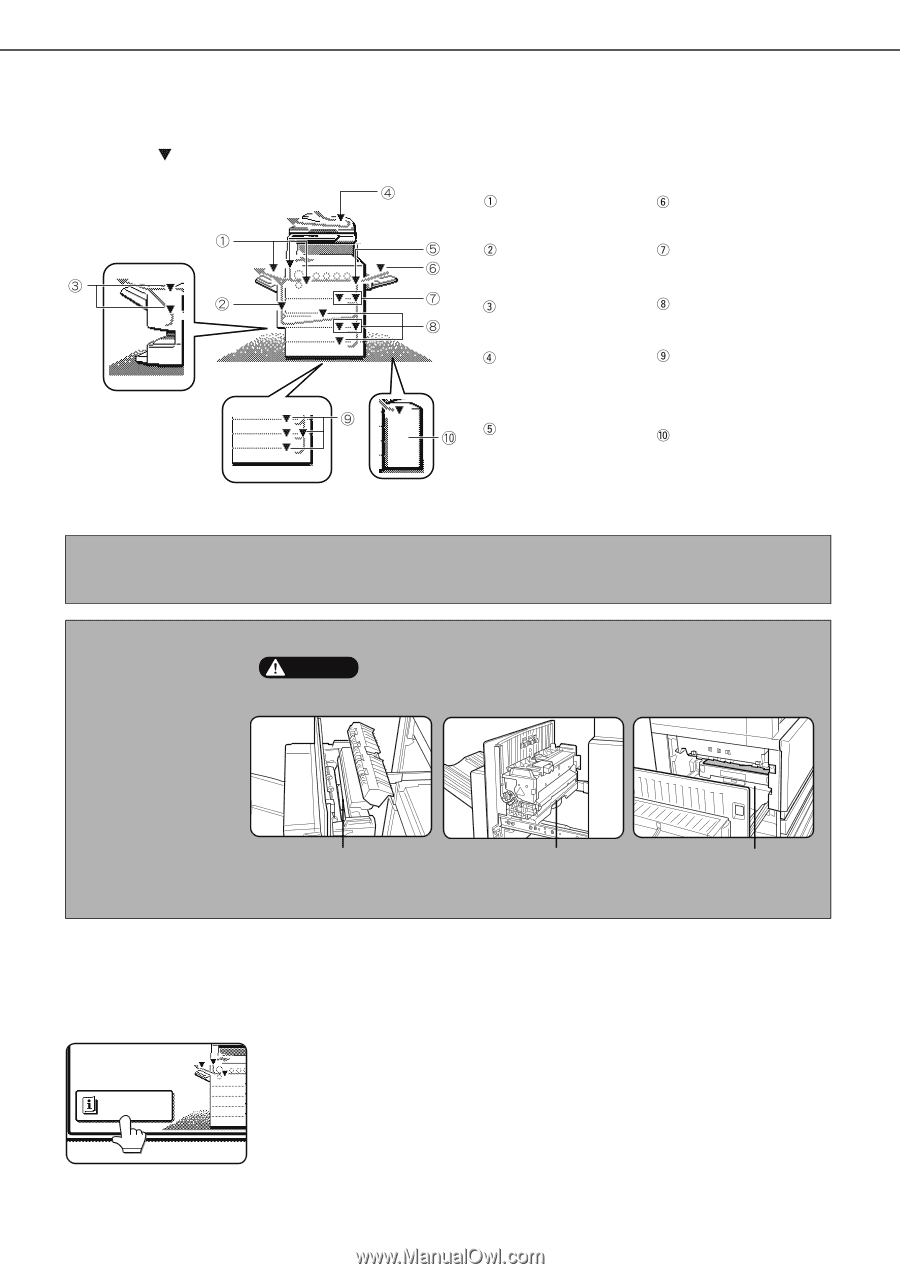
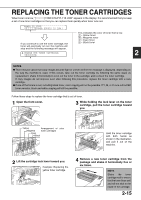
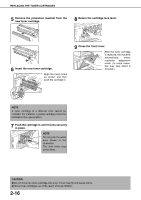
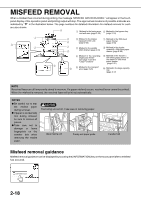
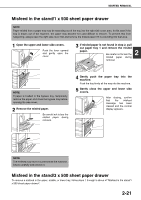
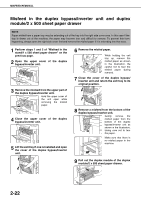
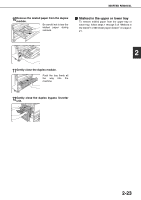
MISFEED REMOVAL When a misfeed has occurred during printing, the message "MISFEED HAS OCCURRED." will appear in the touch panel display of the operation panel and printing output will stop. The approximate locations of possible misfeeds are indicated by " " in the illustration below. The page numbers for detailed information for misfeed removal for each are also shown. Misfeed in the fusing area, and exit area (page 2-20) Misfeed in the bypass tray (page 2-19) Misfeed in the duplex bypass/inverter unit (page 2-22) Misfeed in the saddle stitch finisher (page 3-10) Misfeed in the reversing single pass feeder (see page 7-2 in the "Copy Functions" Misfeed in the transport area (page 2-20) Misfeed in the 500 sheet paper drawer (page 2-19) Misfeed in the duplex module/2 x 500 sheet paper drawer (page 2-22) Misfeed in the stand/1 x 500 sheet paper drawer or the stand/3 x 500 sheet paper drawer (page 2-21) Misfeed in the large capacity tray (page 3-17) NOTE Received faxes are all temporarily stored in memory. If a paper misfeed occurs, received faxes cannot be printed. When the misfeed is removed, the received faxes will print out automatically. NOTES G Be careful not to tear the misfed paper during removal. G If paper is accidentally torn during removal, be sure to remove all pieces. G Take care not to damage or leave fingerprints on the transfer belt when removing the misfed paper. CAUTION The fusing unit is hot. Take care in removing paper. Upper fusing unit Fusing unit paper guide Transfer belt Misfeed removal guidance Misfeed removal guidance can be displayed by touching the [INFORMATION] key on the touch panel after a misfeed has occurred. INFORMATION 2-18
-
 1
1 -
2
-
3
-
4
-
5
-
6
-
7
-
8
-
9
-
10
-
11
-
12
-
13
-
14
-
15
-
16
-
17
-
18
-
19
-
20
-
21
-
22
-
23
-
24
-
25
-
26
-
27
-
28
-
29
-
30
-
31
-
32
-
33
-
34
-
 35
35 -
 36
36 -
 37
37 -
 38
38 -
 39
39 -
 40
40 -
 41
41 -
 42
42 -
 43
43 -
 44
44 -
 45
45 -
46
-
47
-
48
-
49
-
50
-
51
-
52
-
53
-
54
-
55
-
56
-
57
-
58
-
59
-
60
-
61
-
62
-
63
-
64
-
65
-
66
-
67
-
68
-
69
-
70
-
71
-
72
-
73
-
74
-
75
-
76
-
77
-
78
-
79
-
80
-
81
-
82
-
83
-
84
-
85
-
86
-
87
-
88
-
89
-
90
-
91
-
92
-
93
-
94
-
95
-
96
-
97
-
98
-
99
-
100
-
101
-
102
-
103
-
104
-
105
-
106
-
107
-
108
-
109
-
110
-
111
-
112
-
113
-
114
-
115
-
116
-
117
-
118
-
119
-
120
-
121
-
122
-
123
-
124
-
125
-
126
-
127
-
128
-
129
-
130
-
131
-
132
-
133
-
134
-
135
-
136
-
137
-
138
-
139
-
140
-
141
-
142
-
143
-
144
-
145
-
146
-
147
-
148
-
149
-
150
-
151
-
152
-
153
-
154
-
155
-
156
-
157
-
158
-
159
-
160
-
161
-
162
-
163
-
164
-
165
-
166
-
167
-
168
-
169
-
170
-
171
-
172
-
173
-
174
-
175
-
176
-
177
-
178
-
179
-
180
-
181
-
182
-
183
-
184
 |
 |