Sony DCR PC101 Operating Instructions - Page 169
Making your computer recognize your camcorder, Connecting to your computer with USB port
 |
View all Sony DCR PC101 manuals
Add to My Manuals
Save this manual to your list of manuals |
Page 169 highlights
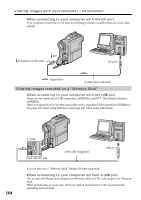
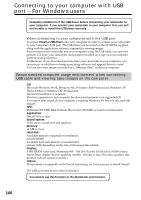
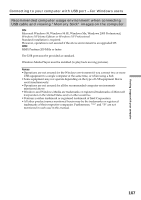
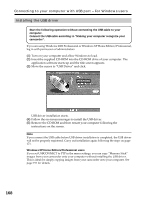
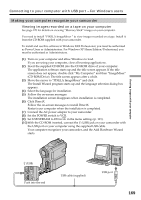
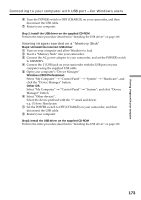
Connecting to your computer with USB port - For Windows users Making your computer recognize your camcorder Viewing images recorded on a tape on your computer See page 170 for details on viewing "Memory Stick" images on your computer. You need to install "PIXELA ImageMixer " to view images recorded on a tape. Install it from the CD-ROM supplied with your camcorder. To install and use this software in Windows 2000 Professional, you must be authorized as Power Users or Administrators. For Windows XP Home Edition/Professional, you must be authorized as Administrators. (1) Turn on your computer and allow Windows to load. If you are using your computer, close all running applications. (2) Insert the supplied CD-ROM into the CD-ROM drive of your computer. The application software starts up and the title screen appears. If the title screen does not appear, double-click "My Computer" and then "ImageMixer" (CD-ROM Drive). The title screen appears after a while. (3) Move the cursor to "PIXELA ImageMixer" and click. The Install Wizard program starts up and the language selection dialog box appears. (4) Select the language for installation. (5) Follow the on-screen messages. The installation screen disappears when installation is completed. (6) Click DirectX. Follow the on-screen messages to install DirectX. Restart your computer when the installation is completed. (7) Connect the AC power adaptor to your camcorder. (8) Set the POWER switch to VCR. (9) Set USB STREAM to ON in in the menu settings (p. 191). (10) With the CD-ROM inserted, connect the (USB) jack on your camcorder with the USB port on your computer using the supplied USB cable. Your computer recognizes your camcorder, and the Add Hardware Wizard starts. Viewing images with your computer (USB) Push into the end USB cable (supplied) USB port 169
-
 1
1 -
2
-
3
-
4
-
5
-
6
-
7
-
8
-
9
-
10
-
11
-
12
-
13
-
14
-
15
-
16
-
17
-
18
-
19
-
20
-
21
-
22
-
23
-
24
-
25
-
26
-
27
-
28
-
29
-
30
-
31
-
32
-
33
-
34
-
35
-
36
-
37
-
38
-
39
-
40
-
41
-
42
-
43
-
44
-
45
-
46
-
47
-
48
-
49
-
50
-
51
-
52
-
53
-
54
-
55
-
56
-
57
-
58
-
59
-
60
-
61
-
62
-
63
-
64
-
65
-
66
-
67
-
68
-
69
-
70
-
71
-
72
-
73
-
74
-
75
-
76
-
77
-
78
-
79
-
80
-
81
-
82
-
83
-
84
-
85
-
86
-
87
-
88
-
89
-
90
-
91
-
92
-
93
-
94
-
95
-
96
-
97
-
98
-
99
-
100
-
101
-
102
-
103
-
104
-
105
-
106
-
107
-
108
-
109
-
110
-
111
-
112
-
113
-
114
-
115
-
116
-
117
-
118
-
119
-
120
-
121
-
122
-
123
-
124
-
125
-
126
-
127
-
128
-
129
-
130
-
131
-
132
-
133
-
134
-
135
-
136
-
137
-
138
-
139
-
140
-
141
-
142
-
143
-
144
-
145
-
146
-
147
-
148
-
149
-
150
-
151
-
152
-
153
-
154
-
155
-
156
-
157
-
158
-
159
-
160
-
161
-
162
-
163
-
 164
164 -
 165
165 -
 166
166 -
 167
167 -
 168
168 -
 169
169 -
 170
170 -
 171
171 -
 172
172 -
 173
173 -
 174
174 -
175
-
176
-
177
-
178
-
179
-
180
-
181
-
182
-
183
-
184
-
185
-
186
-
187
-
188
-
189
-
190
-
191
-
192
-
193
-
194
-
195
-
196
-
197
-
198
-
199
-
200
-
201
-
202
-
203
-
204
-
205
-
206
-
207
-
208
-
209
-
210
-
211
-
212
-
213
-
214
-
215
-
216
-
217
-
218
-
219
-
220
-
221
-
222
-
223
-
224
 |
 |
