Sony DCR PC101 Operating Instructions - Page 90
Dubbing only desired scenes, Digital program editing on tapes, Step 2: Setting the VCR to operate with the i.LINK cable
 |
View all Sony DCR PC101 manuals
Add to My Manuals
Save this manual to your list of manuals |
Page 90 highlights
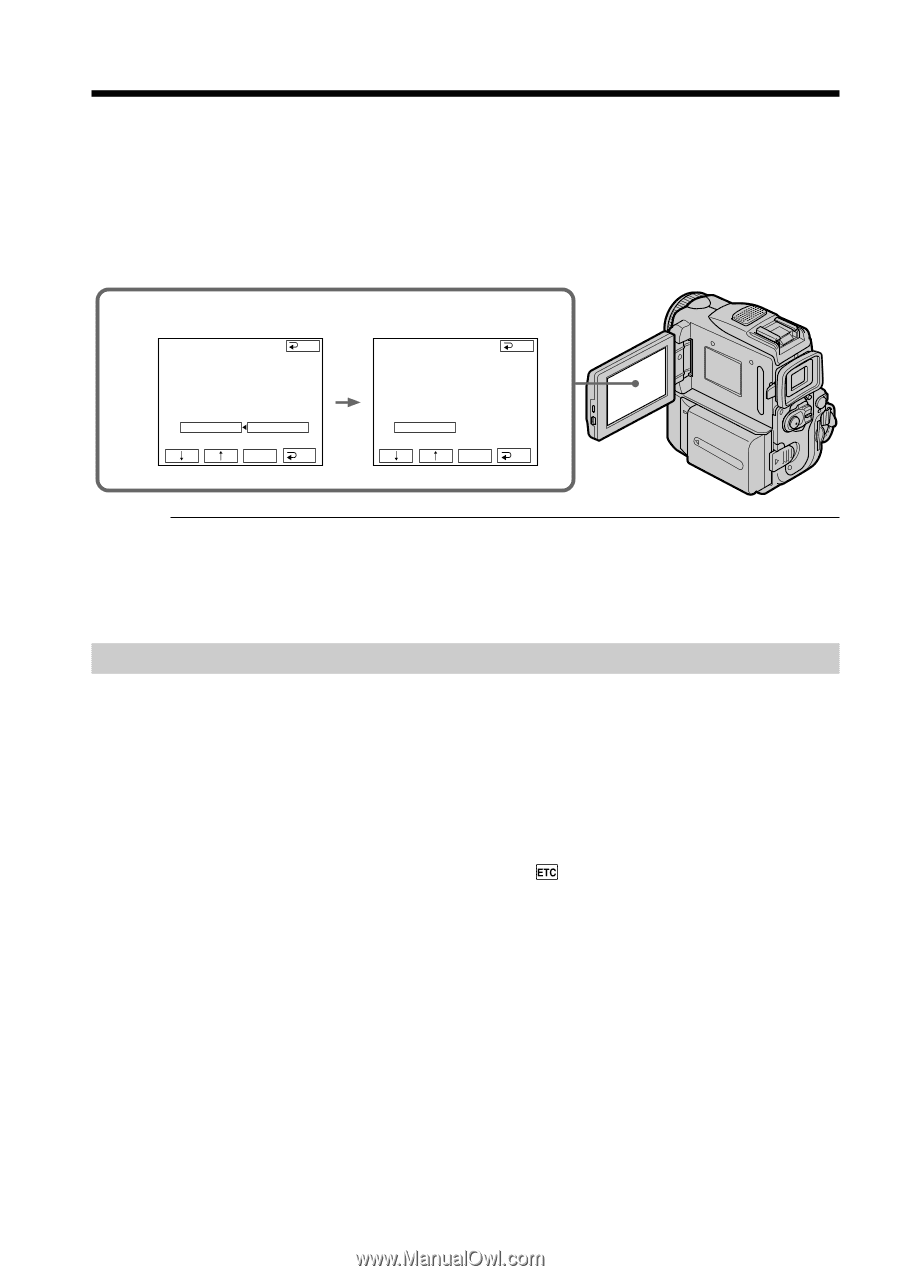
Dubbing only desired scenes - Digital program editing (on tapes) (4) Confirming the VCR operation 1 Insert a recordable tape into the VCR, then set the VCR to recording pause. 2 Press r/R to select IR TEST, then press EXEC. 3 Press r/R to select EXECUTE, then press EXEC. If the VCR starts recording, the setting is correct. The indicator you selected to cancel recording pause on the VCR flashes on the LCD screen. When finished, the indicator changes to COMPLETE. 2,3 V I DEO ED I T END ED I T SET CONTROL ADJ TEST "CUT - I N" ENGAGE "CUT -OUT" REC PAUSE I R SETUP PAUSEMODE RETURN I R TEST EXECUTE EXEC RET. V I DEO ED I T ED I T SET CONTROL ADJ TEST "CUT - I N" "CUT -OUT" I R SETUP PAUSEMODE I R TEST END COMPLETE EXEC RET. When the VCR does not operate correctly • After checking the code in "About the IR SETUP" code, set the IR SETUP or the PAUSEMODE again. • Place your camcorder at least 30 cm (12 in.) away from the VCR. • Refer to the operating instructions of your VCR. Step 2: Setting the VCR to operate with the i.LINK cable When you connect using the i.LINK cable (optional), follow the procedures below. (1) Set the POWER switch to VCR on your camcorder. (2) Turn the power of the connected VCR on, then set the input selector to DV input. When you connect a digital video camera recorder, set its power switch to VCR/VTR. (3) Press FN to display PAGE1. (4) Press MENU, then select VIDEO EDIT in , then press EXEC (p. 192). (5) Press r/R to select TAPE, then press EXEC. (6) Press EDIT SET. (7) Press r/R to select CONTROL, then press EXEC. (8) Press r/R to select i.LINK, then press EXEC. 90
-
 1
1 -
2
-
3
-
4
-
5
-
6
-
7
-
8
-
9
-
10
-
11
-
12
-
13
-
14
-
15
-
16
-
17
-
18
-
19
-
20
-
21
-
22
-
23
-
24
-
25
-
26
-
27
-
28
-
29
-
30
-
31
-
32
-
33
-
34
-
35
-
36
-
37
-
38
-
39
-
40
-
41
-
42
-
43
-
44
-
45
-
46
-
47
-
48
-
49
-
50
-
51
-
52
-
53
-
54
-
55
-
56
-
57
-
58
-
59
-
60
-
61
-
62
-
63
-
64
-
65
-
66
-
67
-
68
-
69
-
70
-
71
-
72
-
73
-
74
-
75
-
76
-
77
-
78
-
79
-
80
-
81
-
82
-
83
-
84
-
 85
85 -
 86
86 -
 87
87 -
 88
88 -
 89
89 -
 90
90 -
 91
91 -
 92
92 -
 93
93 -
 94
94 -
 95
95 -
96
-
97
-
98
-
99
-
100
-
101
-
102
-
103
-
104
-
105
-
106
-
107
-
108
-
109
-
110
-
111
-
112
-
113
-
114
-
115
-
116
-
117
-
118
-
119
-
120
-
121
-
122
-
123
-
124
-
125
-
126
-
127
-
128
-
129
-
130
-
131
-
132
-
133
-
134
-
135
-
136
-
137
-
138
-
139
-
140
-
141
-
142
-
143
-
144
-
145
-
146
-
147
-
148
-
149
-
150
-
151
-
152
-
153
-
154
-
155
-
156
-
157
-
158
-
159
-
160
-
161
-
162
-
163
-
164
-
165
-
166
-
167
-
168
-
169
-
170
-
171
-
172
-
173
-
174
-
175
-
176
-
177
-
178
-
179
-
180
-
181
-
182
-
183
-
184
-
185
-
186
-
187
-
188
-
189
-
190
-
191
-
192
-
193
-
194
-
195
-
196
-
197
-
198
-
199
-
200
-
201
-
202
-
203
-
204
-
205
-
206
-
207
-
208
-
209
-
210
-
211
-
212
-
213
-
214
-
215
-
216
-
217
-
218
-
219
-
220
-
221
-
222
-
223
-
224
 |
 |