Sony LF-X11 User Manual - Page 46
NetAV Check, Using NetAV
 |
View all Sony LF-X11 manuals
Add to My Manuals
Save this manual to your list of manuals |
Page 46 highlights
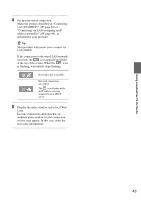
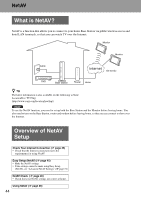
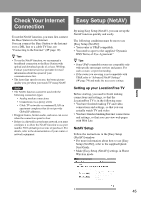
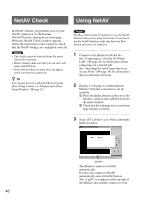
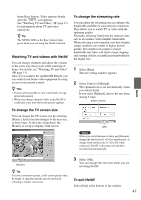
NetAV Check Using NetAV In [NetAV Check], you perform a test of your NetAV connection via the Internet. [NetAV Check] is displayed on a web page. When the [NetAV Check] window appears, follow the instructions in the window to check that the NetAV settings are configured correctly. Notes • This check cannot be done in On the Go mode. Always do it at home. • Before starting, make sure that you can view web pages with Web Lite. • If the [NetAV Check] window does not appear, check your Internet connection. z Tip You can also proceed to [NetAV Check] from the [Easy Setup] window, see "Displaying the [Easy Setup] Window" (1 page 24). Note The Base Station must be turned on to use the NetAV function when you are away from home. If you want to use the NetAV function, make sure that your Base Station and router are turned on. 1 Connect to the Internet in On the Go. See "Connecting to a On the Go-Wired LAN" (1 page 42) for information about connecting via a wired LAN. See "Searching For and Connecting to an Access Point" (1 page 38) for information about connecting wirelessly. 2 Display a web page to confirm that the Monitor's Internet connection is set up correctly. 1 Press the [Index] button at the top of the Monitor, and then select [Web Lite] from the index window. 2 Check that the web page set as your home page displays correctly. 3 Select [TV], [Video 1], or [Video 2] from the [Index] window. [NetAV] The Monitor connects to NetAV automatically. If it does not connect to NetAV automatically, select [NetAV] button. The icon appears at the top right if the Monitor successfully connects to your 46
-
 1
1 -
2
-
3
-
4
-
5
-
6
-
7
-
8
-
9
-
10
-
11
-
12
-
13
-
14
-
15
-
16
-
17
-
18
-
19
-
20
-
21
-
22
-
23
-
24
-
25
-
26
-
27
-
28
-
29
-
30
-
31
-
32
-
33
-
34
-
35
-
36
-
37
-
38
-
39
-
40
-
 41
41 -
 42
42 -
 43
43 -
 44
44 -
 45
45 -
 46
46 -
 47
47 -
 48
48 -
 49
49 -
 50
50 -
 51
51 -
52
-
53
-
54
-
55
-
56
-
57
-
58
-
59
-
60
-
61
-
62
-
63
-
64
-
65
-
66
-
67
-
68
-
69
-
70
-
71
-
72
-
73
-
74
-
75
-
76
-
77
-
78
-
79
-
80
-
81
-
82
-
83
-
84
-
85
-
86
-
87
-
88
-
89
-
90
-
91
-
92
-
93
-
94
-
95
-
96
 |
 |
