Sony PEG-TH55 CLIE Handbook (primary manual) - Page 155
CLIE Organizer, HotSync, Modem Sync Preferences
 |
View all Sony PEG-TH55 manuals
Add to My Manuals
Save this manual to your list of manuals |
Page 155 highlights
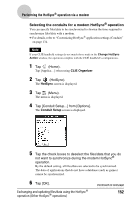
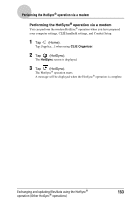
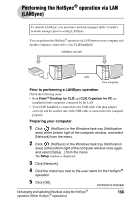
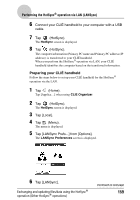
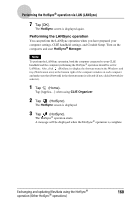
Performing the HotSync® operation via a network 6 Connect a USB cable to your CLIÉ handheld and press (the HotSync button). The computer information (Primary PC name and Primary PC address (IP address)) is transferred to your CLIÉ handheld. When you perform the HotSync® operation via a network, your CLIÉ handheld identifies the computer based on the transferred information. Preparing your CLIÉ handheld Follow the steps below to set up your CLIÉ handheld for the HotSync® operation via a network. 1 Tap (Home). Tap [Applica...] when using CLIE Organizer. 2 Tap (HotSync). The HotSync screen is displayed. 3 Tap [Modem]. 4 Tap (Menu). The menu is displayed. 5 Tap [Modem Sync Prefs...] from [Options]. The Modem Sync Preferences screen is displayed. Exchanging and updating files/data using the HotSync® operation (Other HotSync® operations) Continued on next page 155
-
 1
1 -
2
-
3
-
4
-
5
-
6
-
7
-
8
-
9
-
10
-
11
-
12
-
13
-
14
-
15
-
16
-
17
-
18
-
19
-
20
-
21
-
22
-
23
-
24
-
25
-
26
-
27
-
28
-
29
-
30
-
31
-
32
-
33
-
34
-
35
-
36
-
37
-
38
-
39
-
40
-
41
-
42
-
43
-
44
-
45
-
46
-
47
-
48
-
49
-
50
-
51
-
52
-
53
-
54
-
55
-
56
-
57
-
58
-
59
-
60
-
61
-
62
-
63
-
64
-
65
-
66
-
67
-
68
-
69
-
70
-
71
-
72
-
73
-
74
-
75
-
76
-
77
-
78
-
79
-
80
-
81
-
82
-
83
-
84
-
85
-
86
-
87
-
88
-
89
-
90
-
91
-
92
-
93
-
94
-
95
-
96
-
97
-
98
-
99
-
100
-
101
-
102
-
103
-
104
-
105
-
106
-
107
-
108
-
109
-
110
-
111
-
112
-
113
-
114
-
115
-
116
-
117
-
118
-
119
-
120
-
121
-
122
-
123
-
124
-
125
-
126
-
127
-
128
-
129
-
130
-
131
-
132
-
133
-
134
-
135
-
136
-
137
-
138
-
139
-
140
-
141
-
142
-
143
-
144
-
145
-
146
-
147
-
148
-
149
-
 150
150 -
 151
151 -
 152
152 -
 153
153 -
 154
154 -
 155
155 -
 156
156 -
 157
157 -
 158
158 -
 159
159 -
 160
160 -
161
-
162
-
163
-
164
-
165
-
166
-
167
-
168
-
169
-
170
-
171
-
172
-
173
-
174
-
175
-
176
-
177
-
178
-
179
-
180
-
181
-
182
-
183
-
184
-
185
-
186
-
187
-
188
-
189
-
190
-
191
-
192
-
193
-
194
-
195
-
196
-
197
-
198
-
199
-
200
-
201
-
202
-
203
-
204
-
205
-
206
-
207
-
208
-
209
-
210
-
211
-
212
-
213
-
214
-
215
-
216
-
217
-
218
-
219
-
220
-
221
-
222
-
223
-
224
-
225
-
226
-
227
-
228
-
229
-
230
-
231
 |
 |