Sony SRR1000 Product Brochure (SRMASTER: SRR1000 Operation Manual) - Page 28
To reset time data, To set the user bits, To record the current time, To cancel the input data
 |
View all Sony SRR1000 manuals
Add to My Manuals
Save this manual to your list of manuals |
Page 28 highlights
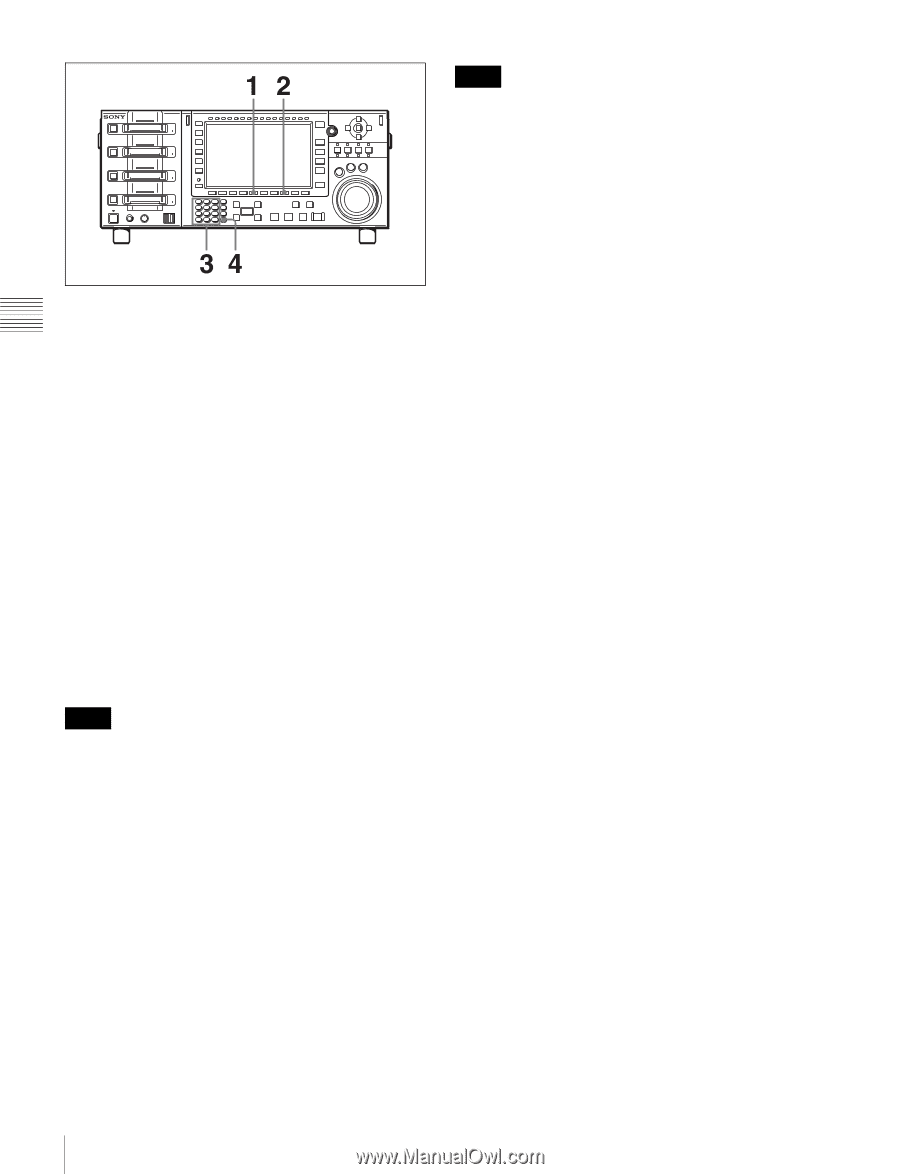
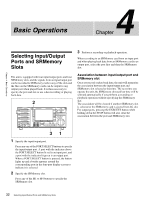
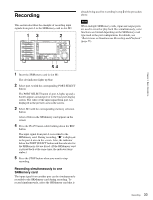
Chapter 3 Setting Up the Memory Storage Unit Notes • The values read by the time code reader cannot be reset. • Time data cannot be reset when the internal time code generator is locked to external time codes or to values read by the time code reader. 1 Use the [F5] (TM SEL) button in the TC menu to select the TC (time code) to be set. 2 Use the [F8] (TM SET) button in the TC menu to select preset mode. The numbers in the time code display section turn orange. 3 Use the numeric buttons to input the time code. Pressing a numeric button inputs a value in the flashing digit in the time code display section. Use the right and left cursor buttons to move the flashing digit. To cancel the input data Press the CLR button. 4 Press the SET button to confirm the input data. If you press the + or - button and then enter a value, the input data becomes the result of the addition or subtraction. Notes • The data from an external time code generator cannot be set. • The time data cannot be set when the internal time code generator is locked to external time codes or to values read by the time code reader. • Entries made in preset mode are shown in the 24-hour display even when ±12H is set. To reset time data Press the [F7] (TM RESET) button in the TC menu. The time data is reset as follows in accordance with the setting of the [F5] (TM SEL) button in the TC menu. For TC (time codes) or UB (user bits) The internal time code generator is reset and the time data display becomes 00:00:00:00 (for TC) or 00 00 00 00 (for UB). To set the user bits 1 Use the [F5] (TM SEL) button in the TC menu to select "UB". 2 Use the [F8] (TM SET) button to select preset mode. The numbers in the time code display section turn orange. 3 Use the numeric buttons to enter the desired user bit value in hexadecimal notation. Press the 0 to 5 buttons while holding down the SFT button to enter the letters A to F. 4 Press the SET button. To record the current time 1 Use the [F4] (DF/NDF) button in the TC menu to select "DF". 2 Use the [F3] (RUN) button in the TC menu to select "Free". 3 Use the numeric buttons to enter the target time. 4 When the target time arrives, press the SET button. The time code generator starts operating from the specified time. To pause the current time Press and hold down the [F9] (TM HOLD) button in the TC menu. The current time is paused only while the button is held down. 28 Time Code Settings
-
 1
1 -
2
-
3
-
4
-
5
-
6
-
7
-
8
-
9
-
10
-
11
-
12
-
13
-
14
-
15
-
16
-
17
-
18
-
19
-
20
-
21
-
22
-
 23
23 -
 24
24 -
 25
25 -
 26
26 -
 27
27 -
 28
28 -
 29
29 -
 30
30 -
 31
31 -
 32
32 -
 33
33 -
34
-
35
-
36
-
37
-
38
-
39
-
40
-
41
-
42
-
43
-
44
-
45
-
46
-
47
-
48
-
49
-
50
-
51
-
52
-
53
-
54
-
55
-
56
-
57
-
58
-
59
-
60
-
61
-
62
-
63
-
64
-
65
-
66
-
67
-
68
-
69
-
70
 |
 |