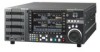
Sony SRR1000 Product Brochure (SRMASTER: SRR1000 Operation Manual) - Page 38
Selecting Audio Signals, Monitor
 |
View all Sony SRR1000 manuals
Add to My Manuals
Save this manual to your list of manuals |
Page 38 highlights
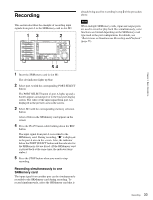
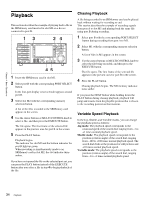
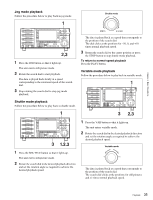
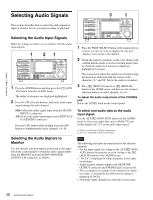
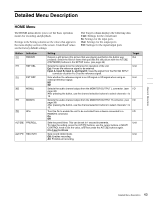
Chapter 4 Basic Operations Selecting Audio Signals This section describes how to select the audio signals to input or monitor before you start recording or playback. Selecting the Audio Input Signals Make the settings as follows in accordance with the audio input signals. 1 Press the AUDIO button and then press the [F1] (AUD IN) button from the AUDIO menu. The audio level meters are displayed highlighted. 2 Press the CH selection buttons, and make audio input signal settings for each channel. SDI: Selects the audio signal input from the HD SDI INPUT A connector. A/E: Selects the audio signal input from a DIGITAL I/ O (AES/EBU) connector. Press the CH1 button while holding down the SFT button to simultaneously select channels 1 to 16. Selecting the Audio Signals to Monitor Use the channel selection buttons positioned in the upper left of the control panel to switch the audio signal output from the PHONES jack and AUDIO MONITOR OUTPUT L/R connectors as follows. 1 Press the PORT SELECT button of the input port you want to set once or twice to display the one-port display screen on the color display. 2 Check the audio level meters on the color display and confirm that the mode is not level setting mode (state in which the audio level meters are displayed highlighted in orange). The channels for which the signals are currently being monitored are indicated with the reverse video characters "L" and "R" below the audio level meters. 3 Press [F5] (MON (L)) button or [F6] (MON (R)) button in the HOME menu, and then use the channel selection buttons to select channels 1 to 16. To adjust the audio output level of the PHONES jack Rotate the LEVEL knob on the control panel. To select non-audio data as the audio input signal Use the ALT/[F2] (NON-AUD) buttons in the AUDIO menu to select non-audio data such as Dolby1) E and Dolby Digital (AC-32)) as the audio input signal. 1) Dolby is a trademark of Dolby Laboratories. 2) AC-3 is a trademark of Dolby Laboratories. Note The following describes the operations for the selected channels. • For the input signal, the setting of the ALT/[F2] (NON AUD) buttons has priority over the setting of the [F1] (AUD IN) button of the AUDIO menu. • "DATA" is displayed in white characters in the audio level meters. • Audio monitor output (output to the MONITOR OUTPUT connector and PHONES jack) is turned off. • The recording level settings of the channels for which non-audio is selected do not affect the recording or playback of DATA. • Non-audio input channels are selected in stereo pairs. 38 Selecting Audio Signals
-
 1
1 -
2
-
3
-
4
-
5
-
6
-
7
-
8
-
9
-
10
-
11
-
12
-
13
-
14
-
15
-
16
-
17
-
18
-
19
-
20
-
21
-
22
-
23
-
24
-
25
-
26
-
27
-
28
-
29
-
30
-
31
-
32
-
 33
33 -
 34
34 -
 35
35 -
 36
36 -
 37
37 -
 38
38 -
 39
39 -
 40
40 -
 41
41 -
 42
42 -
 43
43 -
44
-
45
-
46
-
47
-
48
-
49
-
50
-
51
-
52
-
53
-
54
-
55
-
56
-
57
-
58
-
59
-
60
-
61
-
62
-
63
-
64
-
65
-
66
-
67
-
68
-
69
-
70
 |
 |
