Symantec 14541094 Administration Guide - Page 82
Mapping the NDS class to the LDAP class, Creating an LDIF file, pcaHostEntry, Apply, Modify
 |
UPC - 037648640480
View all Symantec 14541094 manuals
Add to My Manuals
Save this manual to your list of manuals |
Page 82 highlights
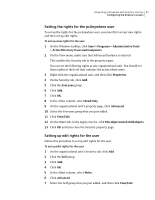
82 Integrating pcAnywhere with directory services Configuring the directory servers 7 In the LDAP attribute field, type pcaHostEntry This entry is case-sensitive and must be entered exactly as it appears above. 8 In the NDS Attribute box, click pcaHostEntry. 9 Click OK. 10 Do one of the following: ■ Click Apply to map other attributes. ■ Click OK to finish. 11 To modify the attributes for this map, highlight the attribute, and then click Modify. Mapping the NDS class to the LDAP class Follow this procedure to map the NDS class to the LDAP class. To map the NDS class to the LDAP class 1 Double-click the LDAP Group icon. 2 On the Class Map tab, click Add. 3 In the LDAP class field, type pcaHost This entry is case-sensitive and must be typed exactly. 4 In the NDS Attribute box, click pcaHost. 5 Click OK. 6 Do one of the following: ■ Click Apply to map other attributes. ■ Click OK to finish. Creating an LDIF file Follow this procedure to create an LDIF file. Note: To perform the following steps, you need access to a word processing utility such as Notepad, as well as access to the server or remote control through Rconag6.nlm and Rconj.exe.
-
 1
1 -
2
-
3
-
4
-
5
-
6
-
7
-
8
-
9
-
10
-
11
-
12
-
13
-
14
-
15
-
16
-
17
-
18
-
19
-
20
-
21
-
22
-
23
-
24
-
25
-
26
-
27
-
28
-
29
-
30
-
31
-
32
-
33
-
34
-
35
-
36
-
37
-
38
-
39
-
40
-
41
-
42
-
43
-
44
-
45
-
46
-
47
-
48
-
49
-
50
-
51
-
52
-
53
-
54
-
55
-
56
-
57
-
58
-
59
-
60
-
61
-
62
-
63
-
64
-
65
-
66
-
67
-
68
-
69
-
70
-
71
-
72
-
73
-
74
-
75
-
76
-
 77
77 -
 78
78 -
 79
79 -
 80
80 -
 81
81 -
 82
82 -
 83
83 -
 84
84 -
 85
85 -
 86
86 -
 87
87 -
88
-
89
-
90
-
91
-
92
-
93
-
94
-
95
-
96
-
97
-
98
-
99
-
100
-
101
-
102
-
103
-
104
-
105
-
106
-
107
-
108
-
109
 |
 |
