Brother International MFC-7360N Software Users Manual - English - Page 170
Scan To, Show Details, Scan Mode, Resolution, Scan Size, Orientation, Rotation Angle, Format, Image
 |
UPC - 012502627005
View all Brother International MFC-7360N manuals
Add to My Manuals
Save this manual to your list of manuals |
Page 170 highlights
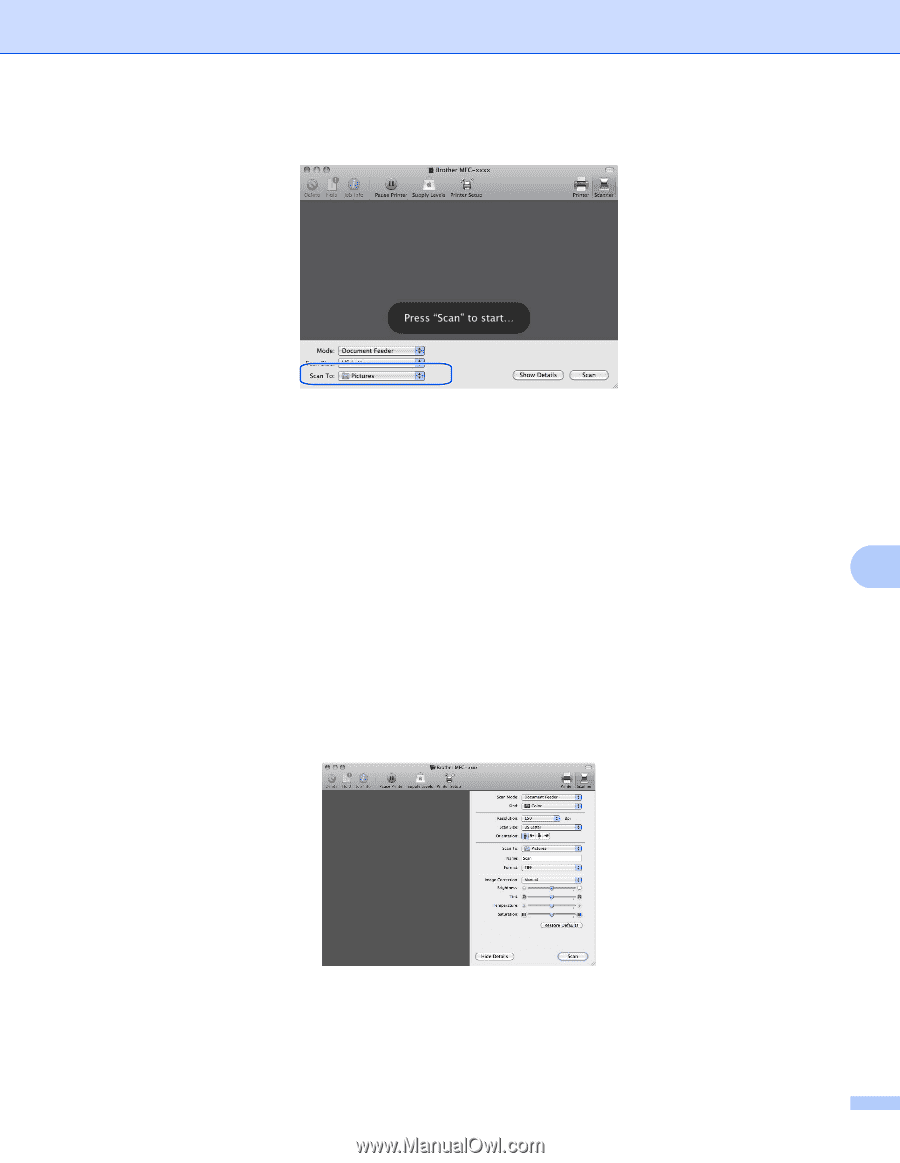
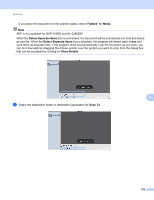
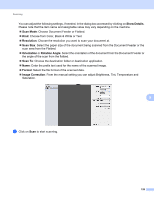
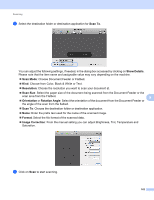
Scanning g Select the destination folder or destination application for Scan To. You can adjust the following settings, if needed, in the dialog box accessed by clicking on Show Details. Please note that the item name and assignable value may vary depending on the machine. Scan Mode: Choose Document Feeder or Flatbed. Kind: Choose from Color, Black & White or Text. Resolution: Choose the resolution you want to scan your document at. Scan Size: Select the paper size of the document being scanned from the Document Feeder or the scan area from the Flatbed. 9 Orientation or Rotation Angle: Select the orientation of the document from the Document Feeder or the angle of the scan from the flatbed. Scan To: Choose the destination folder or destination application. Name: Enter the prefix text used for the name of the scanned image. Format: Select the file format of the scanned data. Image Correction: From the manual setting you can adjust Brightness, Tint, Temperature and Saturation. h Click on Scan to start scanning. 162
-
 1
1 -
2
-
3
-
4
-
5
-
6
-
7
-
8
-
9
-
10
-
11
-
12
-
13
-
14
-
15
-
16
-
17
-
18
-
19
-
20
-
21
-
22
-
23
-
24
-
25
-
26
-
27
-
28
-
29
-
30
-
31
-
32
-
33
-
34
-
35
-
36
-
37
-
38
-
39
-
40
-
41
-
42
-
43
-
44
-
45
-
46
-
47
-
48
-
49
-
50
-
51
-
52
-
53
-
54
-
55
-
56
-
57
-
58
-
59
-
60
-
61
-
62
-
63
-
64
-
65
-
66
-
67
-
68
-
69
-
70
-
71
-
72
-
73
-
74
-
75
-
76
-
77
-
78
-
79
-
80
-
81
-
82
-
83
-
84
-
85
-
86
-
87
-
88
-
89
-
90
-
91
-
92
-
93
-
94
-
95
-
96
-
97
-
98
-
99
-
100
-
101
-
102
-
103
-
104
-
105
-
106
-
107
-
108
-
109
-
110
-
111
-
112
-
113
-
114
-
115
-
116
-
117
-
118
-
119
-
120
-
121
-
122
-
123
-
124
-
125
-
126
-
127
-
128
-
129
-
130
-
131
-
132
-
133
-
134
-
135
-
136
-
137
-
138
-
139
-
140
-
141
-
142
-
143
-
144
-
145
-
146
-
147
-
148
-
149
-
150
-
151
-
152
-
153
-
154
-
155
-
156
-
157
-
158
-
159
-
160
-
161
-
162
-
163
-
164
-
 165
165 -
 166
166 -
 167
167 -
 168
168 -
 169
169 -
 170
170 -
 171
171 -
 172
172 -
 173
173 -
 174
174 -
 175
175 -
176
-
177
-
178
-
179
-
180
-
181
-
182
-
183
-
184
-
185
-
186
-
187
-
188
-
189
-
190
-
191
-
192
-
193
-
194
-
195
-
196
-
197
-
198
-
199
-
200
-
201
-
202
-
203
-
204
-
205
-
206
-
207
-
208
-
209
-
210
-
211
-
212
-
213
-
214
-
215
-
216
-
217
-
218
 |
 |