Brother International PE-300S Users Manual - English
Brother International PE-300S Manual
 |
View all Brother International PE-300S manuals
Add to My Manuals
Save this manual to your list of manuals |
Brother International PE-300S manual content summary:
- Brother International PE-300S | Users Manual - English - Page 1
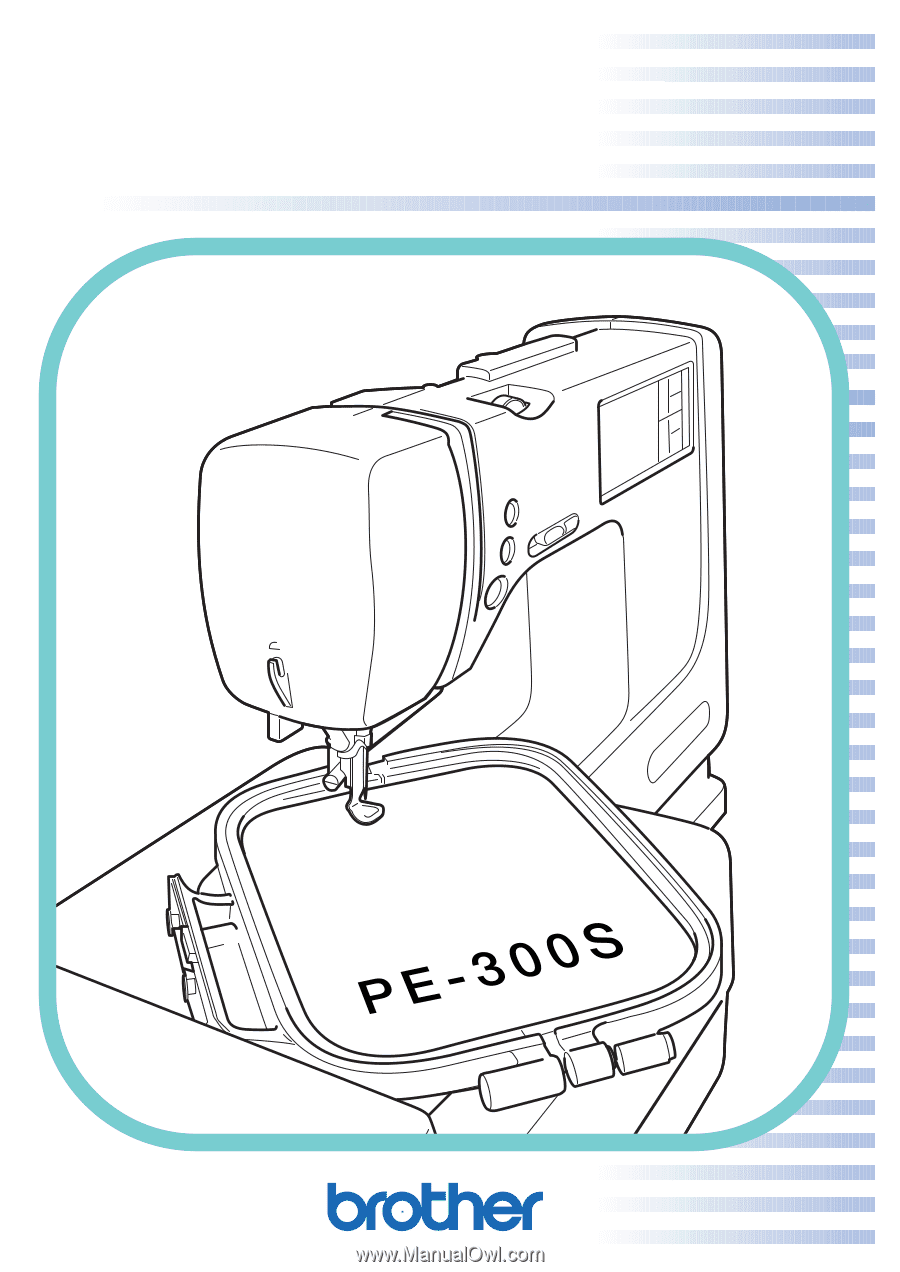
OPERATION MANUAL ® - Brother International PE-300S | Users Manual - English - Page 2
needle, threading bobbin, or changing presser foot, and the like. 15. Always unplug the sewing machine from the electrical outlet when removing covers, lubricating, or when making any other user servicing adjustments mentioned in the instruction manual. 16. This sewing machine is not intended - Brother International PE-300S | Users Manual - English - Page 3
FOR USERS IN THE UK, EIRE, MALTA AND CYPRUS ONLY. If your sewing machine is fitted with a three-pin non- plug. NOTE The plug served from the main lead must be destroyed as a plug with bared flexible cords is hazardous if engaged in a live socket outlet. In the event of replacing the plug fuse, - Brother International PE-300S | Users Manual - English - Page 4
any other parts ● A power failure occurs during use ● Maintaining the machine ● Leaving the machine unattended 3. Do not store anything on the foot controller. 4. Plug the machine directly into the wall. Do not use extension cords. For a longer service life 1. When storing your sewing machine, avoid - Brother International PE-300S | Users Manual - English - Page 5
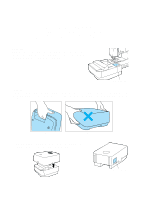
warning labels on your sewing machine. Please heed warning labels when operating the sewing machine. If you don't understand the warnings, please contact the place of purchase. CAUTION Always remove the embroidery unit before moving the sewing machine. Otherwise the embroidery unit could fall and - Brother International PE-300S | Users Manual - English - Page 6
frame to the embroidery unit 77 Removing the embroidery frame 77 Embroidering 78 THREAD TENSION 80 3 Patterns (Memory Card) Patterns (Programmed in Machine) Sewing Chart Error Messages Maintenance Troubleshooting Embroidering Utility Stitches Basic Sewing Machine Operation Setting Up - Brother International PE-300S | Users Manual - English - Page 7
embroidering chart 107 4 PATTERNS (MEMORY CARD) 108 ONE POINT MARK EMBROIDERY PATTERN 108 Patterns (Memory Card) Patterns (Programmed in Machine) Sewing Chart Error Messages Maintenance Troubleshooting Embroidering Utility Stitches Basic Sewing Machine Operation Setting Up Contents - Brother International PE-300S | Users Manual - English - Page 8
) Embroidery Unit Parts 1 Carriage 2 Hoop holder 3 Connector A. Side view 4 Release button 5 Embroidery Unit Handle 5 Patterns (Memory Card) Patterns (Programmed in Machine) Sewing Chart Error Messages Maintenance Troubleshooting Embroidering Utility Stitches Basic Sewing Machine Operation - Brother International PE-300S | Users Manual - English - Page 9
power. 3 Air vents 4 Card slot Slot for memory card insertion. 5 Foot controller jack Use to connect the foot controller. CAUTION - When leaving the sewing machine unat- tended, the main switch of the machine must be switched off or the plug must be removed from the socket-outlet. - When servicing - Brother International PE-300S | Users Manual - English - Page 10
metallic thread, we recommend that you use a 90/14 home sewing machine needle. 2 3 4 Note (For U.S.A. only) Foot controller : Model N5V This foot controller can be used for sewing machine model PE-300S. 7 Error Messages Sewing Chart Patterns (Programmed in Machine) Patterns (Memory Card) - Brother International PE-300S | Users Manual - English - Page 11
Face No.40 Sports 3 Part Code U.S.A. Others SA431 XA6630- Embroidery Cards purchased overseas or non Brother brand embroidery cards may not work with your machine. Embroidering Maintenance Troubleshooting Error Messages Sewing Chart Patterns (Programmed in Machine) Patterns (Memory Card - Brother International PE-300S | Users Manual - English - Page 12
(sewing position, size, stitch density, etc...). 5" " KEY Use this key to save or retrieve combined letters. 6" " KEY Press to go back one screen of operation screens. Maintenance Troubleshooting Error Messages Sewing Chart Patterns (Programmed in Machine) Patterns (Memory Card) 9 - Brother International PE-300S | Users Manual - English - Page 13
machine. * Sewing continues at a slow speed while this button is pressed. * The needle will stop to its highest position when the machine is stopped. Utility Stitches Embroidering Maintenance Troubleshooting Error Messages Sewing Chart Patterns (Programmed in Machine) Patterns (Memory Card - Brother International PE-300S | Users Manual - English - Page 14
case can be removed to expose the free arm. 1. Slide accessory case to the left and out of the machine. 2. Convenient for sewing hard to get at tubular areas like pant legs. Maintenance Troubleshooting Error Messages Sewing Chart Patterns (Programmed in Machine) Patterns (Memory Card) 11 - Brother International PE-300S | Users Manual - English - Page 15
the plug into a wall outlet. 1 Main power switch 1 I O 2. Set the main power switch to " I ". 3. To turn off the sewing machine, set the main power switch to " ". Embroidering Maintenance Troubleshooting Error Messages Sewing Chart Patterns (Programmed in Machine) Patterns (Memory Card) 12 - Brother International PE-300S | Users Manual - English - Page 16
Maintenance Troubleshooting Error Messages Sewing Chart Patterns (Programmed in Machine) 2. Press " " key to soften the characters on the screen, or " " key to sharpen them. 3. After you have finished adjusting, turn the power off and back on again once more. 13 Patterns (Memory Card) - Brother International PE-300S | Users Manual - English - Page 17
Contents Setting Up Basic Sewing Machine Operation HOW TO CHANGE LANGUAGE While touching a selection key, turn the power off and then back on again Stitches Embroidering Maintenance Troubleshooting Error Messages Sewing Chart Patterns (Programmed in Machine) Patterns (Memory Card) 14 - Brother International PE-300S | Users Manual - English - Page 18
previously being displayed. CAUTION - This function should not be used as a translation function. - If the power supply is turned off, the current lan- guage setting will be retained and will not be cleared. 15 Error Messages Sewing Chart Patterns (Programmed in Machine) Patterns (Memory Card) - Brother International PE-300S | Users Manual - English - Page 19
Lfl Ø 9·10 1 1. Turn the power on. I O 1 2. While winding the bobbin, be sure that the spool pin is pulled out and pushed toward the back of the sewing machine. 1 Spool pin Maintenance Troubleshooting Error Messages Sewing Chart Patterns (Programmed in Machine) Patterns (Memory Card) 16 - Brother International PE-300S | Users Manual - English - Page 20
you hold the thread gently with your right hand while guiding the end of the thread with your left hand. 1 Run thread all the way through the thread guides as shown. Embroidering Maintenance Troubleshooting Error Messages Sewing Chart Patterns (Programmed in Machine) Patterns (Memory Card) 17 - Brother International PE-300S | Users Manual - English - Page 21
the "START/STOP" button. The bobbin will stop spin- ning when bobbin winding is finished. 10. When the bobbin stops spinning, press the "START/STOP" button to stop the sewing machine. 11. Push the bobbin shaft to the left. Remove the bobbin. Patterns (Programmed in Machine) Patterns (Memory Card) - Brother International PE-300S | Users Manual - English - Page 22
bobbin cover by placing the left end in place and pressing down lightly on the right end so that it snaps into place. 1 2 * Sewing can begin without pulling out the bobbin thread. Maintenance Troubleshooting Error Messages Sewing Chart Patterns (Programmed in Machine) Patterns (Memory Card - Brother International PE-300S | Users Manual - English - Page 23
bodily injury could result. 1. Raise the presser foot using the presser foot lever. 2. Press the "NEEDLE POSITION" button to raise the needle to the up position. Embroidering Maintenance Troubleshooting Error Messages Sewing Chart Patterns (Programmed in Machine) 1 20 3. Set the thread spool - Brother International PE-300S | Users Manual - English - Page 24
1 Thread take-up lever * Threading is easy if you hold the thread gently with your left hand while guiding the end of the thread with your right hand. 5. Lower the presser foot. Maintenance Troubleshooting Error Messages Sewing Chart Patterns (Programmed in Machine) Patterns (Memory Card) 21 - Brother International PE-300S | Users Manual - English - Page 25
Troubleshooting Error Messages Sewing Chart Patterns (Programmed in Machine) Patterns (Memory Card) 5 Pull the thread towards the rear to finish the upper threading. CAUTION Be careful not to force the thread and bend or damage the needle. 7. Pass the thread underneath the presser foot - Brother International PE-300S | Users Manual - English - Page 26
the foot controller is being used, the "START/STOP" button has no effect on the sewing. Note (For U.S.A. only) Foot controller: Model N5V This foot controller can be used for sewing machine model PE300S. Error Messages Sewing Chart Patterns (Programmed in Machine) Patterns (Memory Card) 23 - Brother International PE-300S | Users Manual - English - Page 27
q Overcasting q Blind hem stitch q Buttonhole q Blind hem stitch q Patchwork stitch q Bar tack q Applique q Scallop q Triple zigzag q Decorative stitch Embroidering Maintenance Troubleshooting Error Messages Sewing Chart Patterns (Programmed in Machine) Patterns (Memory Card) 24 - Brother International PE-300S | Users Manual - English - Page 28
presser foot. 3. While pressing down on the thread and the fabric with your left hand, turn the balance wheel with your right hand to lower the needle to the sewing start position. 1 Thread Maintenance Troubleshooting Error Messages Sewing Chart Patterns (Programmed in Machine) Patterns (Memory - Brother International PE-300S | Users Manual - English - Page 29
Sewing in reverse is carried out at a slow sewing speed. * Sews in place when sewing any stitch other than a straight stitch or zigzag stitch. 6. Raise the presser foot, remove the fabric and cut the thread. 5 26 Error Messages Sewing Chart Patterns (Programmed in Machine) Patterns (Memory Card - Brother International PE-300S | Users Manual - English - Page 30
Sewing Machine Operation Utility Stitches STITCH WIDTH AND STITCH LENGTH Your machine will automatically set stitch length and width when a stitch is selected. See the following instructions Troubleshooting Error Messages Sewing Chart Patterns (Programmed in Machine) Patterns (Memory Card) 27 - Brother International PE-300S | Users Manual - English - Page 31
Sewing Machine Operation Utility Stitches Embroidering Maintenance Troubleshooting ) 5.0 (13/64) 2.0 (5/64) 3.5 (9/64) 5.0 (13/64) Manual 0.0 - 5.0 (0.0 - 13/64) ---- 0.0 - 5.0 (0.0 - 13/ 1.0 (1/64 - 3/64) 28 Error Messages Sewing Chart Patterns (Programmed in Machine) Patterns (Memory Card) - Brother International PE-300S | Users Manual - English - Page 32
1.5 (1/16) 0.0 (0.0) 5.0 (13/64) 5.0 (13/64) 5.0 (13/64) 5.0 (13/64) Manual 2.5 - 5.0 (3/32 - 13/64) 2.5 - 5.0 (3/32 - 13/64) 0.0 - 5.0 (0 - Memory Card) Patterns (Programmed in Machine) Sewing Chart Error Messages Maintenance Troubleshooting Embroidering Utility Stitches Basic Sewing Machine - Brother International PE-300S | Users Manual - English - Page 33
beginning on the actual piece to be worked. * The machine may stop sewing if tension is set extremely low. This is not a sign that there is anything wrong with your machine. Simply adjust to the correct stitch tension and begin again. 30 Patterns (Programmed in Machine) Patterns (Memory Card) - Brother International PE-300S | Users Manual - English - Page 34
foot holder to release the foot. 1 Presser foot holder 1 4. Place the presser foot pin directly below the holder-end and lower the presser foot lever to attach the presser foot. 1 Holder-end 2 Foot pin 1 2 31 Error Messages Sewing Chart Patterns (Programmed in Machine) Patterns (Memory Card - Brother International PE-300S | Users Manual - English - Page 35
the needle, and then turn off the power. 2. Remove the screw on the presser foot holder. 1 Disk-shaped screwdriver 1 3. Change the foot and screw back on tightly. Embroidering Maintenance Troubleshooting Error Messages Sewing Chart Patterns (Programmed in Machine) Patterns (Memory Card) 32 - Brother International PE-300S | Users Manual - English - Page 36
feed dogs cannot be raised if the balance wheel does not turn, even if the lever is slid to the right. Setting Up Basic Sewing Machine Operation Utility Stitches Embroidering Maintenance Troubleshooting Error Messages Sewing Chart Patterns (Programmed in Machine) Patterns (Memory Card) 33 - Brother International PE-300S | Users Manual - English - Page 37
the back, insert the needle as far as it will go up against the needle stopper. 5. Fasten the screw securely with a screwdriver. 1 Needle stopper 1 Maintenance Troubleshooting Error Messages Sewing Chart Patterns (Programmed in Machine) Patterns (Memory Card) 34 - Brother International PE-300S | Users Manual - English - Page 38
, puckered fabric or skipped stitches. Furthermore, use of a thin needle (size #9-11) on a heavyweight fabric such as denim could cause bent or broken needles. Maintenance Troubleshooting Error Messages Sewing Chart Patterns (Programmed in Machine) Patterns (Memory Card) 35 - Brother International PE-300S | Users Manual - English - Page 39
reinforcement stitch. * Reverse stitches are sewn while the "REVERSE STITCH" button is pressed. * Sewing in reverse is carried out at a slow sewing speed. 4. Raise the presser foot, remove the fabric and cut the thread. 5 Sewing Chart Patterns (Programmed in Machine) Patterns (Memory Card) - Brother International PE-300S | Users Manual - English - Page 40
needle at the corner of the fabric, then raise the presser foot and turn the fabric. 1 6 When stitching a hem less than .5 cm in width, baste corners, change directions and pull the thread behind the foot while sewing. 1 Less than 0.5 cm 37 Patterns (Programmed in Machine) Patterns (Memory Card) - Brother International PE-300S | Users Manual - English - Page 41
the presser foot lever higher to make room for thicker fabrics. If the fabric will not feed at the beginning of sewing, place another piece of fabric with the same thickness at the back of the material. Maintenance Troubleshooting Error Messages Sewing Chart Patterns (Programmed in Machine - Brother International PE-300S | Users Manual - English - Page 42
1 Using the free arm The free arm is handy when sewing hard-to-reach areas like hems and cuffs on pant legs. Remove the accessory case to use it. Utility Stitches Embroidering Maintenance Troubleshooting Error Messages Sewing Chart Patterns (Programmed in Machine) Patterns (Memory Card) 39 - Brother International PE-300S | Users Manual - English - Page 43
sewing with this stitch. Triple stitch 5 3 Use on high stress areas like the arm holes of sleeves and the crotch of slacks as a strengthening stitch. Utility Stitches Embroidering Maintenance Troubleshooting Error Messages Sewing Chart Patterns (Programmed in Machine) Patterns (Memory Card - Brother International PE-300S | Users Manual - English - Page 44
drop point is over the edge of the fabric. 1 Needle drop point 1 Applique (using a zigzag stitch) Attach the applique using adhesive or basting, then sew it. Embroidering Maintenance Troubleshooting Error Messages Sewing Chart Patterns (Programmed in Machine) Patterns (Memory Card) 41 - Brother International PE-300S | Users Manual - English - Page 45
1 Sewing a curve with a zigzag stitch 5 3 An attractive stitch can be achieved when sewing around corners by using a narrow stitch width. Utility Stitches Embroidering Maintenance Troubleshooting Error Messages Sewing Chart Patterns (Programmed in Machine) Patterns (Memory Card) 42 - Brother International PE-300S | Users Manual - English - Page 46
sewing. 1 Elastic Band 1 Overcasting 5 3 Use when sewing stretchable fabrics. Allow the needle to drop off over the edge of the fabric while sewing. Utility Stitches Embroidering Maintenance Troubleshooting Error Messages Sewing Chart Patterns (Programmed in Machine) Patterns (Memory Card - Brother International PE-300S | Users Manual - English - Page 47
width has been adjusted, turn the balance wheel by hand and check that the G needle does not touch the presser foot. If it does touch, the needle may break and cause an injury. Maintenance Troubleshooting Error Messages Sewing Chart Patterns (Programmed in Machine) Patterns (Memory Card) 44 - Brother International PE-300S | Users Manual - English - Page 48
1 5 3 J For use on a wide range of fabrics. Attach J foot. Keep foot on the edge of fabric so needle drops slightly over the edge while sewing. 1 Needle Drop Point Embroidering Maintenance Troubleshooting Error Messages Sewing Chart Patterns (Programmed in Machine) Patterns (Memory Card) 45 - Brother International PE-300S | Users Manual - English - Page 49
needle slightly catches the fold of the hem, and then sew the fabric. 1 Needle drop position 4. Turn over the fabric and remove the basting stitch. 1 Reverse side 2 Surface 1 2 Maintenance Troubleshooting Error Messages Sewing Chart Patterns (Programmed in Machine) Patterns (Memory Card) 46 - Brother International PE-300S | Users Manual - English - Page 50
Contents Setting Up Basic Sewing Machine Operation Utility Stitches If the needle does not catch the fold of key. This moves the needle away from the fold. Embroidering Maintenance Troubleshooting Error Messages Sewing Chart Patterns (Programmed in Machine) Patterns (Memory Card) 47 - Brother International PE-300S | Users Manual - English - Page 51
A this, push the presser foot towards the back of the machine as shown in the left figure. 4. Lower the buttonhole lever and position it behind the metal bracket on the buttonhole foot. 1 Metal bracket on the buttonhole foot Sewing Chart Patterns (Programmed in Machine) Patterns (Memory Card) - Brother International PE-300S | Users Manual - English - Page 52
toward the other pin. 1 Pin Utility Stitches Embroidering Maintenance Troubleshooting Error Messages Sewing Chart Order of one cycle 1 2 3 4 5 6 7 8 9 * 1 2 3 4 5 6 7 8 * 1 2 3 4 5 * * Reinforcement stitch 49 Patterns (Programmed in Machine) Patterns (Memory Card) - Brother International PE-300S | Users Manual - English - Page 53
with the seam ripper. Embroidering Maintenance Troubleshooting Error Messages Sewing Chart Patterns (Programmed in Machine) Buttons that do not fit into the guide plate (Odd-shaped buttons) 2 50 1 4 5 3 6 Use scale on the buttonholer foot to gauge buttonhole size. Buttonholer scale - Brother International PE-300S | Users Manual - English - Page 54
the presser foot. 1 2 mm (5/64") 1 5 4. Lower the buttonhole lever and position it behind the metal 3 bracket on the buttonhole foot. 1 Metal bracket on buttonhole foot Maintenance Troubleshooting Error Messages Sewing Chart Patterns (Programmed in Machine) Patterns (Memory Card) 1 51 - Brother International PE-300S | Users Manual - English - Page 55
the foot, and move the slider out of the way. 1 Presser foot 2 Cardboard * Use a larger stitch length when working with heavyweight fabrics that don't feed very easily. Embroidering Maintenance Troubleshooting Error Messages Sewing Chart Patterns (Programmed in Machine) Patterns (Memory Card - Brother International PE-300S | Users Manual - English - Page 56
Troubleshooting Error Messages Sewing Chart Patterns (Programmed in Machine) Sewing the applique around corners 1. Stop the machine and position the needle just outside the applique. 2. Raise the presser foot and turn the fabric as needed to keep the correct needle position. 53 Patterns (Memory - Brother International PE-300S | Users Manual - English - Page 57
Sewing Machine Operation SCALLOP J Use to put a decorative trim on shirt collars and handkerchiefs. 12 1 Scallop 2 Scallop 1. Attach the J foot. While sewing Embroidering Maintenance Troubleshooting Error Messages Sewing Chart Patterns (Programmed in Machine) Patterns (Memory Card) 54 - Brother International PE-300S | Users Manual - English - Page 58
3 1 cm (3/8") 4 Reverse side 4 1 1 3 Attach the J foot. Line the presser foot up along the center of the seam and sew. 1 Surface 2 Seam 2 Utility Stitches Embroidering Maintenance Troubleshooting Error Messages Sewing Chart Patterns (Programmed in Machine) Patterns (Memory Card) 55 - Brother International PE-300S | Users Manual - English - Page 59
side of the foot when sewing to the right of the zipper.) 1 Left-Right 2 Loosen 3 Tighten 4 Adjustment screw 5 Needle drop point 3. Sew with the machine on the right side of the fabric, and then remove basting. 1 0.7- 1 cm Sewing Chart Patterns (Programmed in Machine) Patterns (Memory Card) 56 - Brother International PE-300S | Users Manual - English - Page 60
3cm space. Stop machine when you come to about 5cm from the top of the zipper, move the zipper slide out of your way, and continue sewing to the end of the zipper. 1 0.3 cm 2 5 cm Maintenance Troubleshooting Error Messages Sewing Chart Patterns (Programmed in Machine) Patterns (Memory Card) 57 - Brother International PE-300S | Users Manual - English - Page 61
, stop machine, drop needle down through fabric, remove basting, move the slide out of your way and finish sewing. 1 Basting stitch 2 0.7-1 cm 3 Reinforcement stitches 4 5 cm Maintenance Troubleshooting Error Messages Sewing Chart Patterns (Programmed in Machine) Patterns (Memory Card) 58 - Brother International PE-300S | Users Manual - English - Page 62
cloth and iron gathers. 1. Attach the J foot. Sew new rows of stitches over the top of the straight stitched rows. J 2. Pull out the threads used in the straight stitched rows. Maintenance Troubleshooting Error Messages Sewing Chart Patterns (Programmed in Machine) Patterns (Memory Card) 59 - Brother International PE-300S | Users Manual - English - Page 63
the feed dog. ( ) 1 Feed dog adjustment lever 1 2. Attach button sew-on foot (sold separately). Utility Stitches Embroidering Maintenance Troubleshooting Error Messages Sewing Chart 3. Select the . Place the button under the presser foot. Match up needle position with button holes. Lower the - Brother International PE-300S | Users Manual - English - Page 64
1 Attaching buttons with four holes First sew the two holes which are closest to you. Once they have been sewn, raise the presser foot, move the needle to the next two holes and then sew them in the same way. 61 Error Messages Sewing Chart Patterns (Programmed in Machine) Patterns (Memory Card) - Brother International PE-300S | Users Manual - English - Page 65
on the foot holder and remove foot holder. Embroidering Maintenance Troubleshooting Error Messages Sewing Chart Patterns (Programmed in Machine) 3. Attach the embroidery foot. Screw back on tightly. 1 Screw * Make sure the needle clamp screw is also tightened. 1 62 Patterns (Memory Card) - Brother International PE-300S | Users Manual - English - Page 66
of the embroidery unit. Attach unit to the machine as shown in the drawing until you hear a click sound. CAUTION Always make sure the unit is pressed all the way into the machine to ensure accurate stitching. 63 Error Messages Sewing Chart Patterns (Programmed in Machine) Patterns (Memory Card) - Brother International PE-300S | Users Manual - English - Page 67
unit while pushing the Release button. CAUTION Always turn the power off when removing the embroidery unit. Failure to do so could cause damage. Utility Stitches Embroidering Maintenance Troubleshooting Error Messages Sewing Chart Patterns (Programmed in Machine) Patterns (Memory Card) 64 - Brother International PE-300S | Users Manual - English - Page 68
hoops attached, and turn the power on again. Different types of embroidery patterns will appear on the screen. One-point patterns Borders Lettering Memory card (Optional) Maintenance Troubleshooting Error Messages Sewing Chart Patterns (Programmed in Machine) Patterns (Memory Card) 65 - Brother International PE-300S | Users Manual - English - Page 69
Contents Setting Up Basic Sewing Machine Operation Utility Stitches Embroidering One-point patterns 1. Push " " key. * screen to select the pattern you wish to embroider. Maintenance Troubleshooting Error Messages Sewing Chart Patterns (Programmed in Machine) Patterns (Memory Card) 66 - Brother International PE-300S | Users Manual - English - Page 70
3. The Sew screen will appear. * Pushing " screen. " key will bring you back to the previous Setting Up Basic Sewing Machine Operation Utility Stitches Embroidering Maintenance Troubleshooting Error Messages Sewing Chart Patterns (Programmed in Machine) Patterns (Memory Card) 67 - Brother International PE-300S | Users Manual - English - Page 71
your border. * Push the " " key to go to the next screen of stitches. w * Press the " " key to go back to the previous screen. 4. The Sew screen will appear. Embroidering Maintenance Troubleshooting Error Messages Sewing Chart Patterns (Programmed in Machine) Patterns (Memory Card) 68 - Brother International PE-300S | Users Manual - English - Page 72
Contents Setting Up Basic Sewing Machine Operation Utility Stitches Embroidering Lettering w w w w Press " " key. * If appear at the top of your screen. It's that easy. Maintenance Troubleshooting Error Messages Sewing Chart Patterns (Programmed in Machine) Patterns (Memory Card) 69 - Brother International PE-300S | Users Manual - English - Page 73
to the Punctuation and w w Utility Stitches Embroidering Maintenance Troubleshooting Error Messages Sewing Chart Patterns (Programmed in Machine) Lower and upper case letters The " " key button allows you to alternate between upper and lower case lettering. 70 Patterns (Memory Card) - Brother International PE-300S | Users Manual - English - Page 74
the arrow is pointing. Attempting to do so could cause damage. 3. See pages 65-70 for directions on choosing stitches and embroidery patterns. Utility Stitches Embroidering Maintenance Troubleshooting Error Messages Sewing Chart Patterns (Programmed in Machine) Patterns (Memory Card) 71 - Brother International PE-300S | Users Manual - English - Page 75
Contents Setting Up Basic Sewing Machine Operation Utility Stitches CHOOSING EMBROIDERY PATTERNS (PART II) If you accidentally choose the size is highlighted. Embroidering Maintenance Troubleshooting Error Messages Sewing Chart Patterns (Programmed in Machine) Patterns (Memory Card) 72 - Brother International PE-300S | Users Manual - English - Page 76
Contents Setting Up Basic Sewing Machine Operation To make words Example: For practice, try entering the characters " all fit in the screen. Utility Stitches Embroidering Maintenance Troubleshooting Error Messages Sewing Chart Patterns (Programmed in Machine) Patterns (Memory Card) 73 - Brother International PE-300S | Users Manual - English - Page 77
) for the bobbin thread. Types of embroidery frames Medium frame 1 10 cm (H) × 10 cm (W) Small frame (Optional) 2 2 cm (H) × 6 cm (W) (for embroidering initials) Maintenance Troubleshooting Error Messages Sewing Chart Patterns (Programmed in Machine) Patterns (Memory Card) CAUTION Depending - Brother International PE-300S | Users Manual - English - Page 78
and lay the fabric on top of it.) 4. Place the embroidery sheet into the inner frame, while matching lines on the sheet with mark on fabric. 1 Inner frame 1 2 Standard line 2 Maintenance Troubleshooting Error Messages Sewing Chart Patterns (Programmed in Machine) Patterns (Memory Card) 75 - Brother International PE-300S | Users Manual - English - Page 79
frame and inner frame are at the same height. 6. Remove the embroidery sheet before starting to embroider. 1 1 Finger hole for removing grid Utility Stitches Embroidering Maintenance Troubleshooting Error Messages Sewing Chart Patterns (Programmed in Machine) Patterns (Memory Card) 76 - Brother International PE-300S | Users Manual - English - Page 80
Contents Setting Up Basic Sewing Machine Operation Utility Stitches Fitting the embroidery frame to the embroidery unit CAUTION Be sure to wait until the embroidery unit has finished initializing before fitting the embroidery frame. (Refer to page 65.) 1. Raise the presser foot to its highest - Brother International PE-300S | Users Manual - English - Page 81
3. Lower presser foot lever and start embroidering. After 5 to 6 stitches have been sewn, stop the sewing machine and cut off any surplus thread from the end of the seam. Embroidering Maintenance Troubleshooting Error Messages Sewing Chart Patterns (Programmed in Machine) Patterns (Memory Card - Brother International PE-300S | Users Manual - English - Page 82
and last color, it will stop automatically. (The screen will automatically return to the first screen.) 7. Trim excess threads. Embroidering order for pattern parts 1 2 3 4 Maintenance Troubleshooting Error Messages Sewing Chart Patterns (Programmed in Machine) Patterns (Memory Card) 79 - Brother International PE-300S | Users Manual - English - Page 83
fabric> of the fabric> w Decrease the upper thread tension. w Increase the upper thread tension. Maintenance Troubleshooting Error Messages Sewing Chart Patterns (Programmed in Machine) Patterns (Memory Card) 80 - Brother International PE-300S | Users Manual - English - Page 84
Contents Setting Up Basic Sewing Machine Operation Utility Stitches CHECKING THREAD COLORS AND TIME REQUIRED Checking you will be taken back to the first screen. Embroidering Maintenance Troubleshooting Error Messages Sewing Chart Patterns (Programmed in Machine) Patterns (Memory Card) 81 - Brother International PE-300S | Users Manual - English - Page 85
The machine's calculations do not include the amount of time it takes you to change threads 2 minutes/2 minutes * Press " " key to return to the color screen. Embroidering Maintenance Troubleshooting Error Messages Sewing Chart Patterns (Programmed in Machine) Patterns (Memory Card) 82 - Brother International PE-300S | Users Manual - English - Page 86
" key. Basic Sewing Machine Operation Utility Stitches Embroidering Maintenance Troubleshooting Error Messages 3 the lower left side of the work. Displays the embroidery hoops that can be used for the selected pattern. Sewing Chart Patterns (Programmed in Machine) Patterns (Memory Card) - Brother International PE-300S | Users Manual - English - Page 87
Contents Setting Up Basic Sewing Machine Operation Utility Stitches Moving the embroidery location Use directional arrows to change needles and possible injury. Embroidering Maintenance Troubleshooting Error Messages Sewing Chart Patterns (Programmed in Machine) Patterns (Memory Card) 84 - Brother International PE-300S | Users Manual - English - Page 88
the lower left corner of the pattern. 3. Use the directional arrows to match the foot up with the mark where you wish your design to be placed. 4. Sew the pattern. Embroidering Maintenance Troubleshooting Error Messages Sewing Chart Patterns (Programmed in Machine) Patterns (Memory Card) 85 - Brother International PE-300S | Users Manual - English - Page 89
Contents Setting Up Basic Sewing Machine Operation Utility Stitches ROTATING AND MIRRORING PATTERNS design has been mirrored. * Not applicable to all patterns. Embroidering Maintenance Troubleshooting Error Messages Sewing Chart Patterns (Programmed in Machine) Patterns (Memory Card) 86 - Brother International PE-300S | Users Manual - English - Page 90
Contents Setting Up Basic Sewing Machine Operation Utility Stitches CHANGING SIZE AND STITCH DENSITY OF Press " " key to return to the previous screen. Embroidering Maintenance Troubleshooting Error Messages Sewing Chart Patterns (Programmed in Machine) Patterns (Memory Card) 87 - Brother International PE-300S | Users Manual - English - Page 91
previous screen. Multi-colored lettering 1. Press " " key, then press " " key. Embroidering Maintenance Troubleshooting Error Messages Sewing Chart Patterns (Programmed in Machine) 2. Press " " key. The machine will automatically stop after each character is sewn so that you can change - Brother International PE-300S | Users Manual - English - Page 92
Cut the upper thread, raise needle and foot, and remove hoop. 2 Reset the bobbin thread, then reattach hoop. 2. Press " " key. Basic Sewing Machine Operation Utility Stitches Embroidering Maintenance Troubleshooting Error Messages Sewing Chart 3. Press " " key. 4. Press " broke. " key to - Brother International PE-300S | Users Manual - English - Page 93
presser foot and push "START/STOP" button. · The machine might not start sewing right away after press- ing " " key or " " key . This is nothing to be alarmed about. Just push "START/STOP" button again. Basic Sewing Machine Operation Utility Stitches Embroidering Maintenance Troubleshooting - Brother International PE-300S | Users Manual - English - Page 94
Contents Setting Up Basic Sewing Machine Operation Utility Stitches Embroidering EMBROIDERY APPLICATIONS Combining characters to form words 1. Enter " the lower left corner. Maintenance Troubleshooting Error Messages Sewing Chart Patterns (Programmed in Machine) Patterns (Memory Card) 91 - Brother International PE-300S | Users Manual - English - Page 95
Machine Operation Utility Stitches Embroidering Maintenance Troubleshooting Error Messages Sewing Chart Outline Embroidery Try something different by stitching only the outline of the pattern. 1. Press " " key to display the outline of the pattern on your screen. 2. Lower the presser foot - Brother International PE-300S | Users Manual - English - Page 96
Sewing Chart Patterns (Programmed in Machine) 4. Without changing the frame shape or size, select the " " stitch, and use it to embroider the applique material onto the project. * Do not change size and sewing position. 1 Applique Finished 1 applique on the project 93 Patterns (Memory Card - Brother International PE-300S | Users Manual - English - Page 97
support the fabric while stitching. When finished, remove the stabilizer carefully. We recommend Brother stabilizers designed especially for use with our machines 1 2 Embroidering Maintenance Troubleshooting Error Messages Sewing Chart Patterns (Programmed in Machine) Patterns (Memory Card) 94 - Brother International PE-300S | Users Manual - English - Page 98
off the power while saving a pattern. 1 1 If an embroidery design is already stored in memory at the chosen position, it will be displayed on your screen. Embroidering Maintenance Troubleshooting Error Messages Sewing Chart Patterns (Programmed in Machine) Patterns (Memory Card) 4. Pattern - Brother International PE-300S | Users Manual - English - Page 99
word "GIRL". 1. Press " " key. 2. Press " " key. 3. Press " " key. Setting Up Basic Sewing Machine Operation Utility Stitches Embroidering Maintenance Troubleshooting Error Messages Sewing Chart Patterns (Programmed in Machine) Patterns (Memory Card) 4. Pattern has been restored. 96 - Brother International PE-300S | Users Manual - English - Page 100
collects in the shuttle. It should be kept clean at all times. 1. Turn off the power and remove the presser foot holder and the needle. 2. Loosen the screws. 5 3 3. Remove the needle plate. 1 Needle plate 1 97 Error Messages Sewing Chart Patterns (Programmed in Machine) Patterns (Memory Card) - Brother International PE-300S | Users Manual - English - Page 101
Contents Setting Up Basic Sewing Machine Operation Utility Stitches Embroidering 1 2 3. Turn the hand wheel towards you. 2 Spring 6. Close needle plate and screw it shut. Maintenance Troubleshooting Error Messages Sewing Chart Patterns (Programmed in Machine) Patterns (Memory Card) 98 - Brother International PE-300S | Users Manual - English - Page 102
this machine (part# XA2037001). Do not use other bulbs. Bulbs can be purchased at a Brother dealer near you. 4. Set the end cap. 5. Tighten the screw. 1 End cap 2 Screw 1 Embroidering Maintenance Troubleshooting Error Messages Sewing Chart Patterns (Programmed in Machine) Patterns (Memory Card - Brother International PE-300S | Users Manual - English - Page 103
Error Messages Sewing Chart Patterns (Programmed in Machine) Patterns (Memory Card) If you have gone through the troubleshooting tips and are still unable to find the source of the problem, please take your machine back to the place of purchase or your nearest Brother dealer for repairs. 100 - Brother International PE-300S | Users Manual - English - Page 104
NO Error Messages Sewing Chart Patterns (Programmed in Machine) Patterns (Memory Card) If you have gone through the troubleshooting tips and are still unable to find the source of the problem, please take your machine back to the place of purchase or your nearest Brother dealer for repairs. 101 - Brother International PE-300S | Users Manual - English - Page 105
to the machine. Connect embroidery unit properly to the machine. P.63 NO The combination of fabric, thread and needle is not correct. Check the "RELATED CHART OF SEWING FABRICS, THREAD AND NEEDLE" . P.35 NO Presser foot is not lowered. Lower the presser foot. P.21 NO Memory card is not - Brother International PE-300S | Users Manual - English - Page 106
the presser foot or embroidery foot is raised. This message is displayed when trying to retrieve a pattern from a memory card and that memory card is not inserted. This message is dis- played when the " " key is touched while a memory card that cannot be read by this machine is inserted - Brother International PE-300S | Users Manual - English - Page 107
. This message is displayed when the embroidery unit is attached while the needle is lowered. Patterns (Memory Card) Patterns (Programmed in Machine) Sewing Chart Error Messages Maintenance Troubleshooting Embroidering Utility Stitches Basic Sewing Machine Operation Setting Up Contents - Brother International PE-300S | Users Manual - English - Page 108
when in editing mode. This message is displayed while the embroidery unit is initializing. 105 Patterns (Memory Card) Patterns (Programmed in Machine) Sewing Chart Error Messages Maintenance Troubleshooting Embroidering Utility Stitches Basic Sewing Machine Operation Setting Up Contents - Brother International PE-300S | Users Manual - English - Page 109
NAME OF PATTERN PATTERN TYPE OF PRESSER FOOT USE REINFORCEMENT STITCH KEY STITCH WIDTH BY STITCH ADJUSTING KEY STITCH LENGTH BY STITCH ADJUSTING KEY Setting Up Basic Sewing Machine Operation Utility Stitches Embroidering Maintenance Troubleshooting STRAIGHT TRIPLE STITCH STRETCH STITCH ZIGZAG - Brother International PE-300S | Users Manual - English - Page 110
Sizes: [L] 30mm (1-3/16"), [M] 15mm (9/16"), [S] 9mm (0-3/8"), Utility Stitches Embroidering Maintenance Troubleshooting Error Messages Sewing Chart Patterns (Programmed in Machine) Frame pattern embroidering chart Sizes can be enlarged or reduced. Frames Stitch 107 Patterns (Memory Card) - Brother International PE-300S | Users Manual - English - Page 111
Setting Up Basic Sewing Machine Operation Utility Stitches PATTERNS (MEMORY CARD) ONE POINT MARK EMBROIDERY PATTERN
-
 1
1 -
 2
2 -
 3
3 -
 4
4 -
 5
5 -
 6
6 -
 7
7 -
8
-
9
-
10
-
11
-
12
-
13
-
14
-
15
-
16
-
17
-
18
-
19
-
20
-
21
-
22
-
23
-
24
-
25
-
26
-
27
-
28
-
29
-
30
-
31
-
32
-
33
-
34
-
35
-
36
-
37
-
38
-
39
-
40
-
41
-
42
-
43
-
44
-
45
-
46
-
47
-
48
-
49
-
50
-
51
-
52
-
53
-
54
-
55
-
56
-
57
-
58
-
59
-
60
-
61
-
62
-
63
-
64
-
65
-
66
-
67
-
68
-
69
-
70
-
71
-
72
-
73
-
74
-
75
-
76
-
77
-
78
-
79
-
80
-
81
-
82
-
83
-
84
-
85
-
86
-
87
-
88
-
89
-
90
-
91
-
92
-
93
-
94
-
95
-
96
-
97
-
98
-
99
-
100
-
101
-
102
-
103
-
104
-
105
-
106
-
107
-
108
-
109
-
110
-
111
 |
 |
O
PERATION MANUAL
®