Brother International PE-300S Users Manual - English - Page 39
Utility Stitches
 |
View all Brother International PE-300S manuals
Add to My Manuals
Save this manual to your list of manuals |
Page 39 highlights
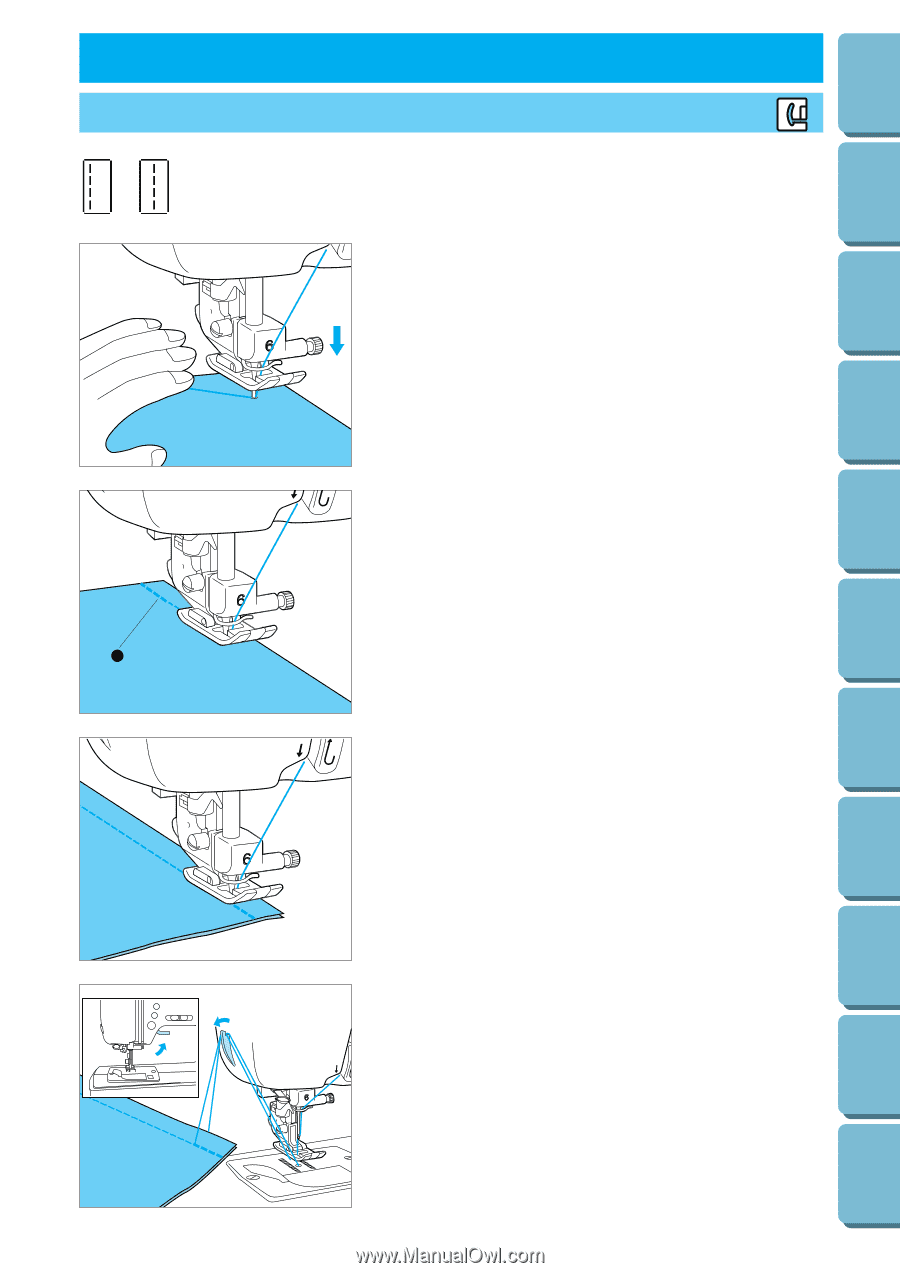
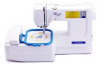
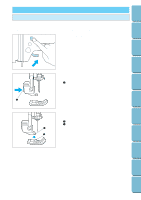
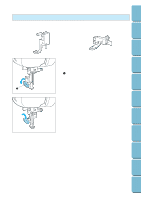
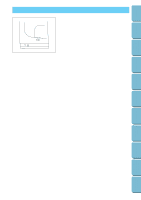
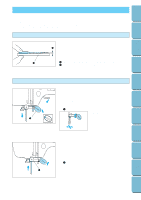
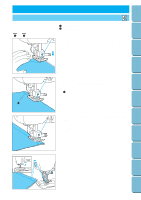
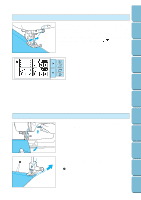
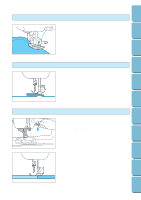
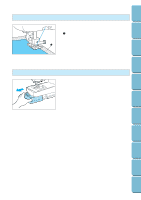
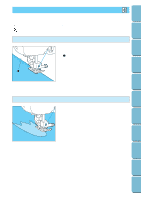
Contents Setting Up UTILITY STITCHES STRAIGHT STITCHES 1 2 J 1 Straight (Left) 2 Straight (Middle) 1. Attach the J foot. Handle thread and fabric with your left hand while turning the balance wheel with the right. Pierce the needle through the fabric as shown. Basic Sewing Machine Operation Utility Stitches Embroidering Maintenance Troubleshooting Error Messages 1 36 3 2. Lower the presser foot. While pressing the reverse stitch but- ton, sew 3-4 stitches in reverse to make a reinforcement stitch. Then release the "REVERSE STITCH" button and press the "START/STOP" button to begin sewing. 1 Reinforcement stitch (3-4 stitches) 5 3 3. At the end of a seam, press the "REVERSE STITCH" button again to sew another reinforcement stitch. * Reverse stitches are sewn while the "REVERSE STITCH" button is pressed. * Sewing in reverse is carried out at a slow sewing speed. 4. Raise the presser foot, remove the fabric and cut the thread. 5 Sewing Chart Patterns (Programmed in Machine) Patterns (Memory Card)
-
 1
1 -
2
-
3
-
4
-
5
-
6
-
7
-
8
-
9
-
10
-
11
-
12
-
13
-
14
-
15
-
16
-
17
-
18
-
19
-
20
-
21
-
22
-
23
-
24
-
25
-
26
-
27
-
28
-
29
-
30
-
31
-
32
-
33
-
 34
34 -
 35
35 -
 36
36 -
 37
37 -
 38
38 -
 39
39 -
 40
40 -
 41
41 -
 42
42 -
 43
43 -
 44
44 -
45
-
46
-
47
-
48
-
49
-
50
-
51
-
52
-
53
-
54
-
55
-
56
-
57
-
58
-
59
-
60
-
61
-
62
-
63
-
64
-
65
-
66
-
67
-
68
-
69
-
70
-
71
-
72
-
73
-
74
-
75
-
76
-
77
-
78
-
79
-
80
-
81
-
82
-
83
-
84
-
85
-
86
-
87
-
88
-
89
-
90
-
91
-
92
-
93
-
94
-
95
-
96
-
97
-
98
-
99
-
100
-
101
-
102
-
103
-
104
-
105
-
106
-
107
-
108
-
109
-
110
-
111
 |
 |