Brother International PE-300S Users Manual - English - Page 59
Zipper Insertion Centered And Side Application
 |
View all Brother International PE-300S manuals
Add to My Manuals
Save this manual to your list of manuals |
Page 59 highlights
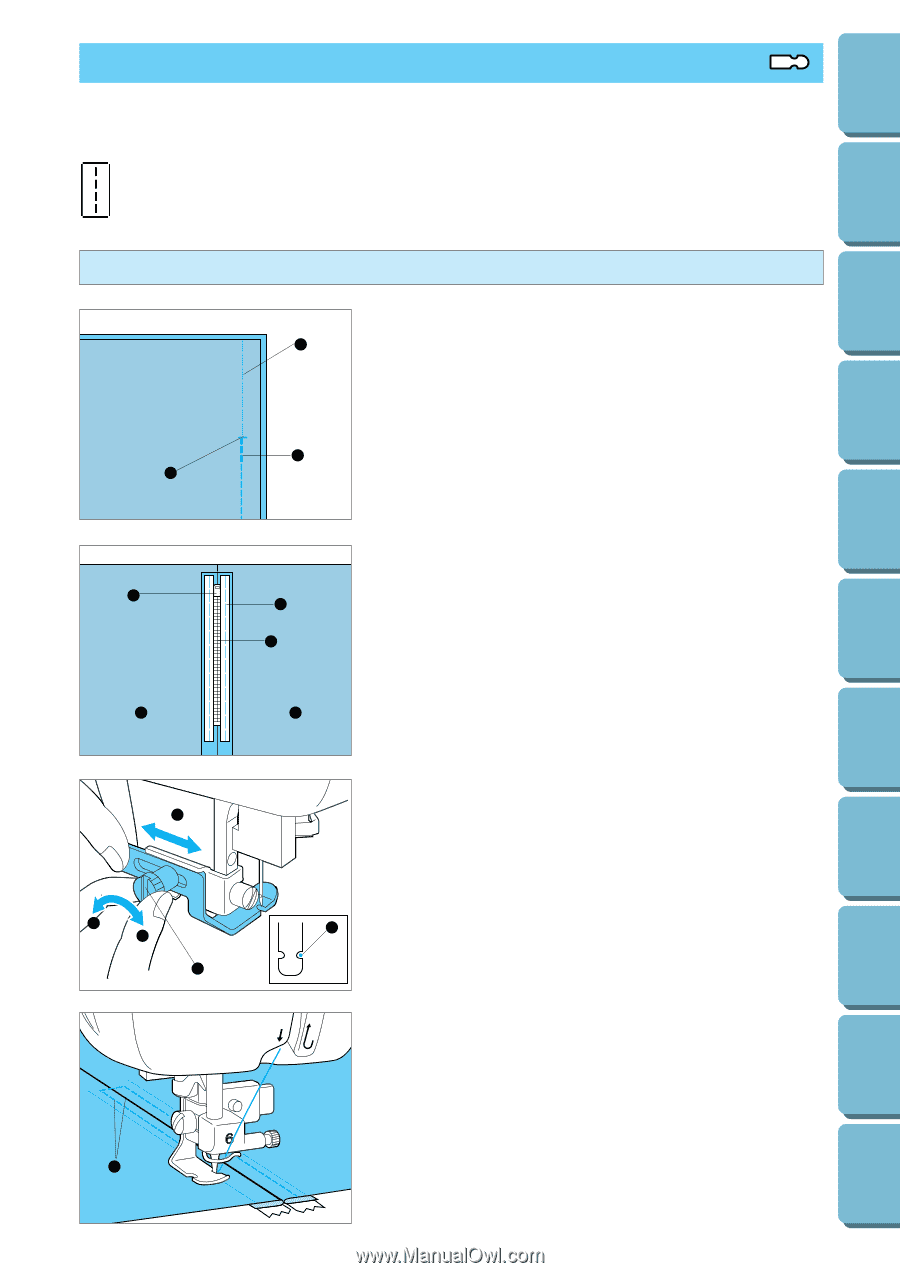
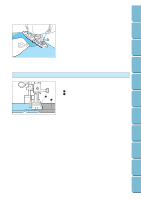
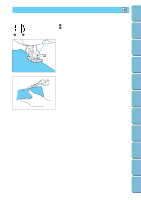
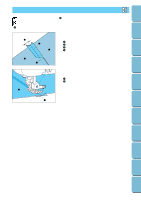
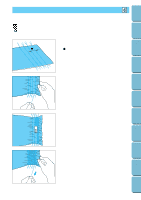
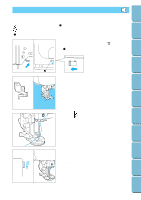
Contents Setting Up Basic Sewing Machine Operation ZIPPER INSERTION (CENTERED AND SIDE APPLICATION) I Caution Before sewing, gently turn the hand wheel to check the needle position. Make sure that the needle does not come down onto the foot, or it could break and cause injury. 1 Straight 1 Centered application 3 2 1 Preparations: Attach presser foot "J" and sew straight stitches up to the crotch end. Change to a basting stitch and sew to the top of the fabric. 1 Crotch end 2 Reverse stitch 3 Basting stitch Utility Stitches Embroidering Maintenance Troubleshooting Error Messages 1 4 1 2 3 4 1 1. Press the seam allowance open and attach the zipper with a basting stitch in the middle. 2 1 Zipper slide 2 Basting 3 3 Zipper 4 Reverse side 4 5 5 3 2. Attach the I foot (see p. 32). Turn the needle position adjustment knob on the back of the foot to position the foot so that the needle comes down over the right side of the foot (as shown). (Adjust foot position so the needle is positioned over the right side of the foot when sewing the left side of the zipper, and over the left side of the foot when sewing to the right of the zipper.) 1 Left-Right 2 Loosen 3 Tighten 4 Adjustment screw 5 Needle drop point 3. Sew with the machine on the right side of the fabric, and then remove basting. 1 0.7- 1 cm Sewing Chart Patterns (Programmed in Machine) Patterns (Memory Card) 56
-
 1
1 -
2
-
3
-
4
-
5
-
6
-
7
-
8
-
9
-
10
-
11
-
12
-
13
-
14
-
15
-
16
-
17
-
18
-
19
-
20
-
21
-
22
-
23
-
24
-
25
-
26
-
27
-
28
-
29
-
30
-
31
-
32
-
33
-
34
-
35
-
36
-
37
-
38
-
39
-
40
-
41
-
42
-
43
-
44
-
45
-
46
-
47
-
48
-
49
-
50
-
51
-
52
-
53
-
 54
54 -
 55
55 -
 56
56 -
 57
57 -
 58
58 -
 59
59 -
 60
60 -
 61
61 -
 62
62 -
 63
63 -
 64
64 -
65
-
66
-
67
-
68
-
69
-
70
-
71
-
72
-
73
-
74
-
75
-
76
-
77
-
78
-
79
-
80
-
81
-
82
-
83
-
84
-
85
-
86
-
87
-
88
-
89
-
90
-
91
-
92
-
93
-
94
-
95
-
96
-
97
-
98
-
99
-
100
-
101
-
102
-
103
-
104
-
105
-
106
-
107
-
108
-
109
-
110
-
111
 |
 |