Brother International PE-300S Users Manual - English - Page 78
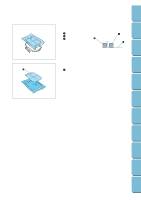
Setting the fabric into the embroidery frame
 |
View all Brother International PE-300S manuals
Add to My Manuals
Save this manual to your list of manuals |
Page 78 highlights
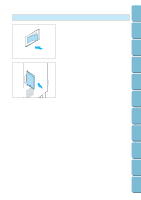
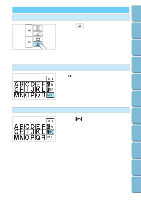
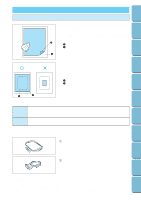
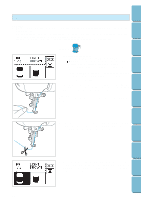
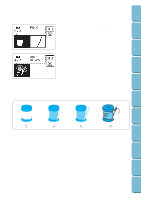
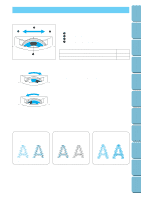
Contents Setting Up Basic Sewing Machine Operation Utility Stitches Embroidering Setting the fabric into the embroidery frame 1. Mark the fabric using a chalk pen or fabric marking pen to indicate the embroidering position. 1 2 2. Loosen the adjusting screw and separate the inner and outer frames. Lay the fabric on top of the outer frame and secure it between the inner and outer frame, and tighten the adjusting screw just enough to secure the fabric. Gently remove the fabric from the frame without loosening the adjusting screw. * Be sure to align the mark on the inner frame with the ( ) mark on the outer frame. 1 Inner frame 3 2 Outer frame 3 Loosen 4 4 Adjusting screw 3. Tighten screw of outer hoop to hold fabric and inner hoop in place. Remove fabric and inner hoop. (For best results lay the outer frame on a flat table surface and lay the fabric on top of it.) 4. Place the embroidery sheet into the inner frame, while matching lines on the sheet with mark on fabric. 1 Inner frame 1 2 Standard line 2 Maintenance Troubleshooting Error Messages Sewing Chart Patterns (Programmed in Machine) Patterns (Memory Card) 75
-
 1
1 -
2
-
3
-
4
-
5
-
6
-
7
-
8
-
9
-
10
-
11
-
12
-
13
-
14
-
15
-
16
-
17
-
18
-
19
-
20
-
21
-
22
-
23
-
24
-
25
-
26
-
27
-
28
-
29
-
30
-
31
-
32
-
33
-
34
-
35
-
36
-
37
-
38
-
39
-
40
-
41
-
42
-
43
-
44
-
45
-
46
-
47
-
48
-
49
-
50
-
51
-
52
-
53
-
54
-
55
-
56
-
57
-
58
-
59
-
60
-
61
-
62
-
63
-
64
-
65
-
66
-
67
-
68
-
69
-
70
-
71
-
72
-
 73
73 -
 74
74 -
 75
75 -
 76
76 -
 77
77 -
 78
78 -
 79
79 -
 80
80 -
 81
81 -
 82
82 -
 83
83 -
84
-
85
-
86
-
87
-
88
-
89
-
90
-
91
-
92
-
93
-
94
-
95
-
96
-
97
-
98
-
99
-
100
-
101
-
102
-
103
-
104
-
105
-
106
-
107
-
108
-
109
-
110
-
111
 |
 |
