Brother International PE-300S Users Manual - English - Page 86
Choosing Embroidery Placement
 |
View all Brother International PE-300S manuals
Add to My Manuals
Save this manual to your list of manuals |
Page 86 highlights
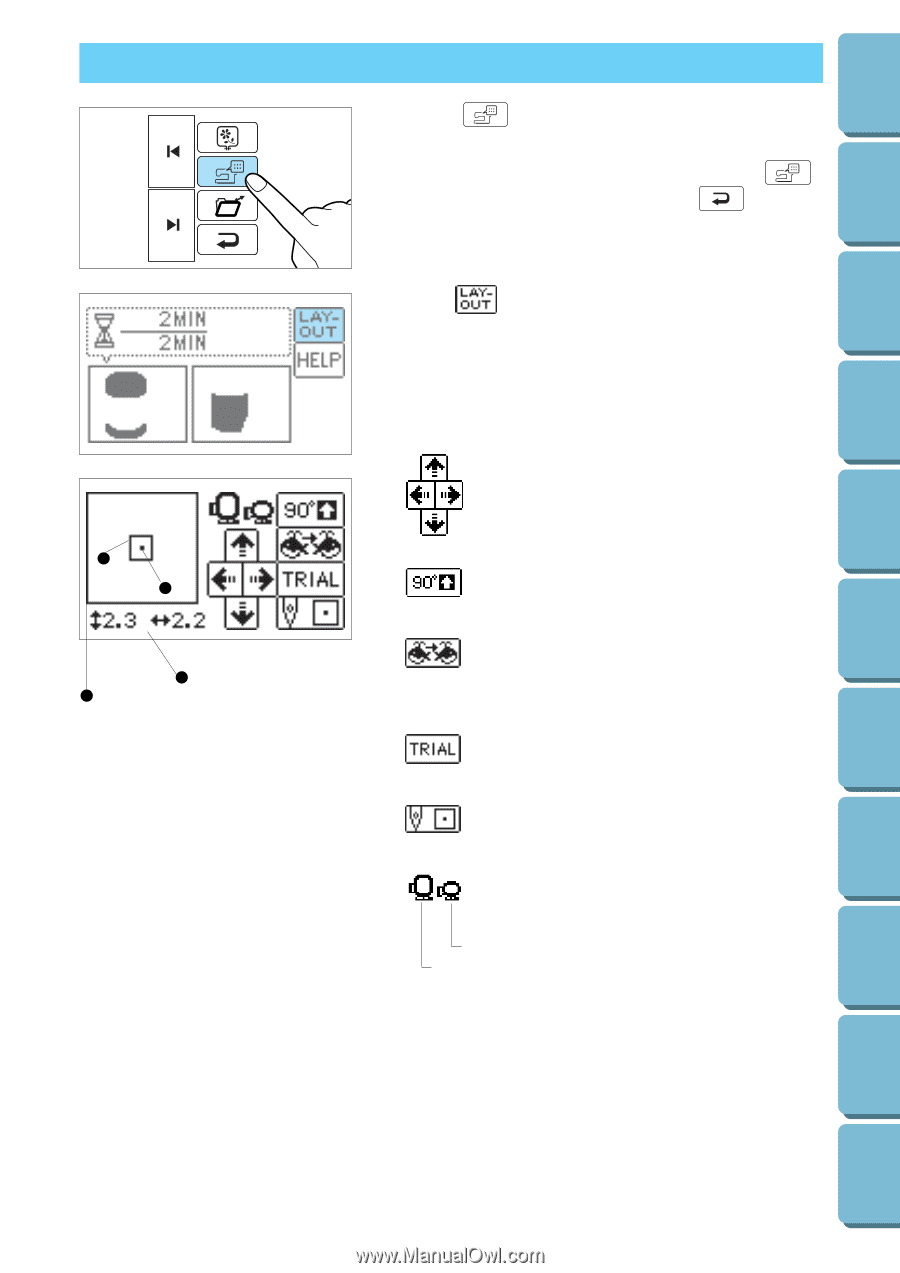
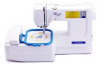
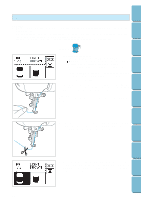
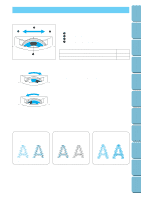
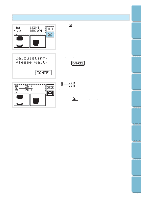
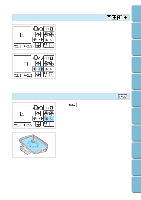
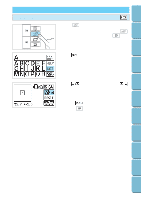
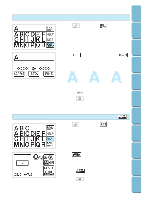
Contents Setting Up CHOOSING EMBROIDERY PLACEMENT 1. Press " " key to go to the edit screen. * You cannot choose or delete patterns from the " " key screen. If you wish to do so, press to go back to the previous screen. 2. Press " " key. Basic Sewing Machine Operation Utility Stitches Embroidering Maintenance Troubleshooting Error Messages 3 2 1 4 Press the directional arrows to set needlework placement. Press to rotate the pattern in 90° increments. (The pattern will rotate in the direction of the arrow.) Press this to flip the design to the left or right (mirror image). * Not applicable to all patterns. Press to move the embroidery hoop so you may check your work. Press to move placement of the needle from the center to the lower left side of the work. Displays the embroidery hoops that can be used for the selected pattern. Small hoop (Optional) Regular hoop 1 Shows size of the pattern. 2 Shows current needle position. 3 Shows the position and area to be stitched. 4 Displays the entire area that can be stitched (10×10 cm). 83 Sewing Chart Patterns (Programmed in Machine) Patterns (Memory Card)
-
 1
1 -
2
-
3
-
4
-
5
-
6
-
7
-
8
-
9
-
10
-
11
-
12
-
13
-
14
-
15
-
16
-
17
-
18
-
19
-
20
-
21
-
22
-
23
-
24
-
25
-
26
-
27
-
28
-
29
-
30
-
31
-
32
-
33
-
34
-
35
-
36
-
37
-
38
-
39
-
40
-
41
-
42
-
43
-
44
-
45
-
46
-
47
-
48
-
49
-
50
-
51
-
52
-
53
-
54
-
55
-
56
-
57
-
58
-
59
-
60
-
61
-
62
-
63
-
64
-
65
-
66
-
67
-
68
-
69
-
70
-
71
-
72
-
73
-
74
-
75
-
76
-
77
-
78
-
79
-
80
-
 81
81 -
 82
82 -
 83
83 -
 84
84 -
 85
85 -
 86
86 -
 87
87 -
 88
88 -
 89
89 -
 90
90 -
 91
91 -
92
-
93
-
94
-
95
-
96
-
97
-
98
-
99
-
100
-
101
-
102
-
103
-
104
-
105
-
106
-
107
-
108
-
109
-
110
-
111
 |
 |