Brother International SE-270D Users Manual - English - Page 141
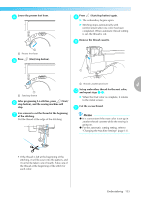
Use scissors to cut the thread at the beginning
 |
View all Brother International SE-270D manuals
Add to My Manuals
Save this manual to your list of manuals |
Page 141 highlights
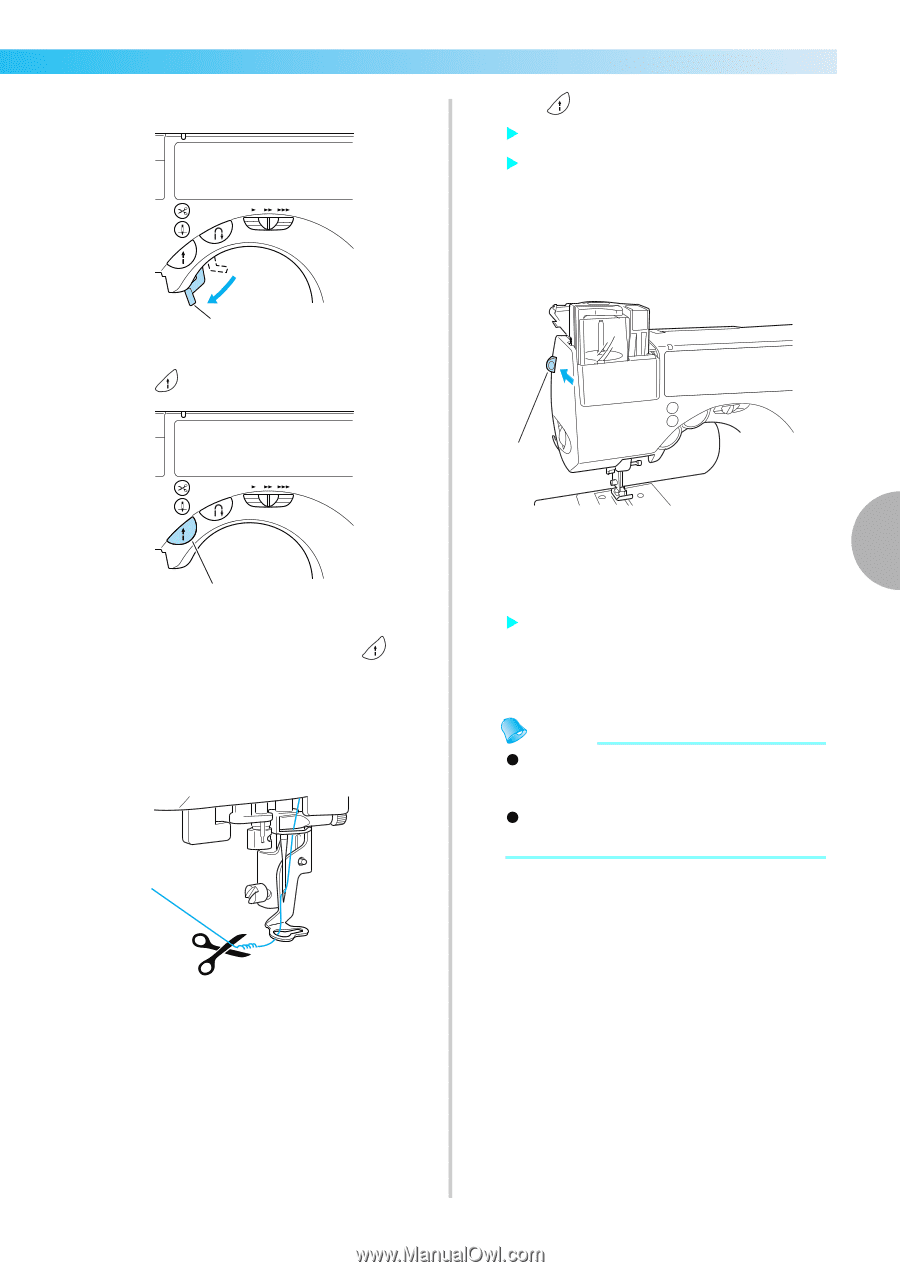
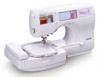
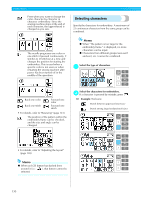
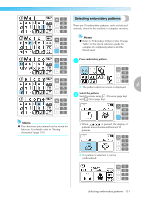
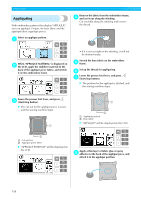
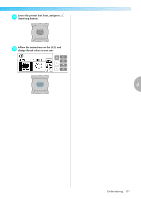
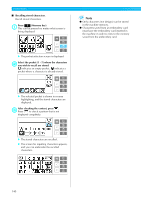
Lower the presser foot lever. d Press (Start/stop button) again. h X The embroidery begins again. X Stitching stops automatically with reinforcement after one color has been completed. When automatic thread cutting is set, the thread is cut. Remove the thread cassette. i 1 a Presser foot lever Press e (Start/stop button). 1 a Thread cassette eject lever 4 1 a Start/stop button After progressing 5-6 stitches, press (Start/ f stop button), and the sewing machine will stop. Set up embroidery thread for the next color, j and repeat steps a-i. X When the final color is complete, it returns to the initial screen. Cut the excess thread. k Use scissors to cut the thread at the beginning g of the stitching. Cut the thread at the edge of the stitching. Memo z It is convenient if the next color is set up in another thread cassette while the sewing is going on. z For the automatic cutting setting, refer to "Changing the Machine Settings" (page 13). • If the thread is left at the beginning of the stitching, it will be sewn into the pattern, and it cannot be taken care of neatly. Take care of the thread at the beginning of the stitch for each color. Embroidering 135
-
 1
1 -
2
-
3
-
4
-
5
-
6
-
7
-
8
-
9
-
10
-
11
-
12
-
13
-
14
-
15
-
16
-
17
-
18
-
19
-
20
-
21
-
22
-
23
-
24
-
25
-
26
-
27
-
28
-
29
-
30
-
31
-
32
-
33
-
34
-
35
-
36
-
37
-
38
-
39
-
40
-
41
-
42
-
43
-
44
-
45
-
46
-
47
-
48
-
49
-
50
-
51
-
52
-
53
-
54
-
55
-
56
-
57
-
58
-
59
-
60
-
61
-
62
-
63
-
64
-
65
-
66
-
67
-
68
-
69
-
70
-
71
-
72
-
73
-
74
-
75
-
76
-
77
-
78
-
79
-
80
-
81
-
82
-
83
-
84
-
85
-
86
-
87
-
88
-
89
-
90
-
91
-
92
-
93
-
94
-
95
-
96
-
97
-
98
-
99
-
100
-
101
-
102
-
103
-
104
-
105
-
106
-
107
-
108
-
109
-
110
-
111
-
112
-
113
-
114
-
115
-
116
-
117
-
118
-
119
-
120
-
121
-
122
-
123
-
124
-
125
-
126
-
127
-
128
-
129
-
130
-
131
-
132
-
133
-
134
-
135
-
 136
136 -
 137
137 -
 138
138 -
 139
139 -
 140
140 -
 141
141 -
 142
142 -
 143
143 -
 144
144 -
 145
145 -
 146
146 -
147
-
148
-
149
-
150
-
151
-
152
-
153
-
154
-
155
-
156
-
157
-
158
-
159
-
160
-
161
-
162
-
163
-
164
-
165
-
166
 |
 |