Brother International SE-270D Users Manual - English - Page 147
Adjusting the thread tension, Resewing
 |
View all Brother International SE-270D manuals
Add to My Manuals
Save this manual to your list of manuals |
Page 147 highlights
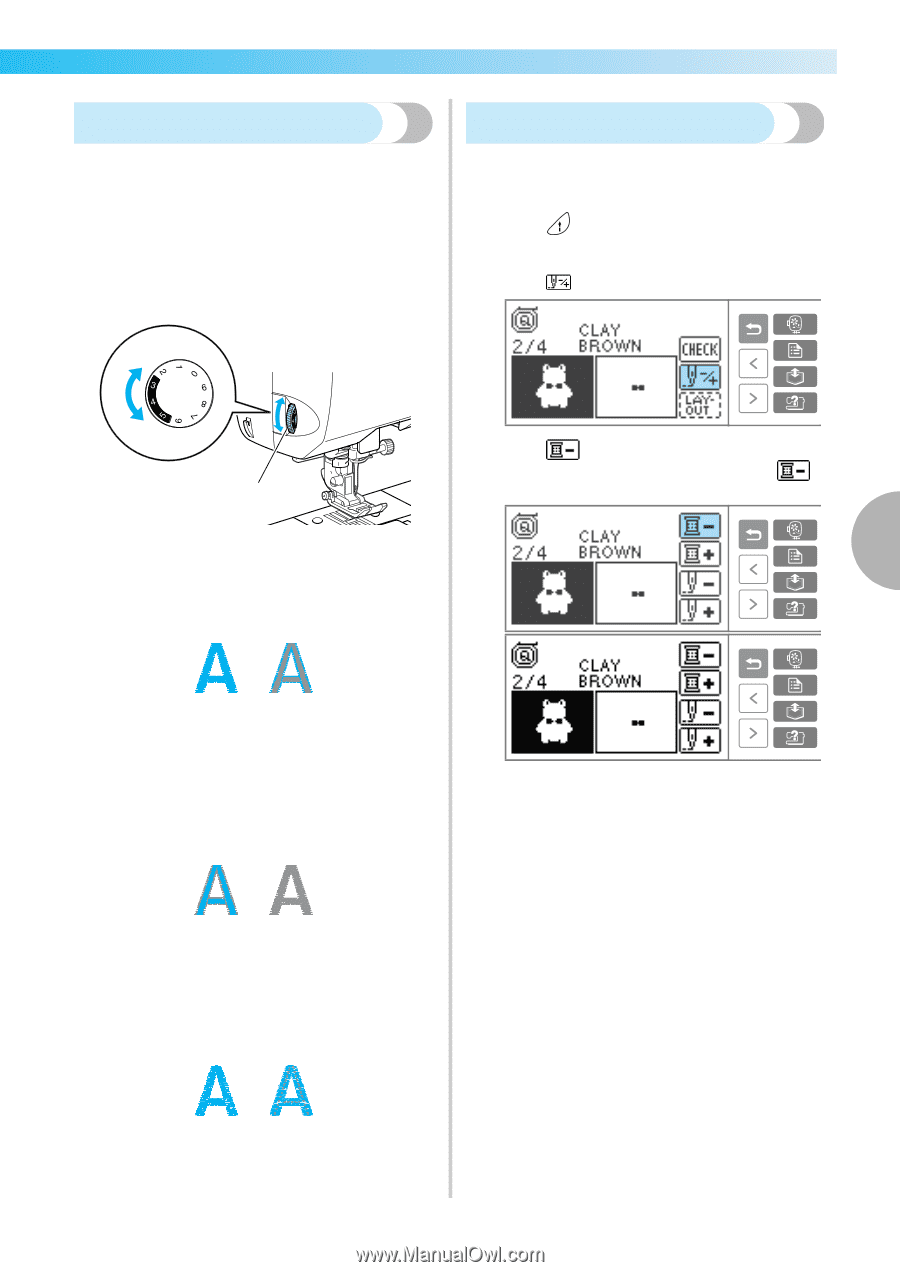
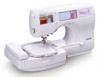
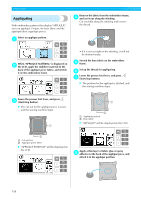
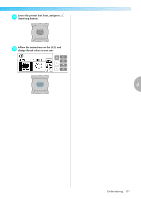
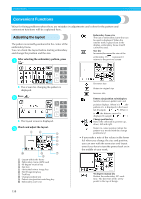
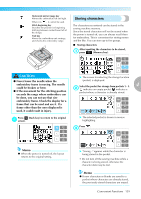
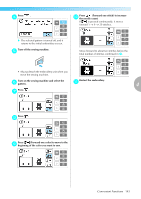
Adjusting the thread tension If embroidery fails, it is difficult to undo the thread and the fabric may be damaged. Before embroidering, use a scrap of the same fabric to check the adjustment of the thread tension, etc. Thread tension adjustment will be explained here. The upper thread tension is changed using the thread tension dial on the left side of the sewing machine. Resewing When the wrong color upper thread has been sewn, it can be resewn with the correct color. Press (Start/stop button) to stop the a sewing machine. Press . b Tight Loose 1 Press (Back one color) to return to the c beginning of the mistaken color. Press one more time to go to previous color. a Thread tension dial 4 ■ Correct thread tension The thread tension is correct when upper thread is just visible on back of the fabric. 1 2 a right side b wrong side ■ Upper thread is too tight The lower thread will be visible on the front of the fabric. In this instance, decrease the upper thread tension. Set up the correct color for the upper thread. d 1 2 a right side b wrong side ■ Upper thread is too loose The upper thread has slack. In this instance, increase the upper thread tension. 1 2 a right side b wrong side Convenient Functions 141
-
 1
1 -
2
-
3
-
4
-
5
-
6
-
7
-
8
-
9
-
10
-
11
-
12
-
13
-
14
-
15
-
16
-
17
-
18
-
19
-
20
-
21
-
22
-
23
-
24
-
25
-
26
-
27
-
28
-
29
-
30
-
31
-
32
-
33
-
34
-
35
-
36
-
37
-
38
-
39
-
40
-
41
-
42
-
43
-
44
-
45
-
46
-
47
-
48
-
49
-
50
-
51
-
52
-
53
-
54
-
55
-
56
-
57
-
58
-
59
-
60
-
61
-
62
-
63
-
64
-
65
-
66
-
67
-
68
-
69
-
70
-
71
-
72
-
73
-
74
-
75
-
76
-
77
-
78
-
79
-
80
-
81
-
82
-
83
-
84
-
85
-
86
-
87
-
88
-
89
-
90
-
91
-
92
-
93
-
94
-
95
-
96
-
97
-
98
-
99
-
100
-
101
-
102
-
103
-
104
-
105
-
106
-
107
-
108
-
109
-
110
-
111
-
112
-
113
-
114
-
115
-
116
-
117
-
118
-
119
-
120
-
121
-
122
-
123
-
124
-
125
-
126
-
127
-
128
-
129
-
130
-
131
-
132
-
133
-
134
-
135
-
136
-
137
-
138
-
139
-
140
-
141
-
 142
142 -
 143
143 -
 144
144 -
 145
145 -
 146
146 -
 147
147 -
 148
148 -
 149
149 -
 150
150 -
 151
151 -
 152
152 -
153
-
154
-
155
-
156
-
157
-
158
-
159
-
160
-
161
-
162
-
163
-
164
-
165
-
166
 |
 |