Canon EOS Digital Rebel XTi EF-S 18-55 Kit User Manual - Page 111
Automatic Sensor Cleaning
 |
View all Canon EOS Digital Rebel XTi EF-S 18-55 Kit manuals
Add to My Manuals
Save this manual to your list of manuals |
Page 111 highlights
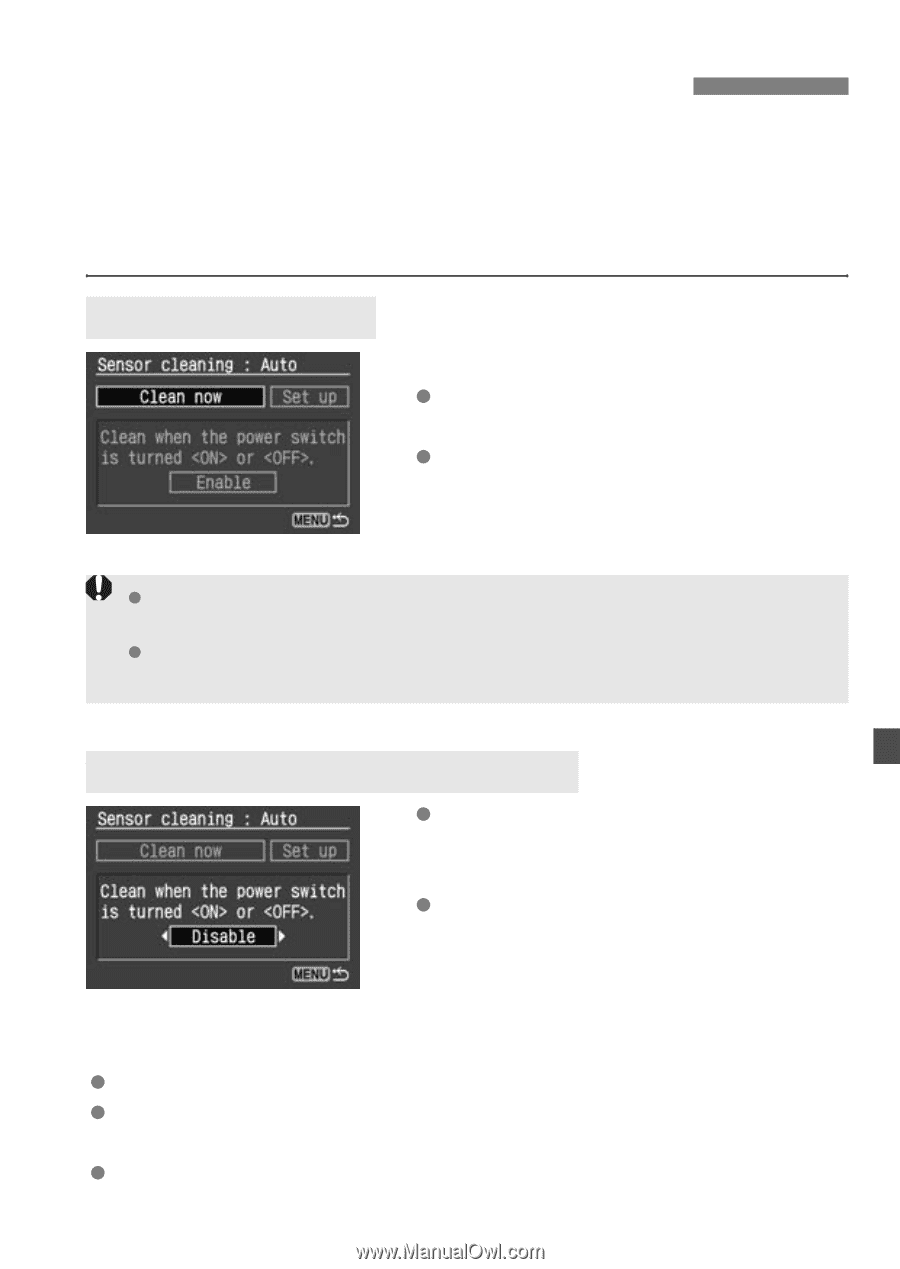
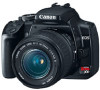
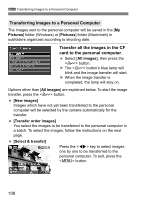
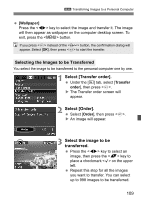
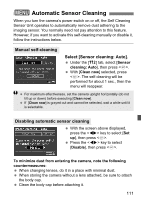
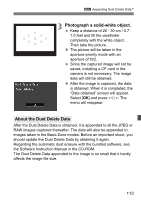
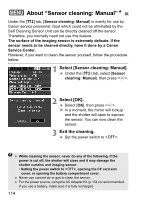
3 Automatic Sensor Cleaning When you turn the camera's power switch on or off, the Self Cleaning Sensor Unit operates to automatically remove dust adhering to the imaging sensor. You normally need not pay attention to this feature. However, if you want to activate this self-cleaning manually or disable it, follow the instructions below. Manual self-cleaning Select [Sensor cleaning: Auto]. Under the [b] tab, select [Sensor cleaning: Auto], then press . With [Clean now] selected, press . The self-cleaning will be performed for about 1 sec., then the menu will reappear. For maximum effectiveness, set the camera upright horizontally (do not tilt up or down) before executing [Clean now]. If [Clean now] is grayed out and cannot be selected, wait a while until it is selectable. Disabling automatic sensor cleaning With the screen above displayed, press the key to select [Set up], then press . Press the key to select [Disable], then press . To minimize dust from entering the camera, note the following countermeasures: When changing lenses, do it in a place with minimal dust. When storing the camera without a lens attached, be sure to attach the body cap. Clean the body cap before attaching it. 111
-
 1
1 -
2
-
3
-
4
-
5
-
6
-
7
-
8
-
9
-
10
-
11
-
12
-
13
-
14
-
15
-
16
-
17
-
18
-
19
-
20
-
21
-
22
-
23
-
24
-
25
-
26
-
27
-
28
-
29
-
30
-
31
-
32
-
33
-
34
-
35
-
36
-
37
-
38
-
39
-
40
-
41
-
42
-
43
-
44
-
45
-
46
-
47
-
48
-
49
-
50
-
51
-
52
-
53
-
54
-
55
-
56
-
57
-
58
-
59
-
60
-
61
-
62
-
63
-
64
-
65
-
66
-
67
-
68
-
69
-
70
-
71
-
72
-
73
-
74
-
75
-
76
-
77
-
78
-
79
-
80
-
81
-
82
-
83
-
84
-
85
-
86
-
87
-
88
-
89
-
90
-
91
-
92
-
93
-
94
-
95
-
96
-
97
-
98
-
99
-
100
-
101
-
102
-
103
-
104
-
105
-
 106
106 -
 107
107 -
 108
108 -
 109
109 -
 110
110 -
 111
111 -
 112
112 -
 113
113 -
 114
114 -
 115
115 -
 116
116 -
117
-
118
-
119
-
120
-
121
-
122
-
123
-
124
-
125
-
126
-
127
-
128
-
129
-
130
-
131
-
132
-
133
-
134
-
135
-
136
-
137
-
138
-
139
-
140
-
141
-
142
-
143
-
144
-
145
-
146
-
147
-
148
-
149
-
150
-
151
-
152
-
153
-
154
-
155
-
156
-
157
-
158
-
159
-
160
-
161
-
162
-
163
-
164
-
165
-
166
-
167
-
168
-
169
-
170
-
171
-
172
-
173
-
174
-
175
-
176
-
177
-
178
-
179
-
180
 |
 |