Dell OptiPlex Gn Reference and Installation Guide (.pdf) - Page 43
Using the ISA Configuration Utility, Quick Start, System Setup program is set to Diskette First. Then - sound drivers
 |
View all Dell OptiPlex Gn manuals
Add to My Manuals
Save this manual to your list of manuals |
Page 43 highlights
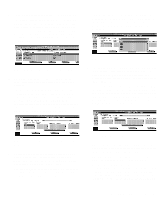
Chapter 3 Using the ISA Configuration Utility The ISA Configuration Utility (ICU) is used by the system to track what expansion cards are installed and what resources are used. With this information, the system automatically configures Plug and Play expansion cards and Peripheral Component Interconnect (PCI) expansion cards and can tell you how to configure nonPlug and Play Industry-Standard Architecture (ISA) expansion cards manually by setting jumpers or switches. Plug and Play and PCI expansion cards do not contain jumpers and switches; they are configured only through software in the basic input/output system (BIOS). CAUTION: The ICU is intended only for configuring non-Plug and Play ISA expansion cards. It should not be used for assigning resources to Plug and Play expansion cards and PCI expansion cards. These cards should be configured automatically by the BIOS. NOTES: The Microsoft Windows NT operating system does not provide full Plug and Play support. Therefore, some Plug and Play cards (such as modem, sound, and network cards) may not work with Windows NT. If your system is running a Dell-installed Windows NT operating system and you want to use Plug and Play cards, Dell recommends that you use the card manufacturer's configuration utility to set the card to legacy mode, enter the card's resources through the manufacturer's utility, and then use the ICU to add the Plug and Play card to your system configuration. On systems with a Dell-installed Windows NT operating system, the ICU is installed on the hard-disk drive as a diskette image. Use the Dell Program Diskette Maker (located in the Dell Accessories program group or folder) to make an ICU diskette from this diskette image. If you are using the Microsoft Windows 95 operating system, the functions provided by the ICU are handled by the Device Manager, which can be accessed by doubleclicking the System icon in the Control Panel. See your Windows 95 documentation for instructions on using the Device Manager to manage resources and resolve conflicts. The remainder of this chapter describes the various features of, and the various ways to use, the ICU. Quick Start To quickly get started using this utility, follow these steps: 1. Determine whether you need to run the ICU. See "When to Run the ICU" found later in this chapter for detailed instructions. 2. Perform any required preparatory steps before starting the utility. Preparatory steps include making a program diskette, copying your mouse driver to this diskette, and making a backup copy of this diskette. See "Preparing to Use the ICU" found later in this chapter for detailed instructions. 3. Start the system using your ICU diskette. Verify that the Boot Sequence category in the System Setup program is set to Diskette First. Then insert the backup copy of the ICU diskette into drive A, and turn on your computer or press the reset button. NOTE: The ICU takes a few minutes to load. During this time, the cursor may appear as a pointer rather than as an hourglass. When the utility has finished loading, the ICU window (see Figure 3-1) is displayed. Using the ISA Configuration Utility 3-1
-
 1
1 -
2
-
3
-
4
-
5
-
6
-
7
-
8
-
9
-
10
-
11
-
12
-
13
-
14
-
15
-
16
-
17
-
18
-
19
-
20
-
21
-
22
-
23
-
24
-
25
-
26
-
27
-
28
-
29
-
30
-
31
-
32
-
33
-
34
-
35
-
36
-
37
-
 38
38 -
 39
39 -
 40
40 -
 41
41 -
 42
42 -
 43
43 -
 44
44 -
 45
45 -
 46
46 -
 47
47 -
 48
48 -
49
-
50
-
51
-
52
-
53
-
54
-
55
-
56
-
57
-
58
-
59
-
60
-
61
-
62
-
63
-
64
-
65
-
66
-
67
-
68
-
69
-
70
-
71
-
72
-
73
-
74
-
75
-
76
-
77
-
78
-
79
-
80
-
81
-
82
-
83
-
84
-
85
-
86
-
87
-
88
-
89
-
90
-
91
-
92
-
93
-
94
-
95
-
96
-
97
-
98
-
99
-
100
-
101
-
102
-
103
-
104
-
105
-
106
-
107
-
108
-
109
-
110
-
111
-
112
-
113
-
114
-
115
-
116
-
117
-
118
-
119
-
120
-
121
-
122
-
123
-
124
-
125
-
126
 |
 |