Epson 2070 Service Manual - Page 118
Current Bi-d Alignment, Bi-d Adjustment Menu, LQ-2070 Service Manual, Adjustment
 |
UPC - 010343812277
View all Epson 2070 manuals
Add to My Manuals
Save this manual to your list of manuals |
Page 118 highlights
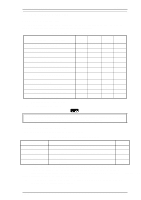
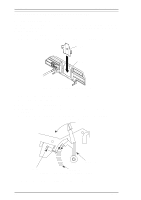
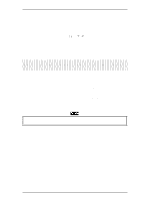
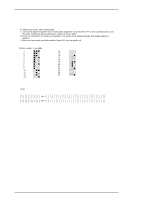
LQ-2070 Service Manual Adjustment < BI-D adjustment > > Mode 1 = 0 Mode 2 = 0 Mode 4 = 0 Cancel [ ESC] Print [SPACE] Speed Value [ ] [ ] Write Default [ RET ] [HOME] Figure 4-8 Bi-d Adjustment Menu 10. Highlight the mode by moving the cursor with the ↑ or ↓ key, and then print the current Bi-d print alignment pattern for that mode by pressing SPACE. Mode 1 VR = 0 Figure 4-9 Current Bi-d Alignment 11. If the Bi-d pattern is not aligned properly, adjust it by changing the value with the ← or → key. If the second row is shifted to the right of the first row, change the value by pressing the ← key, and print the new Bi-d print alignment pattern by pressing SPACE. If the second row is shifted to the left of the first row, change the value by pressing the → key, and print the new Bi-d print alignment pattern by pressing SPACE. Perform this operation for each mode (1,2, and 4). 12. When the Bi-d print alignment is correct for each print mode, press ENTER to write the adjusted values to the EEPROM and print the adjusted value for each mode. This operation returns the program to the Main Menu automatically. 13. To exit this program, press ESC until the computer returns to the MS-DOS prompt. Note The factory settings are written to the EEPROM when you run the "Check pro.(FF) shown in the Main Menu. After you select the factory settings, be sure to run the "Check pro. (FF). Rev. A 4-5
-
 1
1 -
2
-
3
-
4
-
5
-
6
-
7
-
8
-
9
-
10
-
11
-
12
-
13
-
14
-
15
-
16
-
17
-
18
-
19
-
20
-
21
-
22
-
23
-
24
-
25
-
26
-
27
-
28
-
29
-
30
-
31
-
32
-
33
-
34
-
35
-
36
-
37
-
38
-
39
-
40
-
41
-
42
-
43
-
44
-
45
-
46
-
47
-
48
-
49
-
50
-
51
-
52
-
53
-
54
-
55
-
56
-
57
-
58
-
59
-
60
-
61
-
62
-
63
-
64
-
65
-
66
-
67
-
68
-
69
-
70
-
71
-
72
-
73
-
74
-
75
-
76
-
77
-
78
-
79
-
80
-
81
-
82
-
83
-
84
-
85
-
86
-
87
-
88
-
89
-
90
-
91
-
92
-
93
-
94
-
95
-
96
-
97
-
98
-
99
-
100
-
101
-
102
-
103
-
104
-
105
-
106
-
107
-
108
-
109
-
110
-
111
-
112
-
 113
113 -
 114
114 -
 115
115 -
 116
116 -
 117
117 -
 118
118 -
 119
119 -
 120
120 -
 121
121 -
 122
122 -
 123
123 -
124
-
125
-
126
-
127
-
128
-
129
-
130
-
131
-
132
-
133
-
134
-
135
-
136
-
137
-
138
-
139
-
140
-
141
-
142
-
143
-
144
-
145
-
146
-
147
-
148
-
149
-
150
-
151
-
152
-
153
-
154
-
155
-
156
-
157
-
158
-
159
-
160
-
161
-
162
-
163
-
164
-
165
 |
 |
