Epson LQ 670 User Manual - Page 141
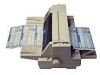
Pa use, Operate, LF/ FF, Lo a d / Eje c t, the best alignment pattern.
 |
View all Epson LQ 670 manuals
Add to My Manuals
Save this manual to your list of manuals |
Page 141 highlights
Troub le shooting Follow the steps below to perform bid irectional ad ju stm ent. 7 N o t e: u To print the instruction sheet and alignment patterns, you need four sheets of A 4 or letter size single-sheet paper or 11-inch or longer continuous paper. (See Chapter 3, "Paper Handling," for instructions on loading single-sheet or continuous paper.) u If you use single-sheet paper, be sure to load a new sheet of paper each time the printer ejects a printed sheet. Otherwise, you cannot proceed to the next step. 1. Make su re p ap er is load ed , then tu rn off the p rinter. While hold ing d ow n the Pa use bu tton, press the Op era te bu tton to tu rn on the printer. The p rinter enters the bid irectional ad ju stm ent m od e and then prints the instruction sheet and the first set of alignm ent p atterns. 2. As d escribed on the instruction sheet, com p are the alignm ent p atterns and select the p attern w ith the best alignm ent. To sp ecify the p attern num ber you w ant, press the LF/ FF bu tton (to d ecrease to the num ber) or the Loa d / Ejec t bu tton (to increase to the num ber) until the Font lights correspond to the correct nu m ber as ind icated at the bottom of the instruction sheet. 3. Press the Font bu tton to save you r selection and p rint the next set of alignm ent p atterns. Then rep eat step 2 to select the best alignment p attern. 4. Press the Font bu tton again to save you r selection and p rint the final set of alignm ent patterns. 5. Select the best pattern in the final set of alignm ent patterns as d escribed in step 2 and then p ress the Font button to save your selection. 6. Press the Op era te bu tton to tu rn off the p rinter and exit the bid irectional ad justm ent m od e. Troubleshooting 7-25
-
 1
1 -
2
-
3
-
4
-
5
-
6
-
7
-
8
-
9
-
10
-
11
-
12
-
13
-
14
-
15
-
16
-
17
-
18
-
19
-
20
-
21
-
22
-
23
-
24
-
25
-
26
-
27
-
28
-
29
-
30
-
31
-
32
-
33
-
34
-
35
-
36
-
37
-
38
-
39
-
40
-
41
-
42
-
43
-
44
-
45
-
46
-
47
-
48
-
49
-
50
-
51
-
52
-
53
-
54
-
55
-
56
-
57
-
58
-
59
-
60
-
61
-
62
-
63
-
64
-
65
-
66
-
67
-
68
-
69
-
70
-
71
-
72
-
73
-
74
-
75
-
76
-
77
-
78
-
79
-
80
-
81
-
82
-
83
-
84
-
85
-
86
-
87
-
88
-
89
-
90
-
91
-
92
-
93
-
94
-
95
-
96
-
97
-
98
-
99
-
100
-
101
-
102
-
103
-
104
-
105
-
106
-
107
-
108
-
109
-
110
-
111
-
112
-
113
-
114
-
115
-
116
-
117
-
118
-
119
-
120
-
121
-
122
-
123
-
124
-
125
-
126
-
127
-
128
-
129
-
130
-
131
-
132
-
133
-
134
-
135
-
 136
136 -
 137
137 -
 138
138 -
 139
139 -
 140
140 -
 141
141 -
 142
142 -
 143
143 -
 144
144 -
 145
145 -
 146
146 -
147
-
148
-
149
-
150
-
151
-
152
-
153
-
154
-
155
-
156
-
157
-
158
-
159
-
160
-
161
-
162
-
163
-
164
-
165
-
166
-
167
-
168
-
169
-
170
-
171
-
172
-
173
-
174
-
175
-
176
-
177
-
178
-
179
-
180
-
181
-
182
-
183
-
184
-
185
-
186
-
187
-
188
 |
 |
