Epson LX-80 User Manual - Page 122
the or is printing on the perforations, check to see that your top
 |
View all Epson LX-80 manuals
Add to My Manuals
Save this manual to your list of manuals |
Page 122 highlights
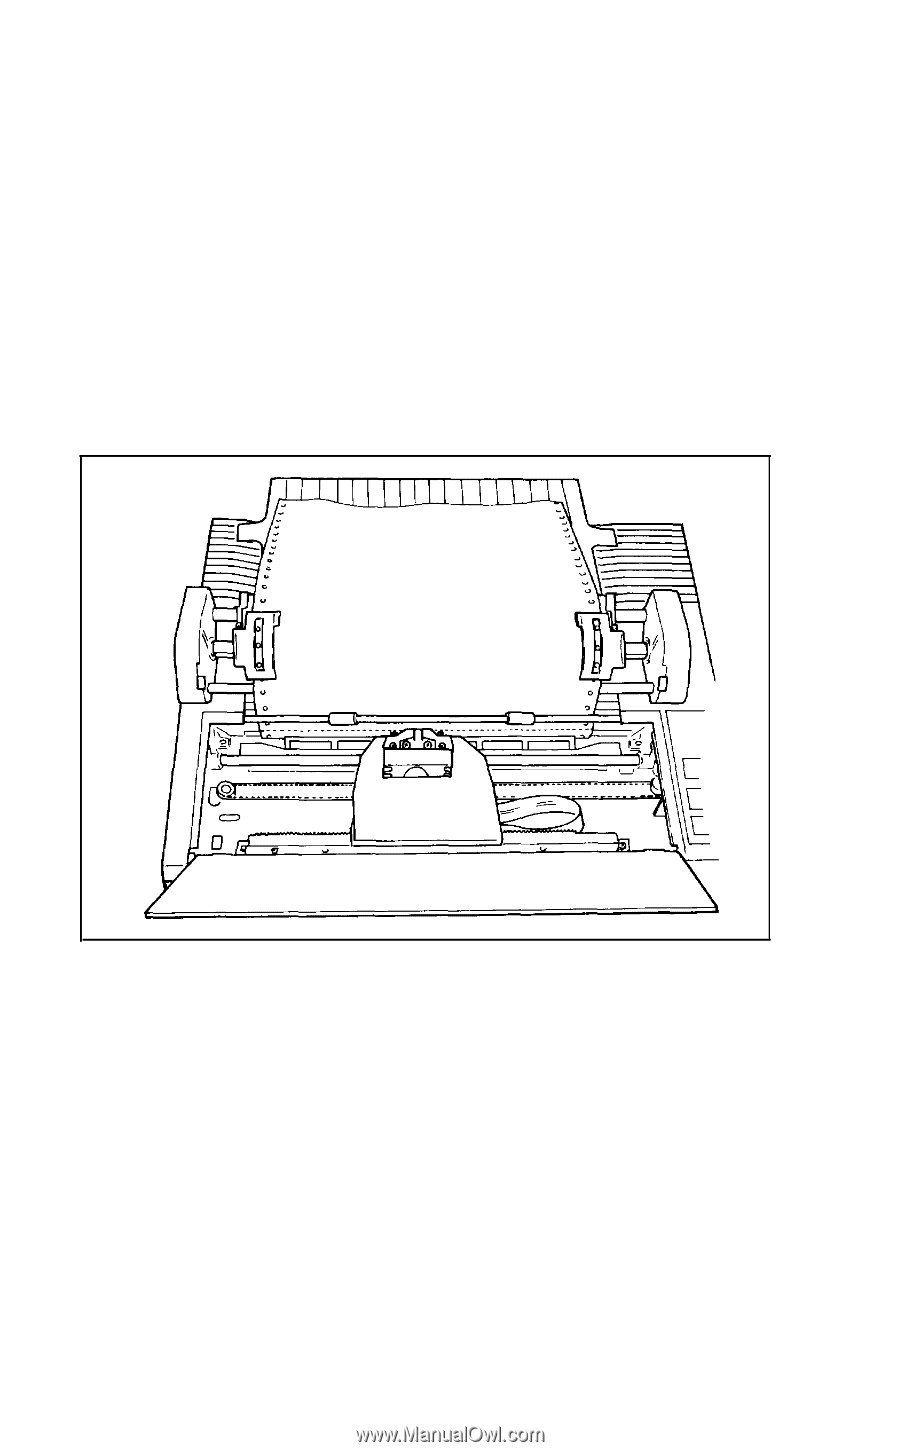
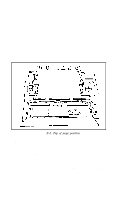
Next pull the paper up until the top is above the pin-feed holders. Fit the holes on the left side of the paper over the pins in the left holder and close the cover. Now fit the right side of the paper in the right holder, moving the holder as needed to match the width of the paper. Close the second cover, make sure the paper has no dips or wrinkles, lock the right holder in place, and push the paper bail against the paper. Now you are ready to set the top of page position. Turn the paper-feed knob to advance the paper until a perforation between sheets is approximately 1/8 of an inch below the top of the ribbon guide, as you see in Figure E-8. Figure E-8. Top of page position When you turn on your LX-80, it will remember this top of page setting and will use it when any program tells it to move to the top of the next page. If you later find that your word processing or other applications program is putting your printing too high or too low on the page or is printing on the perforations, check to see that your top of page setting is correct. Once you have set the top of page, each time you finish printing a document, push the ON LINE button to put the printer off-line and then push the FF button once to advance the paper so that you can tear off your just-printed pages and the paper will be in the right position to begin the next document. E-6
-
 1
1 -
2
-
3
-
4
-
5
-
6
-
7
-
8
-
9
-
10
-
11
-
12
-
13
-
14
-
15
-
16
-
17
-
18
-
19
-
20
-
21
-
22
-
23
-
24
-
25
-
26
-
27
-
28
-
29
-
30
-
31
-
32
-
33
-
34
-
35
-
36
-
37
-
38
-
39
-
40
-
41
-
42
-
43
-
44
-
45
-
46
-
47
-
48
-
49
-
50
-
51
-
52
-
53
-
54
-
55
-
56
-
57
-
58
-
59
-
60
-
61
-
62
-
63
-
64
-
65
-
66
-
67
-
68
-
69
-
70
-
71
-
72
-
73
-
74
-
75
-
76
-
77
-
78
-
79
-
80
-
81
-
82
-
83
-
84
-
85
-
86
-
87
-
88
-
89
-
90
-
91
-
92
-
93
-
94
-
95
-
96
-
97
-
98
-
99
-
100
-
101
-
102
-
103
-
104
-
105
-
106
-
107
-
108
-
109
-
110
-
111
-
112
-
113
-
114
-
115
-
116
-
 117
117 -
 118
118 -
 119
119 -
 120
120 -
 121
121 -
 122
122 -
 123
123 -
 124
124 -
 125
125 -
 126
126 -
 127
127 -
128
-
129
-
130
-
131
-
132
-
133
-
134
-
135
-
136
-
137
-
138
-
139
-
140
-
141
-
142
-
143
-
144
-
145
-
146
-
147
-
148
-
149
-
150
-
151
-
152
-
153
-
154
-
155
-
156
-
157
-
158
 |
 |