Epson LX-80 User Manual - Page 71
Defining NLQ Characters, NLQ grid
 |
View all Epson LX-80 manuals
Add to My Manuals
Save this manual to your list of manuals |
Page 71 highlights
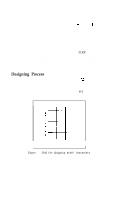
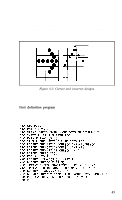
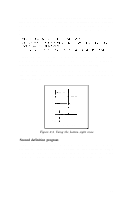
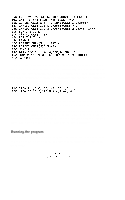
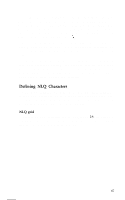
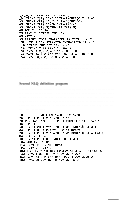
The two lines when printed by your own program provide you with a key to the characters your LX-80 will now print. When you press the key for one of the characters in the top row, the printer will print the corresponding character in the bottom row. In the example above, if you type = your LX-80 will print t (although your screen will continue to show the character =). Because the program puts these new definitions in your printer's Random Access Memory (RAM), it will print the new characters (the ones in the bottom row) unless it is turned off or receives the reset code. If you have designed a few characters and want to use them with your word processing program, for example, just run the second definition program before you start using your word processing program. Then use the two-line printout as your guide to tell you which keys to press for your new characters. Defining NLQ Characters Since NLQ characters use many more dots than draft characters, defining NLQ characters is more complex than designing draft ones. If you use the grid and the programs in this section, however, you will be able to design your own NLQ characters. NLQ grid Because the NLQ characters can use as many as 18 dots vertically and 12 dots horizontally, you plan your designs on a different grid than the one you used for draft characters. 67
-
 1
1 -
2
-
3
-
4
-
5
-
6
-
7
-
8
-
9
-
10
-
11
-
12
-
13
-
14
-
15
-
16
-
17
-
18
-
19
-
20
-
21
-
22
-
23
-
24
-
25
-
26
-
27
-
28
-
29
-
30
-
31
-
32
-
33
-
34
-
35
-
36
-
37
-
38
-
39
-
40
-
41
-
42
-
43
-
44
-
45
-
46
-
47
-
48
-
49
-
50
-
51
-
52
-
53
-
54
-
55
-
56
-
57
-
58
-
59
-
60
-
61
-
62
-
63
-
64
-
65
-
 66
66 -
 67
67 -
 68
68 -
 69
69 -
 70
70 -
 71
71 -
 72
72 -
 73
73 -
 74
74 -
 75
75 -
 76
76 -
77
-
78
-
79
-
80
-
81
-
82
-
83
-
84
-
85
-
86
-
87
-
88
-
89
-
90
-
91
-
92
-
93
-
94
-
95
-
96
-
97
-
98
-
99
-
100
-
101
-
102
-
103
-
104
-
105
-
106
-
107
-
108
-
109
-
110
-
111
-
112
-
113
-
114
-
115
-
116
-
117
-
118
-
119
-
120
-
121
-
122
-
123
-
124
-
125
-
126
-
127
-
128
-
129
-
130
-
131
-
132
-
133
-
134
-
135
-
136
-
137
-
138
-
139
-
140
-
141
-
142
-
143
-
144
-
145
-
146
-
147
-
148
-
149
-
150
-
151
-
152
-
153
-
154
-
155
-
156
-
157
-
158
 |
 |