Epson LX-80 User Manual - Page 16
Ribbon Replacement, using your printer just before you change cassettes, be aware that
 |
View all Epson LX-80 manuals
Add to My Manuals
Save this manual to your list of manuals |
Page 16 highlights
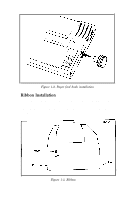
Now turn the knob on the cassette in the direction of the arrow to tighten the ribbon. As you turn the knob, see that the ribbon slips down into its proper place between the print head nose and the silver ribbon guide (Figure l-6). If it doesn't, guide it with a pen or a pencil. Figure l-6. Ribbon placement Ribbon Replacement When your printing begins to become light and you need to replace the ribbon, lift the front of the cassette to remove it and then follow the above instructions with a new cassette. If you have been using your printer just before you change cassettes, be aware that the print head becomes hot during use. Be careful not to touch it. Also remember never to move the print head by hand when the printer is turned on. 8
-
 1
1 -
2
-
3
-
4
-
5
-
6
-
7
-
8
-
9
-
10
-
 11
11 -
 12
12 -
 13
13 -
 14
14 -
 15
15 -
 16
16 -
 17
17 -
 18
18 -
 19
19 -
 20
20 -
 21
21 -
22
-
23
-
24
-
25
-
26
-
27
-
28
-
29
-
30
-
31
-
32
-
33
-
34
-
35
-
36
-
37
-
38
-
39
-
40
-
41
-
42
-
43
-
44
-
45
-
46
-
47
-
48
-
49
-
50
-
51
-
52
-
53
-
54
-
55
-
56
-
57
-
58
-
59
-
60
-
61
-
62
-
63
-
64
-
65
-
66
-
67
-
68
-
69
-
70
-
71
-
72
-
73
-
74
-
75
-
76
-
77
-
78
-
79
-
80
-
81
-
82
-
83
-
84
-
85
-
86
-
87
-
88
-
89
-
90
-
91
-
92
-
93
-
94
-
95
-
96
-
97
-
98
-
99
-
100
-
101
-
102
-
103
-
104
-
105
-
106
-
107
-
108
-
109
-
110
-
111
-
112
-
113
-
114
-
115
-
116
-
117
-
118
-
119
-
120
-
121
-
122
-
123
-
124
-
125
-
126
-
127
-
128
-
129
-
130
-
131
-
132
-
133
-
134
-
135
-
136
-
137
-
138
-
139
-
140
-
141
-
142
-
143
-
144
-
145
-
146
-
147
-
148
-
149
-
150
-
151
-
152
-
153
-
154
-
155
-
156
-
157
-
158
 |
 |
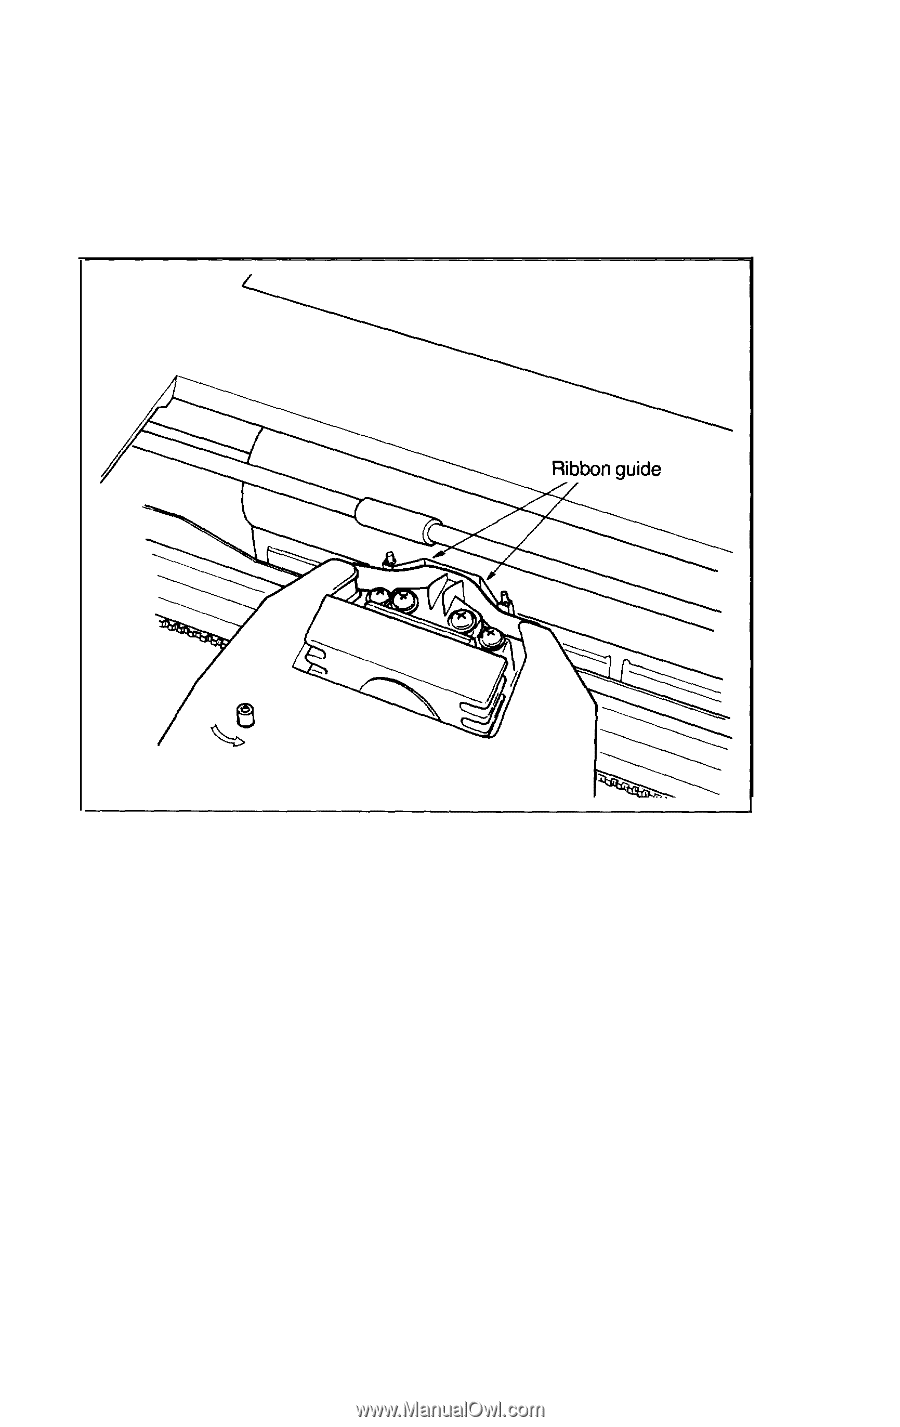
Now turn the knob on the cassette in the direction of the arrow to
tighten the ribbon. As you turn the knob, see that the ribbon slips
down into its proper place between the print head nose and the silver
ribbon guide (Figure l-6). If it doesn’t, guide it with a pen or a pencil.
Figure l-6. Ribbon placement
Ribbon Replacement
When your printing begins to become light and you need to re-
place the ribbon, lift the front of the cassette to remove it and then
follow the above instructions with a new cassette. If you have been
using your printer just before you change cassettes, be aware that the
print head becomes hot during use. Be careful not to touch it. Also
remember never to move the print head by hand when the printer is
turned on.
8