Epson LX-80 User Manual - Page 21
Connecting the LX-80 to Your Computer, in Appendix I.
 |
View all Epson LX-80 manuals
Add to My Manuals
Save this manual to your list of manuals |
Page 21 highlights
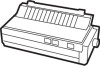
Connecting the LX-80 to Your Computer Now that the test pattern has shown that your printer is working well, it's time to hook it up to your computer. It is best to have both the printer and the computer turned off when you do this. Remember that each computer system has its own way of communicating with a printer. If your computer expects to communicate through a Centronics parallel interface, all you need is a cable. If your computer requires any other kind of interface, you will also need an interface board. If you don't know what a Centronics parallel interface is, your computer manual or your dealer will tell you what you need. Then, once you have plugged your printer cable into your printer and computer, you will probably never think about interfaces again. (If you do want the technical specifications, however, you can find them in Appendix I.) The first three steps in connecting your printer and computer are shown in Figure 1-10. Plug one end of your printer cable into the cable connector of your LX-80 printer. The plug is shaped so that there is only one way it will fit the connector. Now secure the plug to the printer with the wire clips on each side of the connector. These clips insure that your cable will not be loosened or unplugged accidentally. If your cable has a grounding wire, fasten it to the grounding screw below the connector. 13
-
 1
1 -
2
-
3
-
4
-
5
-
6
-
7
-
8
-
9
-
10
-
11
-
12
-
13
-
14
-
15
-
 16
16 -
 17
17 -
 18
18 -
 19
19 -
 20
20 -
 21
21 -
 22
22 -
 23
23 -
 24
24 -
 25
25 -
 26
26 -
27
-
28
-
29
-
30
-
31
-
32
-
33
-
34
-
35
-
36
-
37
-
38
-
39
-
40
-
41
-
42
-
43
-
44
-
45
-
46
-
47
-
48
-
49
-
50
-
51
-
52
-
53
-
54
-
55
-
56
-
57
-
58
-
59
-
60
-
61
-
62
-
63
-
64
-
65
-
66
-
67
-
68
-
69
-
70
-
71
-
72
-
73
-
74
-
75
-
76
-
77
-
78
-
79
-
80
-
81
-
82
-
83
-
84
-
85
-
86
-
87
-
88
-
89
-
90
-
91
-
92
-
93
-
94
-
95
-
96
-
97
-
98
-
99
-
100
-
101
-
102
-
103
-
104
-
105
-
106
-
107
-
108
-
109
-
110
-
111
-
112
-
113
-
114
-
115
-
116
-
117
-
118
-
119
-
120
-
121
-
122
-
123
-
124
-
125
-
126
-
127
-
128
-
129
-
130
-
131
-
132
-
133
-
134
-
135
-
136
-
137
-
138
-
139
-
140
-
141
-
142
-
143
-
144
-
145
-
146
-
147
-
148
-
149
-
150
-
151
-
152
-
153
-
154
-
155
-
156
-
157
-
158
 |
 |
