Epson Stylus Pro 7600 - UltraChrome Ink User Manual - Page 120
Paper Configuration Settings, PhotoEnhance4 settings
 |
View all Epson Stylus Pro 7600 - UltraChrome Ink manuals
Add to My Manuals
Save this manual to your list of manuals |
Page 120 highlights
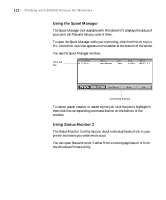
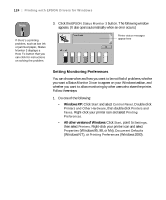
120 | Printing with EPSON Drivers for Windows Note These settings are overridden by any paper configuration settings you may have made using the printer's control panel (page 84). PhotoEnhance4 settings Tone Lets you choose from Normal for standard tone correction, Hard for high contrast, Vivid for more intense colors (as defined above), Sepia, Monochrome, and None (no tone adjustment). Effect Lets you choose from four special effects (and set the intensity using the Low/High slider): Sharpness, Soft Focus, Canvas, and Parchment. Digital Camera Corrects noise and other flaws common to digital camera Correction images. Paper Configuration Settings To access the paper configuration settings, click the Paper Config button in the Advanced dialog box. The following settings are available. Paper Configuration settings Color Density Controls the ink saturation level (for example, when you turn off color management in your printer software). Drying Time per Print Head Pass Use when printing with non-EPSON media. You can make the print head wait up to 5 seconds after each pass to allow ink to dry on the page. Paper Feed Adjustment Eliminates light or dark horizontal banding in your printouts. Paper Thickness Eliminates vertical banding and creates a sharper image when printing on unusually thick or thin paper. Paper Suction Decreases the paper suction level when printing on thinner papers (less than 12 lb), such as CAD drafting paper or backlight film. Cut Method Decreases the cutting blade pressure for thinner papers, to provide a cleaner cut. 4-120
-
 1
1 -
2
-
3
-
4
-
5
-
6
-
7
-
8
-
9
-
10
-
11
-
12
-
13
-
14
-
15
-
16
-
17
-
18
-
19
-
20
-
21
-
22
-
23
-
24
-
25
-
26
-
27
-
28
-
29
-
30
-
31
-
32
-
33
-
34
-
35
-
36
-
37
-
38
-
39
-
40
-
41
-
42
-
43
-
44
-
45
-
46
-
47
-
48
-
49
-
50
-
51
-
52
-
53
-
54
-
55
-
56
-
57
-
58
-
59
-
60
-
61
-
62
-
63
-
64
-
65
-
66
-
67
-
68
-
69
-
70
-
71
-
72
-
73
-
74
-
75
-
76
-
77
-
78
-
79
-
80
-
81
-
82
-
83
-
84
-
85
-
86
-
87
-
88
-
89
-
90
-
91
-
92
-
93
-
94
-
95
-
96
-
97
-
98
-
99
-
100
-
101
-
102
-
103
-
104
-
105
-
106
-
107
-
108
-
109
-
110
-
111
-
112
-
113
-
114
-
 115
115 -
 116
116 -
 117
117 -
 118
118 -
 119
119 -
 120
120 -
 121
121 -
 122
122 -
 123
123 -
 124
124 -
 125
125 -
126
-
127
-
128
-
129
-
130
-
131
-
132
-
133
-
134
-
135
-
136
-
137
-
138
-
139
-
140
-
141
-
142
-
143
-
144
-
145
-
146
-
147
-
148
-
149
-
150
-
151
-
152
-
153
-
154
-
155
-
156
-
157
-
158
-
159
-
160
-
161
-
162
-
163
-
164
-
165
-
166
-
167
-
168
-
169
-
170
-
171
-
172
-
173
-
174
-
175
-
176
-
177
-
178
-
179
-
180
-
181
-
182
-
183
-
184
-
185
-
186
-
187
-
188
-
189
-
190
-
191
-
192
 |
 |