Epson Stylus Pro 7600 - UltraChrome Ink User Manual - Page 143
Installing an Ink Cartridge, Open the ink compartment cover.
 |
View all Epson Stylus Pro 7600 - UltraChrome Ink manuals
Add to My Manuals
Save this manual to your list of manuals |
Page 143 highlights
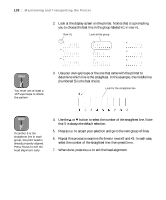
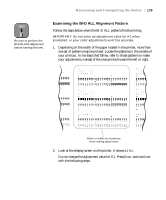
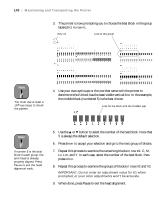
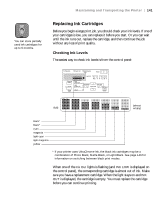
Maintaining and Transporting the Printer | 143 Caution Leave the empty cartridge in the printer until you are ready to replace it. Installing an Ink Cartridge Before you start, make sure the printer is on. Then follow these steps to replace an ink cartridge: 1. Note the color of the cartridge whose Ink Out light is on or flashing. This is the cartridge you need to replace. 2. Open the ink compartment cover. 3. Raise the ink lever to the unlocked position. Warning Do not shake the empty cartridge, or ink may leak out. If ink gets on your hands, wash them thoroughly with soap and water. If ink gets in your eyes, flush them immediately with water. 4. Remove the empty ink cartridge from the printer. 5-143
-
 1
1 -
2
-
3
-
4
-
5
-
6
-
7
-
8
-
9
-
10
-
11
-
12
-
13
-
14
-
15
-
16
-
17
-
18
-
19
-
20
-
21
-
22
-
23
-
24
-
25
-
26
-
27
-
28
-
29
-
30
-
31
-
32
-
33
-
34
-
35
-
36
-
37
-
38
-
39
-
40
-
41
-
42
-
43
-
44
-
45
-
46
-
47
-
48
-
49
-
50
-
51
-
52
-
53
-
54
-
55
-
56
-
57
-
58
-
59
-
60
-
61
-
62
-
63
-
64
-
65
-
66
-
67
-
68
-
69
-
70
-
71
-
72
-
73
-
74
-
75
-
76
-
77
-
78
-
79
-
80
-
81
-
82
-
83
-
84
-
85
-
86
-
87
-
88
-
89
-
90
-
91
-
92
-
93
-
94
-
95
-
96
-
97
-
98
-
99
-
100
-
101
-
102
-
103
-
104
-
105
-
106
-
107
-
108
-
109
-
110
-
111
-
112
-
113
-
114
-
115
-
116
-
117
-
118
-
119
-
120
-
121
-
122
-
123
-
124
-
125
-
126
-
127
-
128
-
129
-
130
-
131
-
132
-
133
-
134
-
135
-
136
-
137
-
 138
138 -
 139
139 -
 140
140 -
 141
141 -
 142
142 -
 143
143 -
 144
144 -
 145
145 -
 146
146 -
 147
147 -
 148
148 -
149
-
150
-
151
-
152
-
153
-
154
-
155
-
156
-
157
-
158
-
159
-
160
-
161
-
162
-
163
-
164
-
165
-
166
-
167
-
168
-
169
-
170
-
171
-
172
-
173
-
174
-
175
-
176
-
177
-
178
-
179
-
180
-
181
-
182
-
183
-
184
-
185
-
186
-
187
-
188
-
189
-
190
-
191
-
192
 |
 |
5-143
Maintaining and Transporting the Printer
|
143
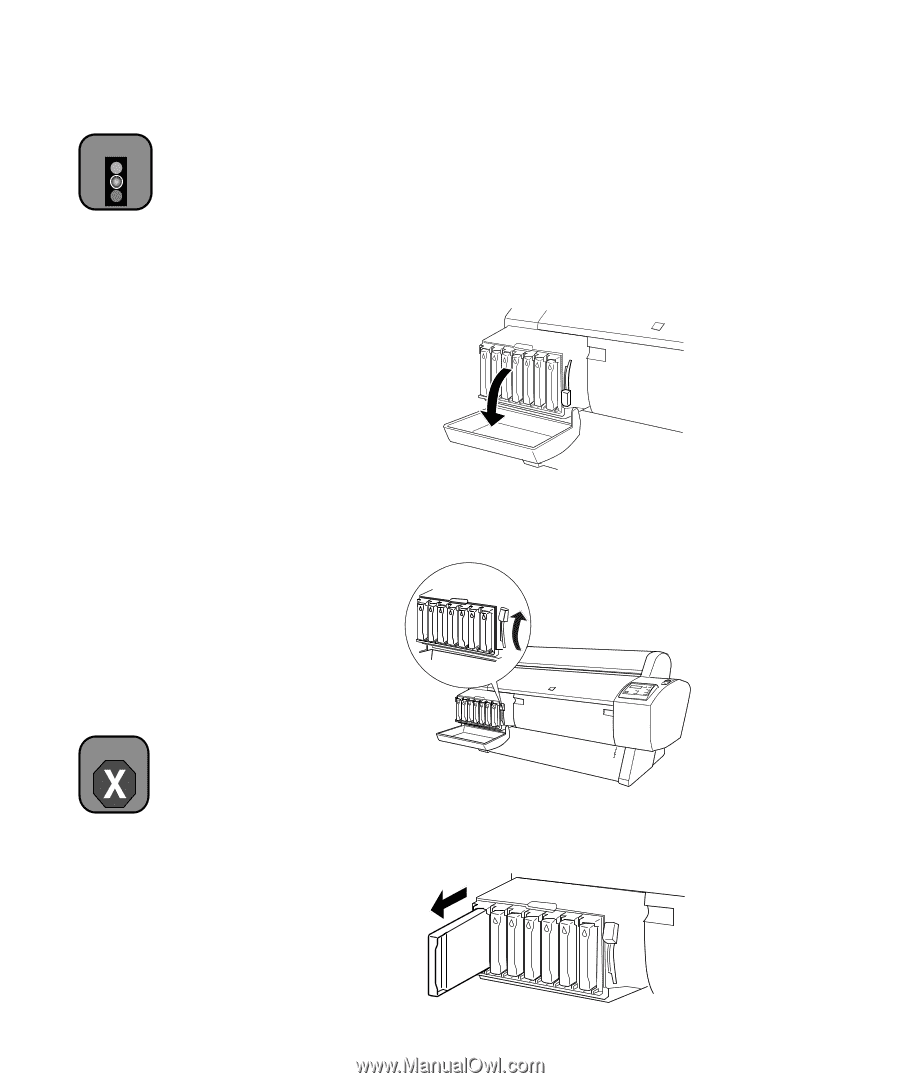
Installing an Ink Cartridge
Before you start, make sure the printer is on. Then follow these steps to
replace an ink cartridge:
1.
Note the color of the cartridge whose
Ink Out
light is on or flashing.
This is the cartridge you need to replace.
2.
Open the ink compartment cover.
3.
Raise the ink lever to the unlocked position.
4.
Remove the empty ink cartridge from the printer.
Caution
Leave the empty
cartridge in the printer
until you are ready to
replace it.
Warning
Do not shake the empty
cartridge, or ink may leak
out. If ink gets on your
hands, wash them
thoroughly with soap and
water. If ink gets in your
eyes, flush them
immediately with water.