HP F4280 User Guide - Page 40
Perform special print jobs, Print a borderless image
 |
UPC - 883585581313
View all HP F4280 manuals
Add to My Manuals
Save this manual to your list of manuals |
Page 40 highlights
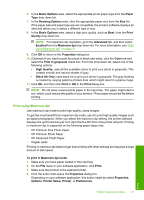
Chapter 7 To delete a printing shortcut 1. On the File menu in your software application, click Print. 2. Make sure the product is the selected printer. 3. Click the button that opens the Properties dialog box. Depending on your software application, this button might be called Properties, Options, Printer Setup, Printer, or Preferences. 4. Click the Printing Shortcuts tab. 5. In the Printing Shortcuts list, click the printing shortcut that you want to delete. 6. Click Delete. The printing shortcut is removed from the list. NOTE: Only the shortcuts that you have created can be deleted. The original HP shortcuts cannot be deleted. Perform special print jobs In addition to supporting standard print jobs, the HP All-in-One can perform special jobs such as printing borderless images, iron-on transfers, and posters. This section contains the following topics: • Print a borderless image • Print a photo on plain paper • Print a photo on photo paper • Print using Maximum dpi • Print on both sides of the page • Print a multiple-page document as a booklet • Print multiple pages on a single sheet • Print a multiple-page document in reverse order • Reverse an image for iron-on transfers • Print on transparencies • Print a group of addresses on labels or envelopes • Print a poster • Print a Web page Print a borderless image Borderless printing lets you print to the top, bottom, and side edges of up to 216 x 279 mm (8.5 x 11 inch) photo paper. TIP: For the best results, use HP Advanced Photo Papers to print your photos. Print 38 Print from your computer
-
 1
1 -
2
-
3
-
4
-
5
-
6
-
7
-
8
-
9
-
10
-
11
-
12
-
13
-
14
-
15
-
16
-
17
-
18
-
19
-
20
-
21
-
22
-
23
-
24
-
25
-
26
-
27
-
28
-
29
-
30
-
31
-
32
-
33
-
34
-
 35
35 -
 36
36 -
 37
37 -
 38
38 -
 39
39 -
 40
40 -
 41
41 -
 42
42 -
 43
43 -
 44
44 -
 45
45 -
46
-
47
-
48
-
49
-
50
-
51
-
52
-
53
-
54
-
55
-
56
-
57
-
58
-
59
-
60
-
61
-
62
-
63
-
64
-
65
-
66
-
67
-
68
-
69
-
70
-
71
-
72
-
73
-
74
-
75
-
76
-
77
-
78
-
79
-
80
-
81
-
82
-
83
-
84
-
85
-
86
-
87
-
88
-
89
-
90
-
91
-
92
-
93
-
94
-
95
-
96
-
97
-
98
-
99
-
100
-
101
-
102
-
103
-
104
-
105
-
106
-
107
-
108
-
109
-
110
-
111
-
112
-
113
-
114
-
115
-
116
-
117
-
118
-
119
-
120
-
121
-
122
-
123
-
124
-
125
-
126
-
127
-
128
-
129
-
130
-
131
-
132
-
133
-
134
-
135
-
136
-
137
-
138
-
139
-
140
-
141
-
142
-
143
-
144
-
145
-
146
-
147
-
148
-
149
-
150
-
151
-
152
-
153
-
154
-
155
-
156
-
157
-
158
-
159
-
160
-
161
-
162
-
163
-
164
-
165
-
166
-
167
-
168
-
169
-
170
-
171
-
172
-
173
-
174
-
175
-
176
-
177
-
178
-
179
-
180
-
181
-
182
-
183
-
184
-
185
-
186
-
187
-
188
-
189
-
190
-
191
-
192
-
193
-
194
-
195
-
196
-
197
-
198
-
199
-
200
-
201
-
202
-
203
-
204
-
205
-
206
-
207
-
208
-
209
-
210
-
211
-
212
-
213
-
214
-
215
-
216
-
217
-
218
-
219
-
220
 |
 |
