HP OmniBook 500 HP OmniBook 500 (FA) - Corporate Evaluator's Guide Edition 4 - Page 126
To install pointing stick support
 |
View all HP OmniBook 500 manuals
Add to My Manuals
Save this manual to your list of manuals |
Page 126 highlights
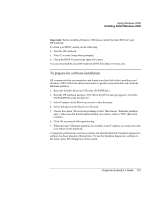
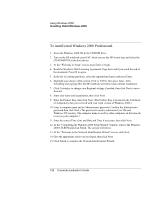
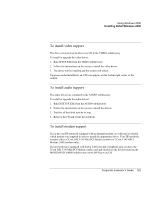
Using Windows 2000 Installing Retail Windows 2000 4. Click Uninstall and select OK to remove the USB device. 5. Go to the WIRELESS subdirectory in the Recovery CD and run the SETUP.EXE. 6. Click Next to continue the installation, click Yes to confirm the license agreement, click Finish to reboot the computer. To install pointing stick support The pointing stick drivers are contained in the TRACKPNT subdirectory of the Recovery CD. To install the pointing stick drivers: 1. Start Windows 2000. 2. Logon. 3. Double-click the "My Computer" icon. 4. Open the "Control Panel" folder. 5. Open the "System" control panel. 6. Click the "Hardware" tab. 7. Click "Device Manager..." 8. Double-click on "Mice and other pointing devices." 9. Double-click on the PS/2 mouse entry. Normally, the entry is named "PS/2 Compatible Mouse", "Microsoft PS/2 Mouse" or "Standard PS/2 Mouse", or "IBM PS/2 TrackPoint". 10. Click the "Driver" tab. 11. Click "Update Driver..." 12. Click "Next" on the "Upgrade Device Driver Wizard" screen. 13. Under the question "What do you want the wizard to do?" Click "Display a list of the known drivers for this device so that I can choose a specific driver". 14. Click "Next". 15. Wait for all hard disk activity to stop. 16. Click "Have Disk..." 126 Corporate Evaluator's Guide
-
 1
1 -
2
-
3
-
4
-
5
-
6
-
7
-
8
-
9
-
10
-
11
-
12
-
13
-
14
-
15
-
16
-
17
-
18
-
19
-
20
-
21
-
22
-
23
-
24
-
25
-
26
-
27
-
28
-
29
-
30
-
31
-
32
-
33
-
34
-
35
-
36
-
37
-
38
-
39
-
40
-
41
-
42
-
43
-
44
-
45
-
46
-
47
-
48
-
49
-
50
-
51
-
52
-
53
-
54
-
55
-
56
-
57
-
58
-
59
-
60
-
61
-
62
-
63
-
64
-
65
-
66
-
67
-
68
-
69
-
70
-
71
-
72
-
73
-
74
-
75
-
76
-
77
-
78
-
79
-
80
-
81
-
82
-
83
-
84
-
85
-
86
-
87
-
88
-
89
-
90
-
91
-
92
-
93
-
94
-
95
-
96
-
97
-
98
-
99
-
100
-
101
-
102
-
103
-
104
-
105
-
106
-
107
-
108
-
109
-
110
-
111
-
112
-
113
-
114
-
115
-
116
-
117
-
118
-
119
-
120
-
 121
121 -
 122
122 -
 123
123 -
 124
124 -
 125
125 -
 126
126 -
 127
127 -
 128
128 -
 129
129 -
 130
130 -
 131
131 -
132
-
133
-
134
-
135
-
136
-
137
-
138
-
139
-
140
-
141
-
142
-
143
-
144
-
145
-
146
-
147
-
148
-
149
-
150
-
151
-
152
-
153
-
154
-
155
-
156
-
157
-
158
-
159
-
160
-
161
-
162
-
163
-
164
-
165
-
166
-
167
-
168
-
169
-
170
-
171
-
172
-
173
-
174
-
175
-
176
-
177
-
178
-
179
-
180
-
181
-
182
-
183
-
184
-
185
-
186
-
187
-
188
-
189
-
190
-
191
-
192
-
193
-
194
-
195
-
196
-
197
-
198
-
199
-
200
-
201
-
202
-
203
-
204
-
205
-
206
-
207
-
208
-
209
-
210
-
211
-
212
-
213
-
214
-
215
-
216
-
217
-
218
-
219
-
220
-
221
-
222
-
223
-
224
-
225
-
226
-
227
-
228
-
229
-
230
-
231
-
232
-
233
-
234
-
235
 |
 |