HP OmniBook 500 HP OmniBook 500 (FA) - Corporate Evaluator's Guide Edition 4 - Page 130
Windows 2000 power management
 |
View all HP OmniBook 500 manuals
Add to My Manuals
Save this manual to your list of manuals |
Page 130 highlights
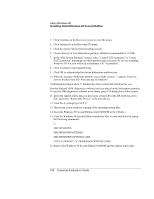
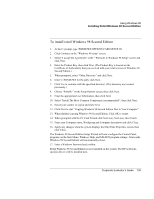
Using Windows 2000 Installing Retail Windows 2000 4. Windows will display the "Locate Driver Files" dialog. Select "Specify a location" and click Next. 5. Click Browse, and browse to the FLOPPY subdirectory. Select OK to continue. 6. Windows should inform you that it has found a driver for the device. Click Next to install the driver. 7. Windows will inform you that it has finished installing the drivers for your new hardware. Click Finish. Your new floppy disk is now successfully installed. You should see a floppy disk with a new drive letter added when you look inside "My Computer". Windows 2000 power management You may want to change the default power management settings in Windows 2000. The BIOS Power Management settings are ignored if ACPI is activated. To configure the power management do the following: 1. From the Control Panel, double-click the Power Options icon. 2. Select the Hibernate tab. 3. Check "Enable hibernate support". 4. Click Apply. 5. Select the Power Schemes tab. 6. Change the "Plugged in" options for Standby to "After 3 hours" and Hibernate to "After 4 hours". 7. Click the Advanced tab. 8. Check "Always show icon on the taskbar". 9. Change the Power buttons options to your desired settings. 10. Select the Alarms tab. 11. In the "Critical battery alarm" box ,click the "Alarm Action" button. 12. In the "Power level" box, choose Hibernate as the action for the computer to do when the alarm goes off. Click OK, then click Apply. 130 Corporate Evaluator's Guide
-
 1
1 -
2
-
3
-
4
-
5
-
6
-
7
-
8
-
9
-
10
-
11
-
12
-
13
-
14
-
15
-
16
-
17
-
18
-
19
-
20
-
21
-
22
-
23
-
24
-
25
-
26
-
27
-
28
-
29
-
30
-
31
-
32
-
33
-
34
-
35
-
36
-
37
-
38
-
39
-
40
-
41
-
42
-
43
-
44
-
45
-
46
-
47
-
48
-
49
-
50
-
51
-
52
-
53
-
54
-
55
-
56
-
57
-
58
-
59
-
60
-
61
-
62
-
63
-
64
-
65
-
66
-
67
-
68
-
69
-
70
-
71
-
72
-
73
-
74
-
75
-
76
-
77
-
78
-
79
-
80
-
81
-
82
-
83
-
84
-
85
-
86
-
87
-
88
-
89
-
90
-
91
-
92
-
93
-
94
-
95
-
96
-
97
-
98
-
99
-
100
-
101
-
102
-
103
-
104
-
105
-
106
-
107
-
108
-
109
-
110
-
111
-
112
-
113
-
114
-
115
-
116
-
117
-
118
-
119
-
120
-
121
-
122
-
123
-
124
-
 125
125 -
 126
126 -
 127
127 -
 128
128 -
 129
129 -
 130
130 -
 131
131 -
 132
132 -
 133
133 -
 134
134 -
 135
135 -
136
-
137
-
138
-
139
-
140
-
141
-
142
-
143
-
144
-
145
-
146
-
147
-
148
-
149
-
150
-
151
-
152
-
153
-
154
-
155
-
156
-
157
-
158
-
159
-
160
-
161
-
162
-
163
-
164
-
165
-
166
-
167
-
168
-
169
-
170
-
171
-
172
-
173
-
174
-
175
-
176
-
177
-
178
-
179
-
180
-
181
-
182
-
183
-
184
-
185
-
186
-
187
-
188
-
189
-
190
-
191
-
192
-
193
-
194
-
195
-
196
-
197
-
198
-
199
-
200
-
201
-
202
-
203
-
204
-
205
-
206
-
207
-
208
-
209
-
210
-
211
-
212
-
213
-
214
-
215
-
216
-
217
-
218
-
219
-
220
-
221
-
222
-
223
-
224
-
225
-
226
-
227
-
228
-
229
-
230
-
231
-
232
-
233
-
234
-
235
 |
 |
