HP OmniBook 500 HP OmniBook 500 (FA) - Corporate Evaluator's Guide Edition 4 - Page 153
that driver for the Intel PIIX PCI Bus Master IDE controller or Intel Ultra ATA
 |
View all HP OmniBook 500 manuals
Add to My Manuals
Save this manual to your list of manuals |
Page 153 highlights
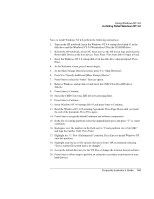
Note Note Using Windows NT 4.0 Installing Retail Windows NT 4.0 11. The "Install Driver" dialog box will appear prompting for the path of the installation files. Specify the location of the INTELATA subdirectory as installation disk path when prompted to do so. 12. Highlight "Intel Ultra ATA Controller" and then click "OK" to install the driver. If the driver was previously installed on the system, a dialog box will appear that states that driver for the "Intel PIIX PCI Bus Master IDE controller" or "Intel Ultra ATA Controller" is already on the system. If this occurs, select "New" to install the new driver. 13. When prompted, reboot the system as directed in order for the changes to take effect. 14. You may get a Services Control Manager dialog box, click OK. Login, go to Start, Settings, Control Panel, and double-click the Devices icon. 15. Find device Atdisk. Click the Startup button, select Disable, click OK. 16. When the Devices dialog box asks if "...you want to make the changes?" Click "Yes". Close the Devices window. Close the Control Panel. After installation, the INTELATA.SYS file is stored in the Windows NT\System32\Drivers directory. To install pointing stick support If you have installed retail Windows NT you need to install the pointing stick drivers. The pointing stick drivers are contained in the TRACKPNT subdirectory. To install or upgrade the pointing stick drivers: 1. Start Windows NT 4.0. 2. Click the Start, Settings, Control Panel. 3. Double-click the Mouse icon. 4. Select the General tab at the top of the Mouse Properties panel. 5. Click Change. 6. Click Have Disk. 7. Enter the full path of the TRACKPNT subdirectory. 8. Click OK, to install from disk. 9. Select IBM PS/2 TrackPoint from the list. Corporate Evaluator's Guide 153
-
 1
1 -
2
-
3
-
4
-
5
-
6
-
7
-
8
-
9
-
10
-
11
-
12
-
13
-
14
-
15
-
16
-
17
-
18
-
19
-
20
-
21
-
22
-
23
-
24
-
25
-
26
-
27
-
28
-
29
-
30
-
31
-
32
-
33
-
34
-
35
-
36
-
37
-
38
-
39
-
40
-
41
-
42
-
43
-
44
-
45
-
46
-
47
-
48
-
49
-
50
-
51
-
52
-
53
-
54
-
55
-
56
-
57
-
58
-
59
-
60
-
61
-
62
-
63
-
64
-
65
-
66
-
67
-
68
-
69
-
70
-
71
-
72
-
73
-
74
-
75
-
76
-
77
-
78
-
79
-
80
-
81
-
82
-
83
-
84
-
85
-
86
-
87
-
88
-
89
-
90
-
91
-
92
-
93
-
94
-
95
-
96
-
97
-
98
-
99
-
100
-
101
-
102
-
103
-
104
-
105
-
106
-
107
-
108
-
109
-
110
-
111
-
112
-
113
-
114
-
115
-
116
-
117
-
118
-
119
-
120
-
121
-
122
-
123
-
124
-
125
-
126
-
127
-
128
-
129
-
130
-
131
-
132
-
133
-
134
-
135
-
136
-
137
-
138
-
139
-
140
-
141
-
142
-
143
-
144
-
145
-
146
-
147
-
 148
148 -
 149
149 -
 150
150 -
 151
151 -
 152
152 -
 153
153 -
 154
154 -
 155
155 -
 156
156 -
 157
157 -
 158
158 -
159
-
160
-
161
-
162
-
163
-
164
-
165
-
166
-
167
-
168
-
169
-
170
-
171
-
172
-
173
-
174
-
175
-
176
-
177
-
178
-
179
-
180
-
181
-
182
-
183
-
184
-
185
-
186
-
187
-
188
-
189
-
190
-
191
-
192
-
193
-
194
-
195
-
196
-
197
-
198
-
199
-
200
-
201
-
202
-
203
-
204
-
205
-
206
-
207
-
208
-
209
-
210
-
211
-
212
-
213
-
214
-
215
-
216
-
217
-
218
-
219
-
220
-
221
-
222
-
223
-
224
-
225
-
226
-
227
-
228
-
229
-
230
-
231
-
232
-
233
-
234
-
235
 |
 |