HP ProLiant xw2x220c Remote Graphics Software 5.3.0 User Guide - Page 101
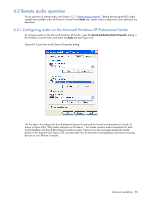
Calibrating audio on the Microsoft Windows XP Professional Sender
 |
View all HP ProLiant xw2x220c manuals
Add to My Manuals
Save this manual to your list of manuals |
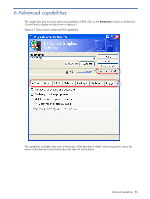
Page 101 highlights
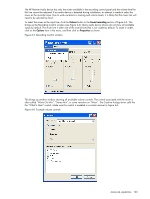
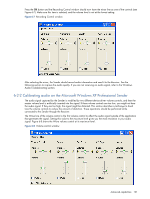
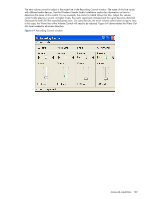
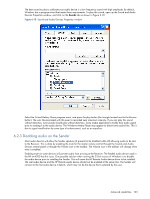
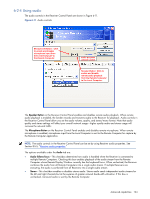
Press the OK button and the Recording Control window should now have the mixer line as one of the controls (see Figure 6-7). Make sure this item is selected, and the volume level is not at the lowest setting. Figure 6-7 Recording Control window After selecting the mixer, the Sender should record audio information and send it to the Receiver. See the following section to improve the audio quality. If you are not receiving an audio signal, refer to the Windows Audio Troubleshooting section. 6-2-2 Calibrating audio on the Microsoft Windows XP Professional Sender The audio signal captured by the Sender is modified by two different device driver volume controls, and then the master volume level is artificially inserted into the signal. If these volume controls are too low, you might not hear the audio signal. If they are too high, the signal might be distorted. This section describes a technique to hand tune the volume controls to reduce the amount of distortion. These operations should be performed while connected to the Sender through the Receiver. The Wave line of the volume control is the first volume control to affect the audio signal outside of the application that generates the signal. Setting this value to the maximum level gives you the most resolution in your audio signal. Figure 6-8 shows the Wave volume control at its maximum level. Figure 6-8 Volume control window Advanced capabilities 101
-
 1
1 -
2
-
3
-
4
-
5
-
6
-
7
-
8
-
9
-
10
-
11
-
12
-
13
-
14
-
15
-
16
-
17
-
18
-
19
-
20
-
21
-
22
-
23
-
24
-
25
-
26
-
27
-
28
-
29
-
30
-
31
-
32
-
33
-
34
-
35
-
36
-
37
-
38
-
39
-
40
-
41
-
42
-
43
-
44
-
45
-
46
-
47
-
48
-
49
-
50
-
51
-
52
-
53
-
54
-
55
-
56
-
57
-
58
-
59
-
60
-
61
-
62
-
63
-
64
-
65
-
66
-
67
-
68
-
69
-
70
-
71
-
72
-
73
-
74
-
75
-
76
-
77
-
78
-
79
-
80
-
81
-
82
-
83
-
84
-
85
-
86
-
87
-
88
-
89
-
90
-
91
-
92
-
93
-
94
-
95
-
 96
96 -
 97
97 -
 98
98 -
 99
99 -
 100
100 -
 101
101 -
 102
102 -
 103
103 -
 104
104 -
 105
105 -
 106
106 -
107
-
108
-
109
-
110
-
111
-
112
-
113
-
114
-
115
-
116
-
117
-
118
-
119
-
120
-
121
-
122
-
123
-
124
-
125
-
126
-
127
-
128
-
129
-
130
-
131
-
132
-
133
-
134
-
135
-
136
-
137
-
138
-
139
-
140
-
141
-
142
-
143
-
144
-
145
-
146
-
147
-
148
-
149
-
150
-
151
-
152
-
153
-
154
-
155
-
156
-
157
-
158
-
159
-
160
-
161
-
162
-
163
-
164
-
165
-
166
-
167
-
168
-
169
-
170
-
171
-
172
-
173
-
174
-
175
-
176
-
177
-
178
-
179
-
180
-
181
-
182
-
183
-
184
-
185
-
186
-
187
-
188
-
189
-
190
-
191
-
192
-
193
-
194
-
195
-
196
 |
 |
