HP Scitex LX600 HP Designjet L65500 Printer and HP Scitex LX Printer Family - - Page 24
Remove any other plastic ties that you can see inside the printer.
 |
View all HP Scitex LX600 manuals
Add to My Manuals
Save this manual to your list of manuals |
Page 24 highlights
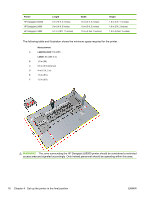
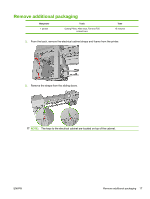
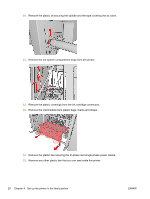
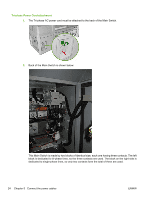
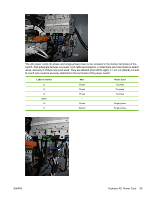
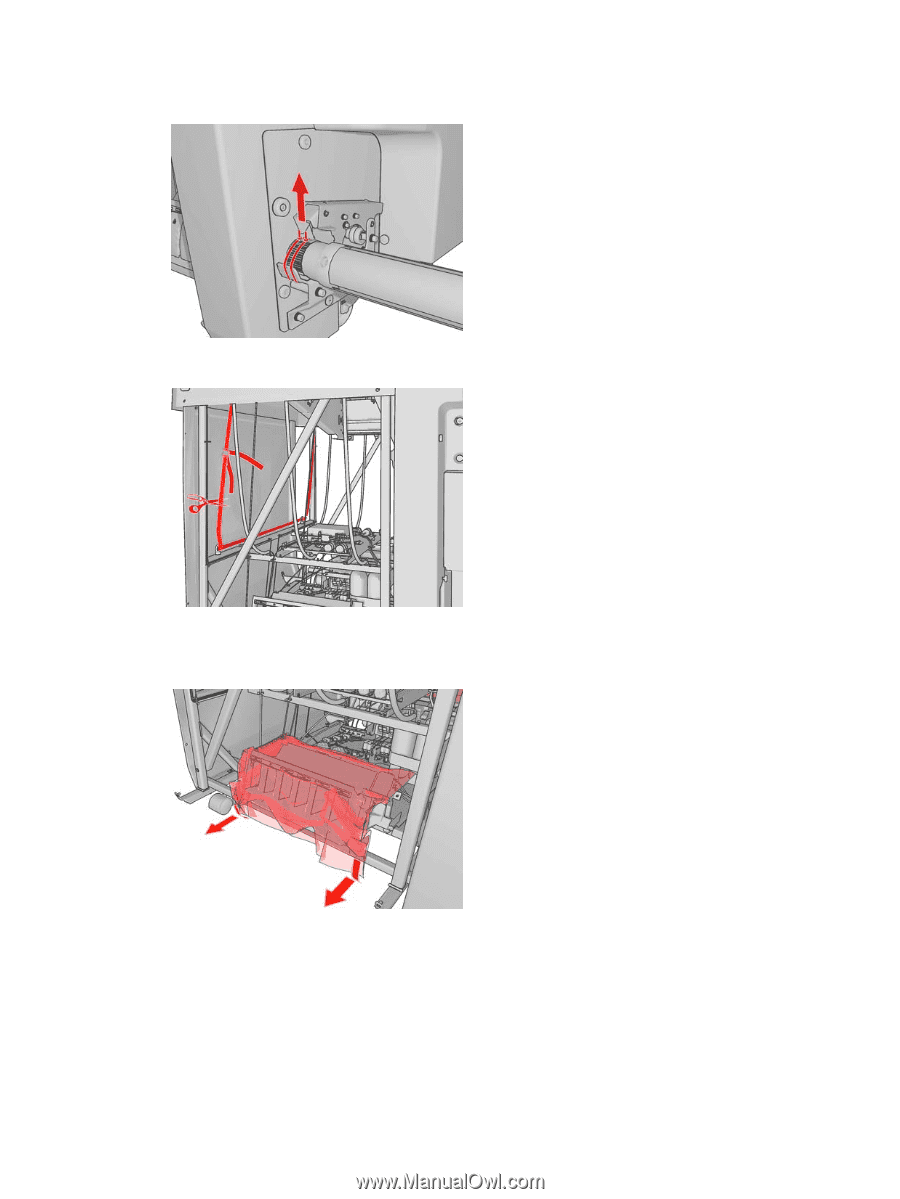
10. Remove the plastic tie securing the spindle and the tape covering the air valve. 11. Remove the ink system compartment strap from the printer. 12. Remove the plastic coverings from the ink cartridge connectors. 13. Remove the intermediate tank plastic bags, foams and straps. 14. Remove the plastic ties securing the tri-phase and single-phase power cables. 15. Remove any other plastic ties that you can see inside the printer. 20 Chapter 4 Set up the printer in the final position ENWW
-
 1
1 -
2
-
3
-
4
-
5
-
6
-
7
-
8
-
9
-
10
-
11
-
12
-
13
-
14
-
15
-
16
-
17
-
18
-
 19
19 -
 20
20 -
 21
21 -
 22
22 -
 23
23 -
 24
24 -
 25
25 -
 26
26 -
 27
27 -
 28
28 -
 29
29 -
30
-
31
-
32
-
33
-
34
-
35
-
36
-
37
-
38
-
39
-
40
-
41
-
42
-
43
-
44
-
45
-
46
-
47
-
48
-
49
-
50
-
51
-
52
-
53
-
54
-
55
-
56
-
57
-
58
-
59
-
60
-
61
-
62
-
63
-
64
-
65
-
66
-
67
-
68
-
69
-
70
-
71
-
72
-
73
-
74
-
75
-
76
-
77
-
78
-
79
-
80
-
81
-
82
-
83
-
84
-
85
-
86
 |
 |
10.
Remove the plastic tie securing the spindle and the tape covering the air valve.
11.
Remove the ink system compartment strap from the printer.
12.
Remove the plastic coverings from the ink cartridge connectors.
13.
Remove the intermediate tank plastic bags, foams and straps.
14.
Remove the plastic ties securing the tri-phase and single-phase power cables.
15.
Remove any other plastic ties that you can see inside the printer.
20
Chapter 4
Set up the printer in the final position
ENWW