HP Scitex LX600 HP Designjet L65500 Printer and HP Scitex LX Printer Family - - Page 43
Service Manual, CAUTION
 |
View all HP Scitex LX600 manuals
Add to My Manuals
Save this manual to your list of manuals |
Page 43 highlights
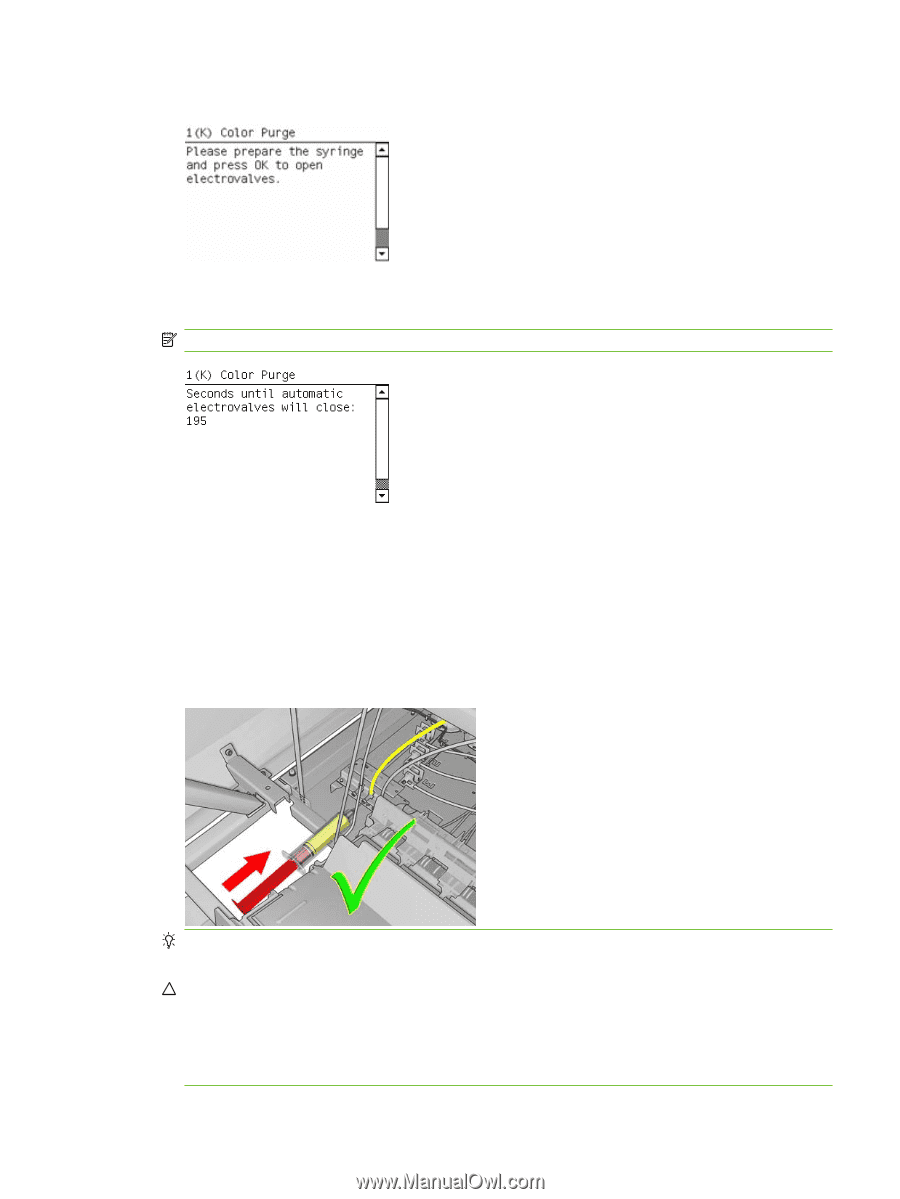
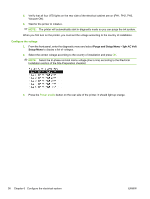
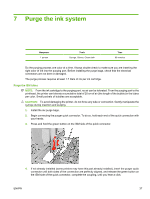
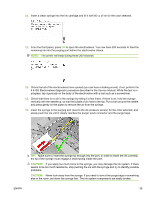
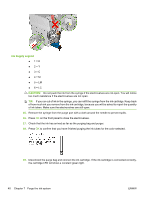
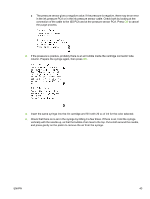
10. Insert a clean syringe into the ink cartridge and fill it with 60 cc of ink for the color selected. 11. From the front panel, press OK to open the electrovalves. You now have 200 seconds to feed the remaining ink into the purging port before the electrovalve closes. NOTE: The printer will beep during these 200 seconds. 12. Check that all of the electrovalves have opened (you can hear a clicking sound). If not, perform the 4.6 ISS Electrovalves diagnostic procedure described in the Service Manual. While the test is in progress, tap vigorously on the body of the electrovalve with a tool such as a screwdriver. 13. Check that there is no air in the syringe by hitting it a few times. If there is air, hold the syringe vertically with the needle up, so that the bubble of air rises to the top. Put a cloth around the needle, and press gently on the piston to remove the air from the syringe. 14. Insert the syringe in the purging port (next to the ink pressure sensor) for the color selected, and slowly push the ink until it clearly reaches the purger quick connector and the purge bags. ENWW TIP: Make sure to insert the syringe far enough into the port. In order to insert the ink correctly, the tip of the syringe must engage a small spring inside the port. CAUTION: If you apply too much force to the syringe, you may damage the ink system. If there seems to be too much resistance, stop pushing the ink with the syringe and try to identify possible problems. CAUTION: Never look away from the syringe. If you need to look at the purge bags or something else in the room, set down the syringe first. The ink system components are easily broken. 39
-
 1
1 -
2
-
3
-
4
-
5
-
6
-
7
-
8
-
9
-
10
-
11
-
12
-
13
-
14
-
15
-
16
-
17
-
18
-
19
-
20
-
21
-
22
-
23
-
24
-
25
-
26
-
27
-
28
-
29
-
30
-
31
-
32
-
33
-
34
-
35
-
36
-
37
-
 38
38 -
 39
39 -
 40
40 -
 41
41 -
 42
42 -
 43
43 -
 44
44 -
 45
45 -
 46
46 -
 47
47 -
 48
48 -
49
-
50
-
51
-
52
-
53
-
54
-
55
-
56
-
57
-
58
-
59
-
60
-
61
-
62
-
63
-
64
-
65
-
66
-
67
-
68
-
69
-
70
-
71
-
72
-
73
-
74
-
75
-
76
-
77
-
78
-
79
-
80
-
81
-
82
-
83
-
84
-
85
-
86
 |
 |