HP Scitex LX600 HP Designjet L65500 Printer and HP Scitex LX Printer Family - - Page 58
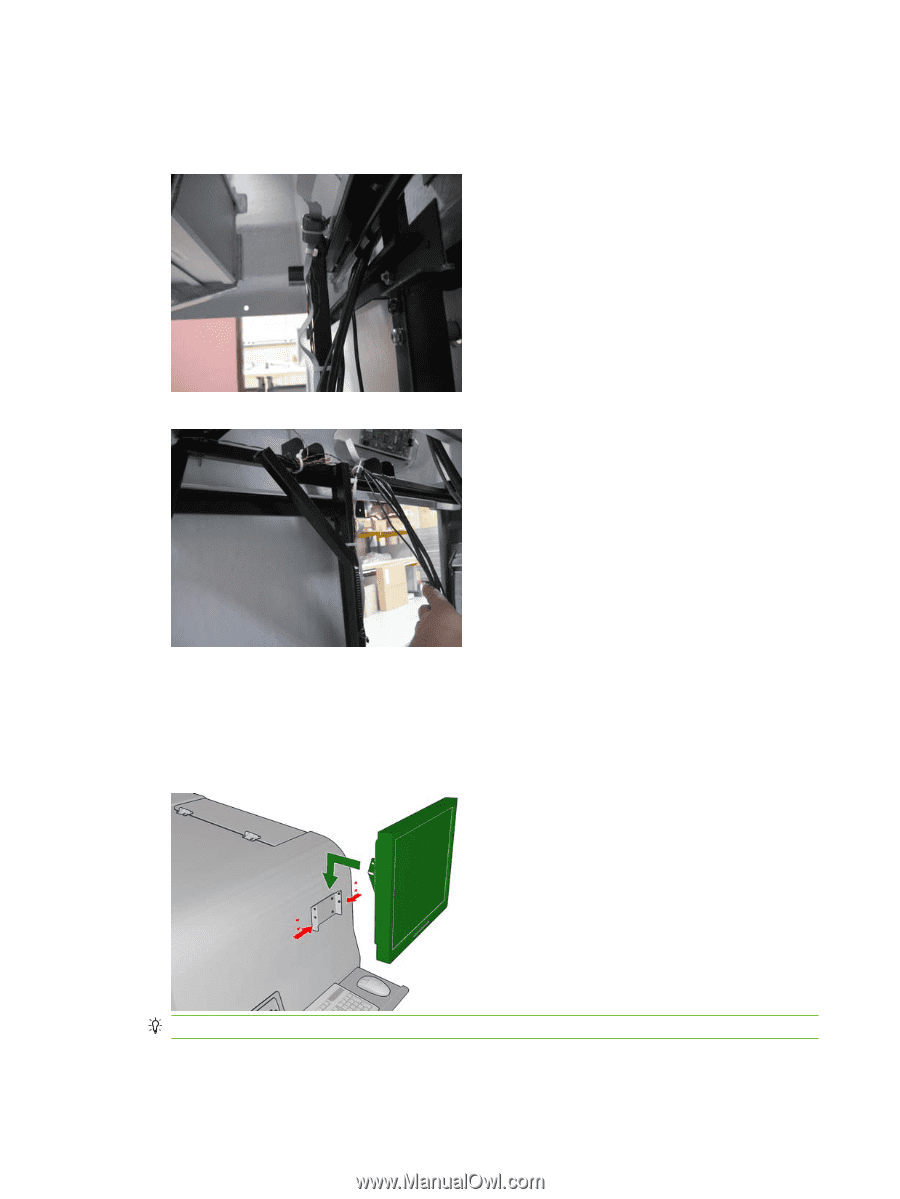
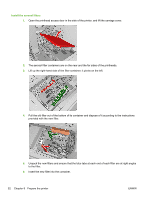
Cables wrongly positioned: hanging over the sliding door support
 |
View all HP Scitex LX600 manuals
Add to My Manuals
Save this manual to your list of manuals |
Page 58 highlights
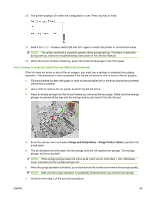
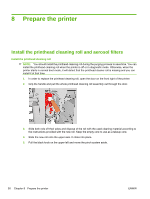
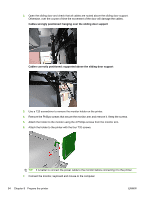
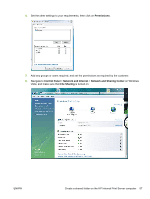
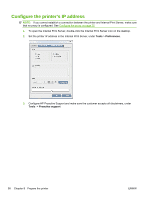
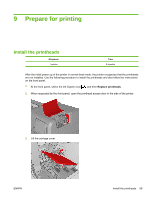
2. Open the sliding door and check that all cables are routed above the sliding door support. Otherwise, over the course of time the movement of the door will damage the cables. Cables wrongly positioned: hanging over the sliding door support Cables correctly positioned: supported above the sliding door support 3. Use a T20 screwdriver to remove the monitor holder on the printer. 4. Remove the Phillips screws that secure the monitor arm and remove it. Keep the screws. 5. Attach the holder to the monitor using the 4 Phillips screws from the monitor arm. 6. Attach the holder to the printer with the four T20 screws. TIP: It is better to connect the power cable to the monitor before connecting it to the printer. 7. Connect the monitor, keyboard and mouse to the computer. 54 Chapter 8 Prepare the printer ENWW
-
 1
1 -
2
-
3
-
4
-
5
-
6
-
7
-
8
-
9
-
10
-
11
-
12
-
13
-
14
-
15
-
16
-
17
-
18
-
19
-
20
-
21
-
22
-
23
-
24
-
25
-
26
-
27
-
28
-
29
-
30
-
31
-
32
-
33
-
34
-
35
-
36
-
37
-
38
-
39
-
40
-
41
-
42
-
43
-
44
-
45
-
46
-
47
-
48
-
49
-
50
-
51
-
52
-
 53
53 -
 54
54 -
 55
55 -
 56
56 -
 57
57 -
 58
58 -
 59
59 -
 60
60 -
 61
61 -
 62
62 -
 63
63 -
64
-
65
-
66
-
67
-
68
-
69
-
70
-
71
-
72
-
73
-
74
-
75
-
76
-
77
-
78
-
79
-
80
-
81
-
82
-
83
-
84
-
85
-
86
 |
 |